My daughters have never been tremendously interested in my automotive pursuits. That’s not something that has ever bothered me or that I’ve tried to impose upon them. I try to expose them to what I’m doing and if they’re interested that’s great, but if it’s just not something that they want to be involved in, that’s perfectly okay too. When my oldest started approaching her 16th birthday, however, she started noticing cars more and more. Of course she was excited to get her license and find in it the same freedom and entry to adulthood that I found all those years ago and I encouraged that excitement as we would point out cool cars to each other when we were out and about. As her birthday got closer and closer, talk turned to how she would learn to drive and what vehicle would become the outlet for that education. That’s when I floated the idea: What if we found a car and worked together to build it for the Grassroots Motorsports $2000 Challenge? Initially I thought her positive reaction to that was more lip-service than actual interest, but as time went on I found myself getting constant reminders from her that we still needed to find a car and get started.
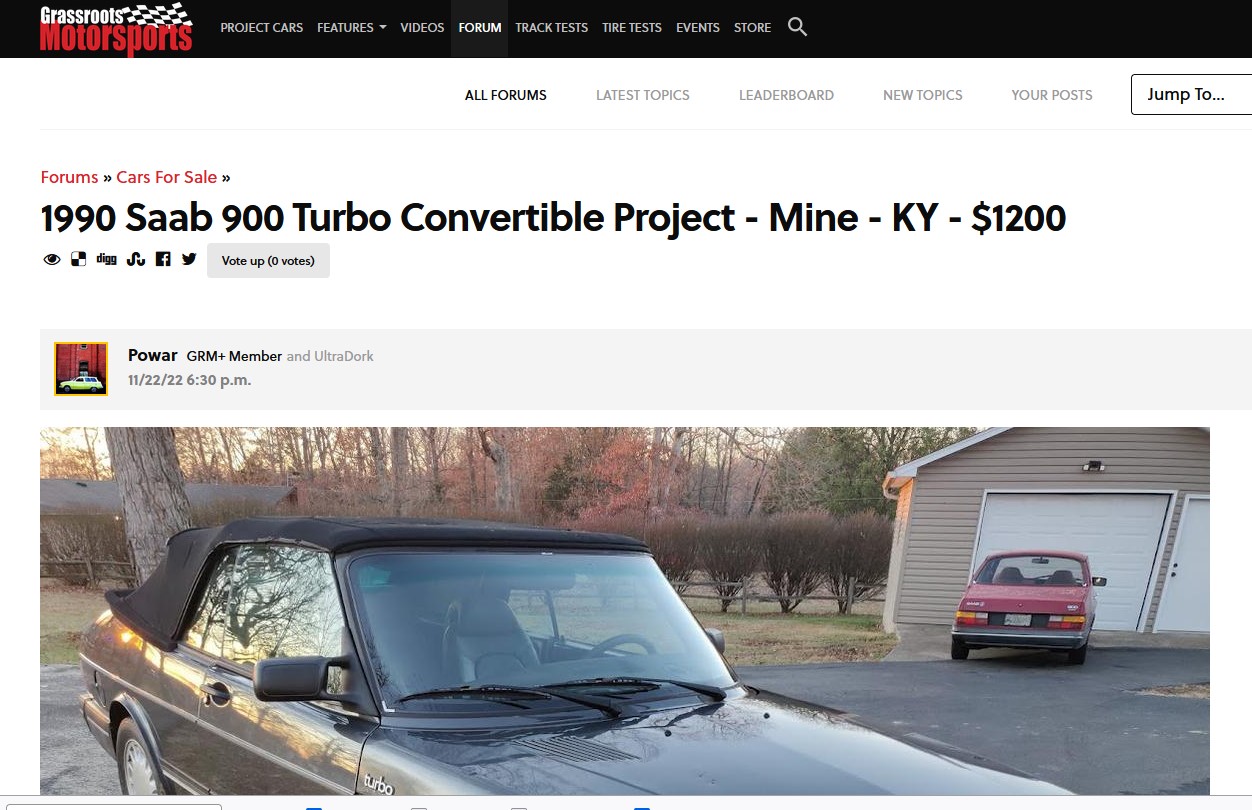
Naturally, my first place to look for a car was the GRM forum. Scrolling through, I found an ad that had been up for a few months with some commensurate price decreases:
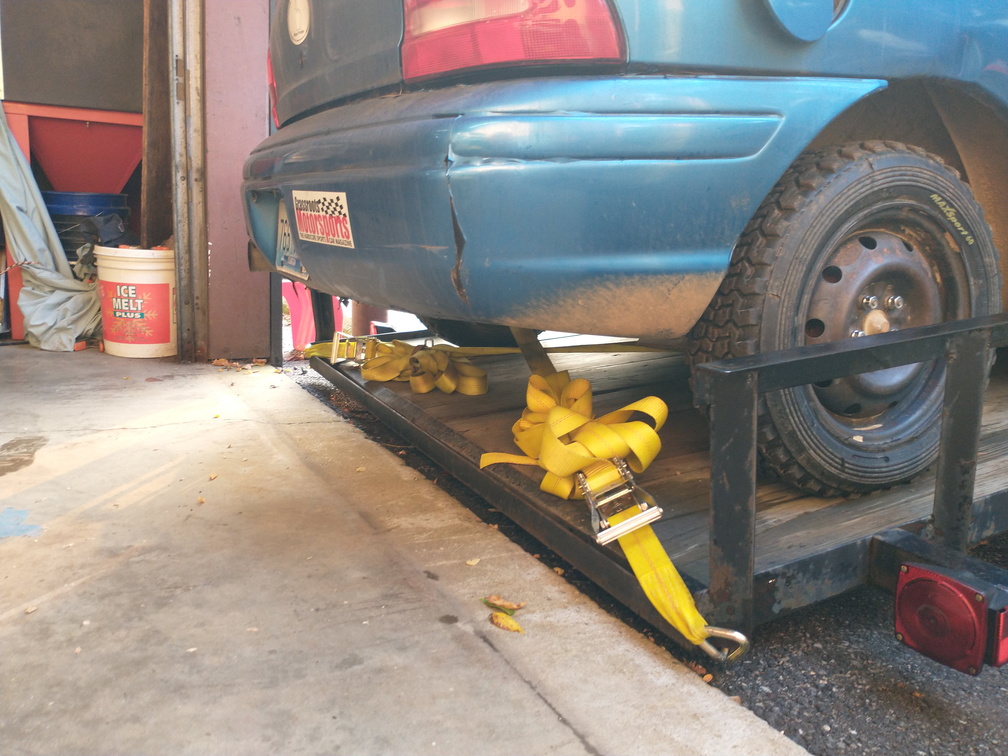
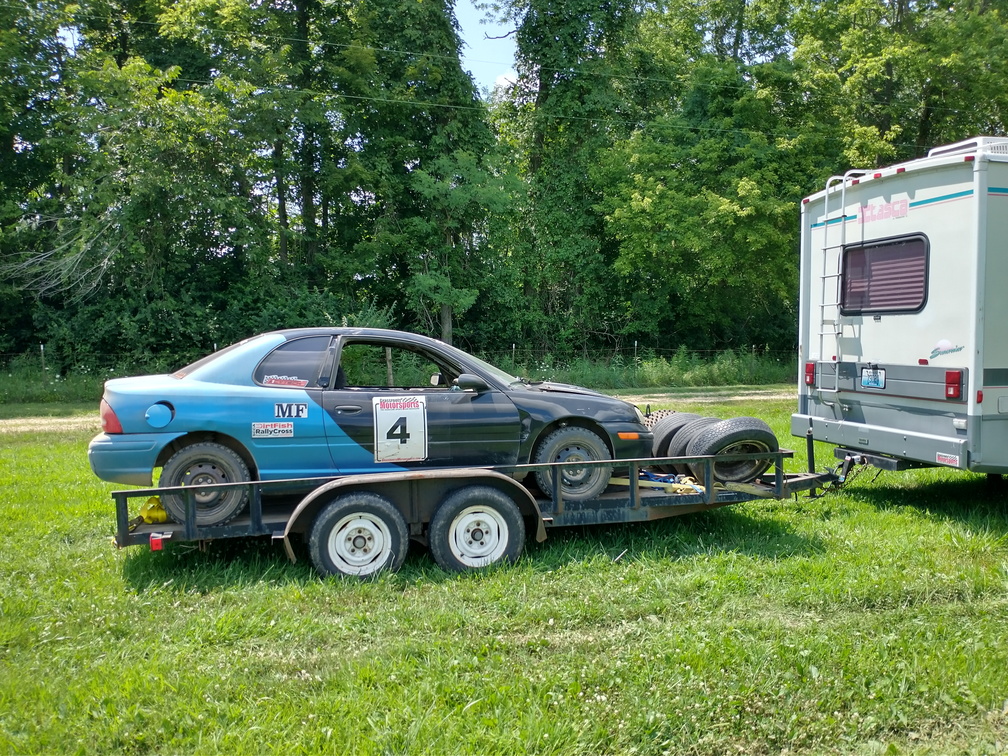
Sitting south of Louisville, KY, the car was only about 2 hours away from me. It was being sold by a forum member, which meant that I was probably dealing with a stand-up guy (spoiler alert: Damn right he is!). It was advertised as needing a new ignition switch and fuel pump along with a new top and tires. The headlight adjusters were broken and it had been sitting for 9 years. The tank was said to be full of bad gas but the only other downside was the fact that it’s an automatic. Powar, the forum member who had the car for sale, had originally bought it to be used as a parts car, but decided that it was just a little too nice to cut in to. It was either going to be sold to the GRM family or it was going to go sit in his parts car collection until he needed to scavenge from it.
When I saw the ad had bubbled to the top again, I texted my daughter and got a resounding – uh, something,
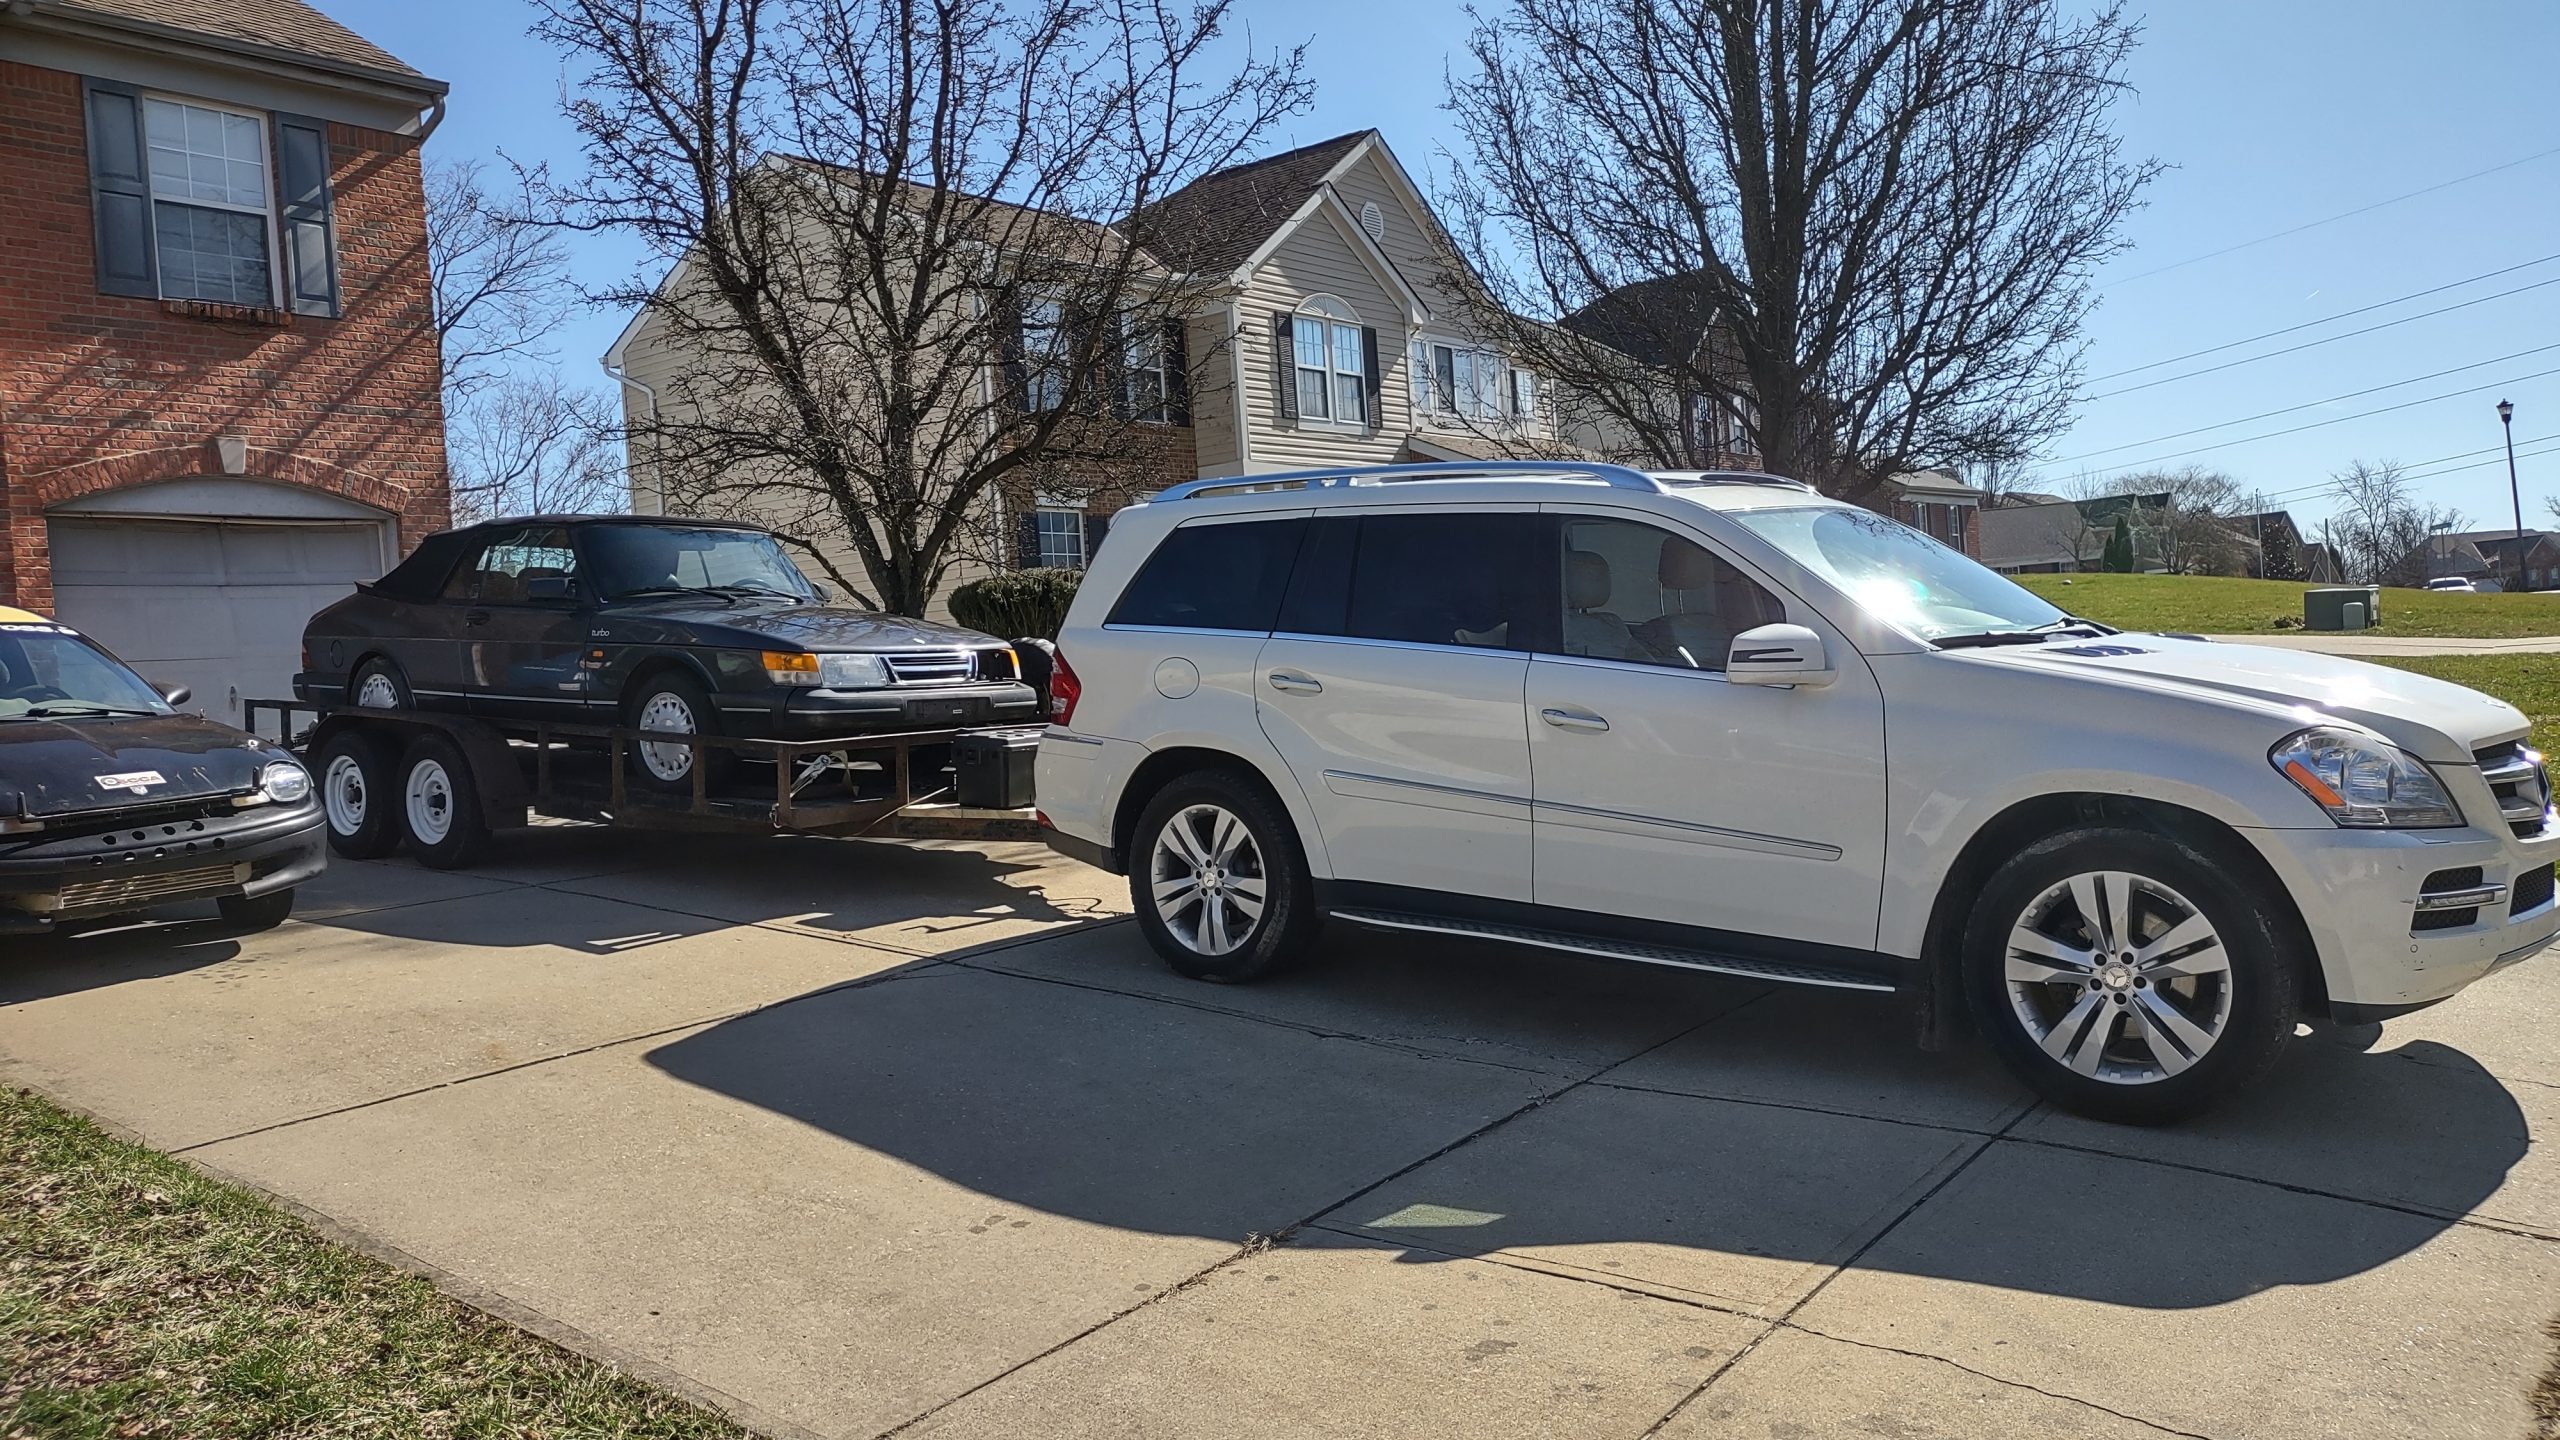
With that ringing endorsement, I set about making a deal. A few days later, we hooked up the trailer to go take a look.
For the princely sum of $750, I had adopted an orphan and was ready to start dragging it out of its slumber.
This year, I finally was able to use the winter downtime wisely, spending my time carefully preparing the car having plenty of time to make sure every job was done right and getting lots of testing in to make sure that for the first event of the season, the car is completely ready to go!
Hahahaha! Yeah, right.
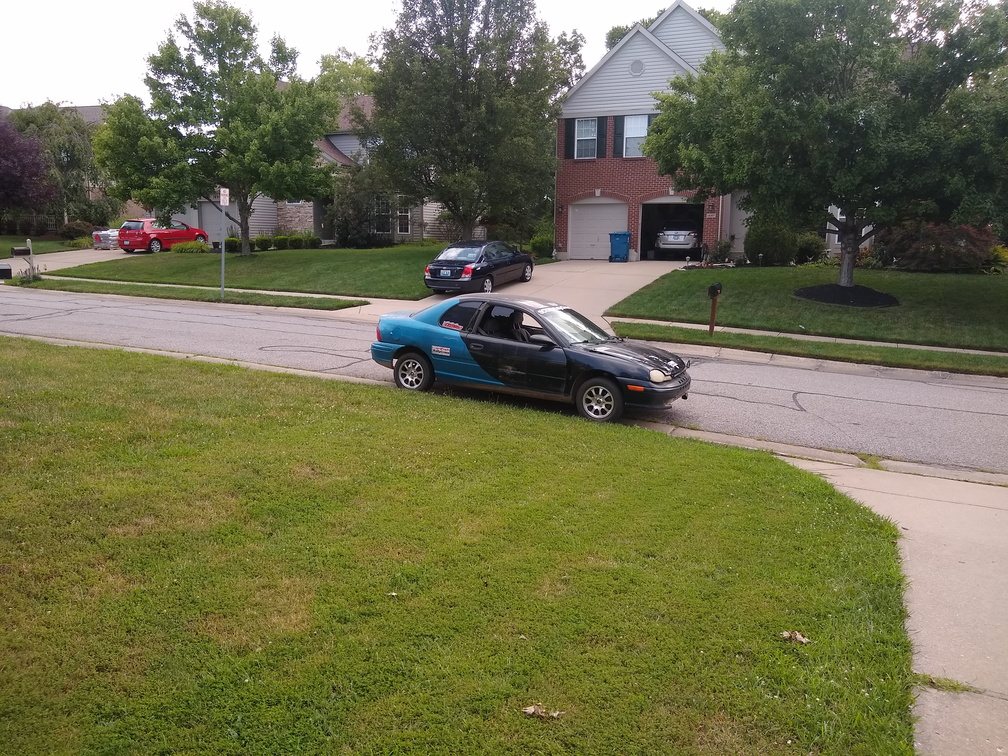
The car basically sat on the trailer all winter and I didn’t do anything more than than sort of think about how I should probably be doing stuff to it. For about a month, I had to get it off the trailer and use it as a daily driver since I had a small issue with oil pressure on my truck. That experience was actually a pretty good way to shake it down and see how things are doing! Overall, I have five issues with it that I’d really like to fix:
Letting off the throttle too suddenly or easing in to the throttle too slowly will cause the car to stall at a stop. that’s really annoying.
The speedometer doesn’t work
The fuel gauge doesn’t work
The tachometer just bounces all over the place
I’m kind of ignorant on oil pressure
My hope was that the gauge issues would be solved by re-flowing the solder joints on the cluster’s PCB. But I did that and no change, so I’m not sure what’s up with that. I think that the tach problem is a source issue from the Megasquirt, the fuel gauge issue is caused by me screwing up the sender when I replaced the fuel pump, and the speedometer is something else as well.
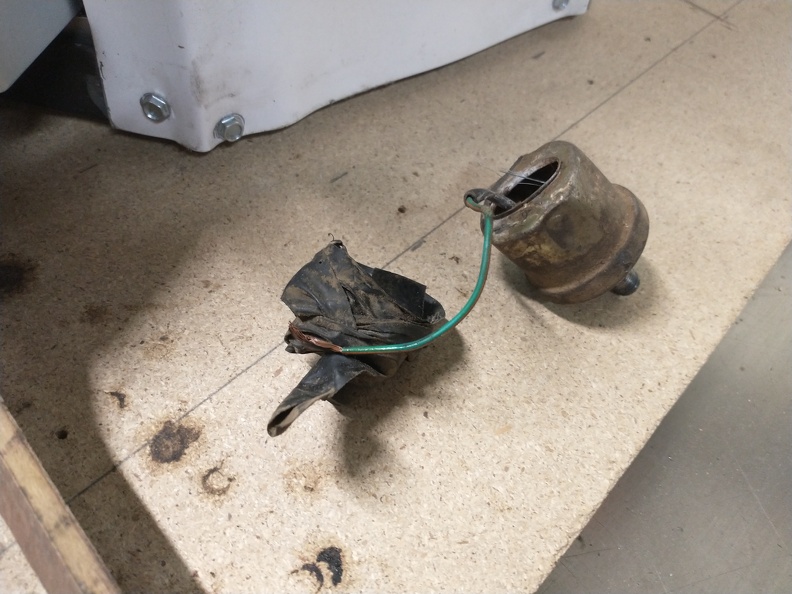
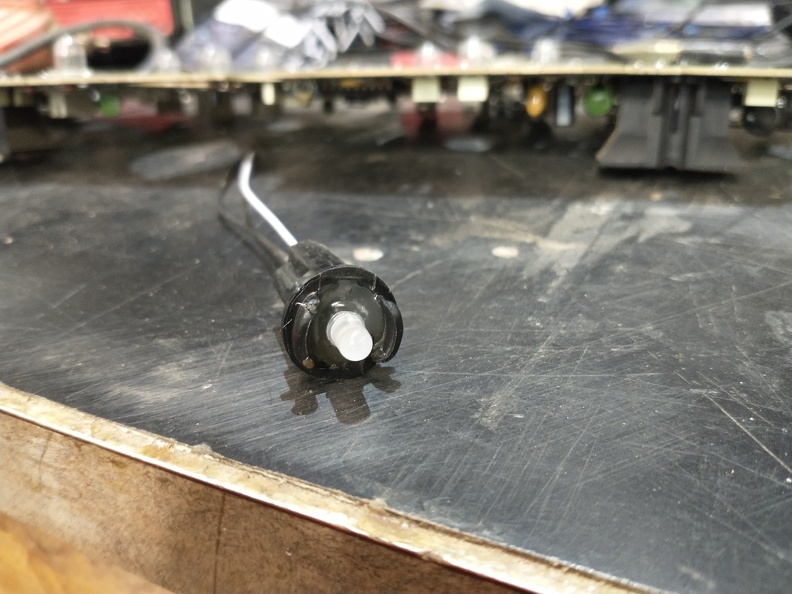
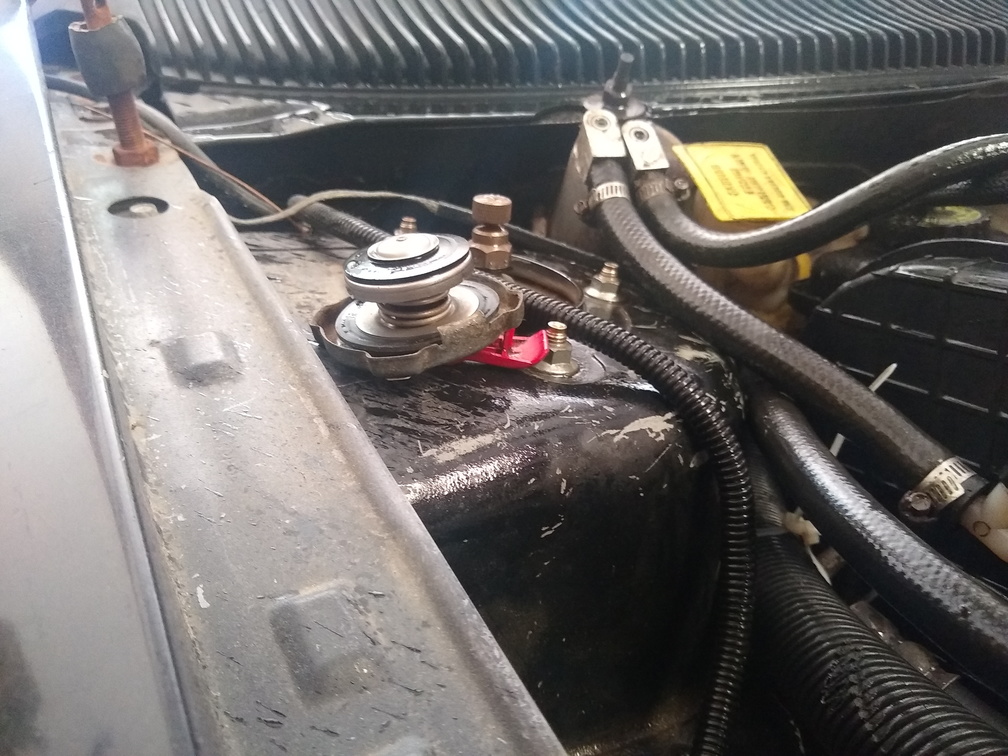
The oil pressure problem was the easiest to fix. In the process of repairing my truck, I picked up a mechanical oil pressure gauge to check my Harbor Freight tool against. Since it was twenty bucks and just laying about, I picked up the $15 copper hardline kit for it, put a hole in the firewall, and went ahead and installed the system. The old pressure sender wasn’t in the best condition:
While I was doing gauges, I also replaced the coolant temp sensor and gauge. One of the times that the motor mount broke, the wires got pulled out of the Glowshift sender and there wasn’t really any way to repair that. I had an electric coolant temperature gauge and sender that I bought for the motorhome ages ago, so I brought that over and installed it on the Neon:
I also used one of those weatherpack connectors to re-create the oil temp gauge sender since the existing connectors were just the blade-types and weren’t working too well. Since I was going to the Equus analog gauge for the coolant temperature, I had the opportunity to move the old coolant temp gauge to be the oil temp gauge. The oil temp readout has some busted LED segments, so it required a lot of interpretation.
In addition to putting those gauges in, I also took the opportunity to pull the incandescent bulbs out of them and replace them with some white LEDs that I had laying about for cosplay projects.
I think they wound up looking much nicer:
I also pulled the bulbs out of the gauge cluster and replaced them with white LEDs. It was a lot of work for a car that I don’t really drive at night.
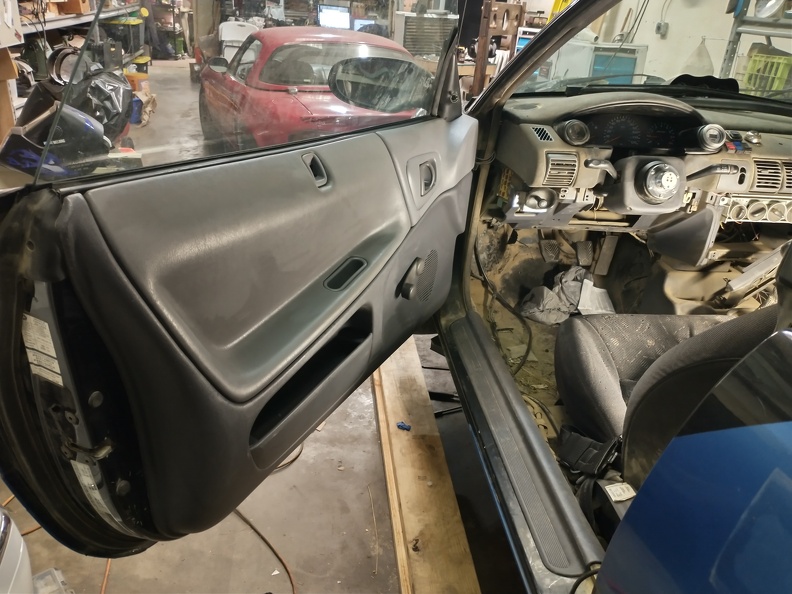
Speaking of driving the car, I also began this process:
Yes! That is an actual door panel installed on the car! With door sill trim! I even have a brand new carpet sitting on the shelf, ready to go in. Fancy, isn’t it? I had to go ahead and fix up the door handle mechanism on the inside since the rules dictate that you have to be able to open the door from the inside. Since I was doing that anyway, I decided to put the door panel on. And in order to do that, I decided to also fix the window guides. So now I have all the door trim on, the windows roll up and down properly, and all the weatherstripping is in place. When you close the door it has a very satisfying “thunk” instead of the old “bang, rattle, rattle, rattle, rattle”. It also turns out that 97.6% of all of the rattling around noises that the car used to make going down the road was coming from the windows banging about in the doors. It’s much more pleasant to drive and I still don’t have any rear trim or seats installed, and there’s no carpet or headliner.
I don’t want to put the carpet in until I’ve decided what to do with the front seats. Originally, I wanted to get a couple Corbeau Forza seats, but if I’m going to have a rear seat installed, I’m going to need at least one seat to be able to fold down for access. I have the Corbeau brackets so I was holding out for those seats, but I may leave that behind and move a different direction. I need to choose from:
Fixed-back seats on sliders for both fronts and rear passengers can squeeze
Folding-back seats on sliders for both fronts to add some bolstering for racing but maintain the back seat access
Leave the seats as they are
Fixed-back seat for the driver and the stock seat for the passenger
Once I work that out, I can pull the seats and put in the carpet, rear seat, and the rest of the trim.
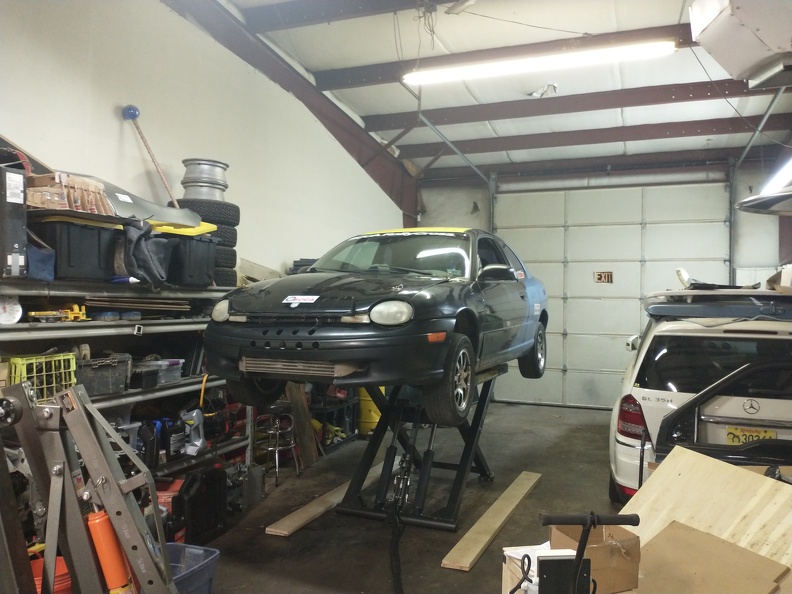
Another small change that I made to Toiletbird Industries was this:
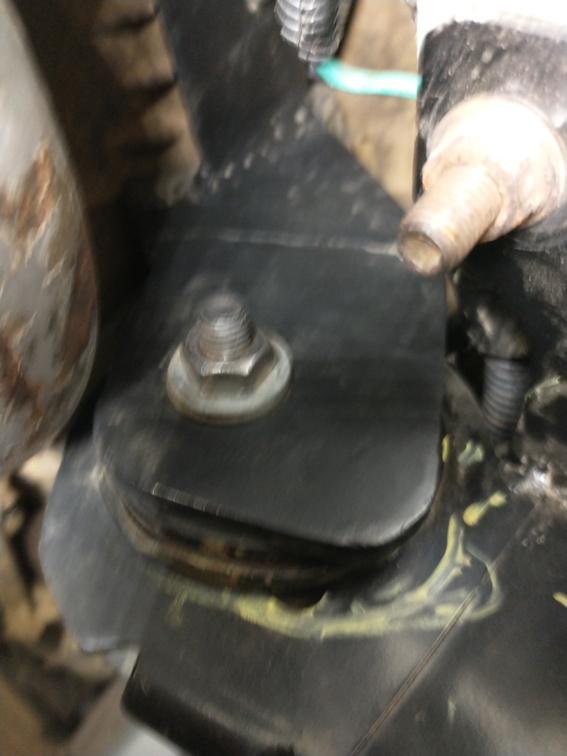
That’s a Titan Lifts 6,660lb scissor lift that will raise the car about 4 and a half feet. It makes everything a lot easier, especially the pre- and post- race inspections. With the car up over my head, I was able to get in there and really look at the front motor mount. It’s still looking absolutely solid with no signs of any cracking, bending, or other deformation.
On the topic of the speedometer, I went ahead and pulling the sender off and felt around in the transmission. It feels like the ring gear on the differential is still solidly in place, so it’s got to be the sender, the wiring, or the cluster. The sender is getting power but I don’t know if it’s sending a signal. I’ve got a USB oscilloscope on the way right now that I’m going to use to see if I can watch the signal coming out and then track it back. I could try hooking a drill up to the sender to see if it makes the speedometer move, but then I wouldn’t need a new tool.
Now that I can get the car in the air, I may try to run the car low on gas – a bit of a trick when you don’t have a fuel gauge OR an odometer! – and then pull the fuel pump assembly out to check the grounds and the sender. It would be really nice to have functioning gauges.
I had the car basically ready for what was supposed to be the first points event for 2021, but it got cancelled (or postponed, I guess) due to rain. But now I know it’ll be ready for the second event! It’s also got to be ready for Nationals this year. Turns out it’s going to be held right up in Ross County, OH, so there’s really no excuse to not be there.
First of all, I totally failed to get any pictures or video. Oops.
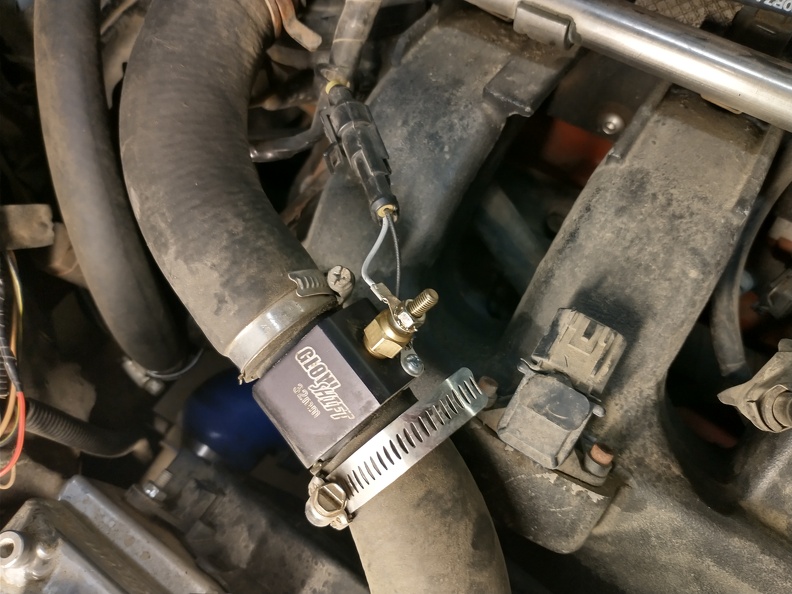
The August event got cancelled due to weather, so the car sat on the trailer for another month and just chilled out. A few days before the September event, though, I took it over to the shop and got that bit of charge pipe replaced. Turns out that the hole wasn’t all that bad, but it was still a leak and had to go!
Other than that, the only thing I did was add fuel and go racing! Fun fact: the two-day event burned up 2 gallons of gas, almost exactly.
The course on the 26th used the front field at Scott’s Bottom which is the rougher of the two. It was absolutely punishing to both car and driver. My first two runs were without any boost because the new pipe slipped out, so I had to fix that before continuing. I think that I had the silicone elbow too far up on the intercooler neck which left too great of a gap for the length of pipe. After adjusting it a bit, it was solid for the rest of the day.
This is the third event on the new motor mounts and everything is still solid and connected. No tearing, cracking, loosening up, or anything like that at all, so I am calling this fixed. All I have to do now is learn how to drive because I was 7th overall and 2nd in a class of 11 cars.
One of the habits that I have been needing to develop is carefully inspecting the car after each event to ensure that there isn’t anything that’s starting to break or otherwise needs attention. Frankly, “carefully” might be a pretty big step, so I’m ready to just settle for driving past the car and making sure it hasn’t been stolen at this point! In an effort to not only give the car an inspection but to do so when there’s time to actually do something about anything I might find I took the car over to the workshop last night to give it a once-over.
To start off with, I was interested to find out if it was possible to get a car off the trailer (and back on again) without using the ramps. Ever since we moved in, I was pretty sure that it could be done but I had never tried it. As it turns out, as long as the angle is right the unloading and reloading can be done very easily with zero ramp!
I had three primary goals: First was to inspect the motor mounts for any sign of breaking, tearing, bending, or other problems; Second was to replace the vacuum cap that disintegrated last month; Third was the adjust the tune to try to get it to idle better without its IAC. The later item wasn’t going to happen because I managed to leave my tuning cable at home, so I jumped right in to inspecting the motor mounts and got the car up in the air.
Well, except once the car was in the air, I got a different idea.
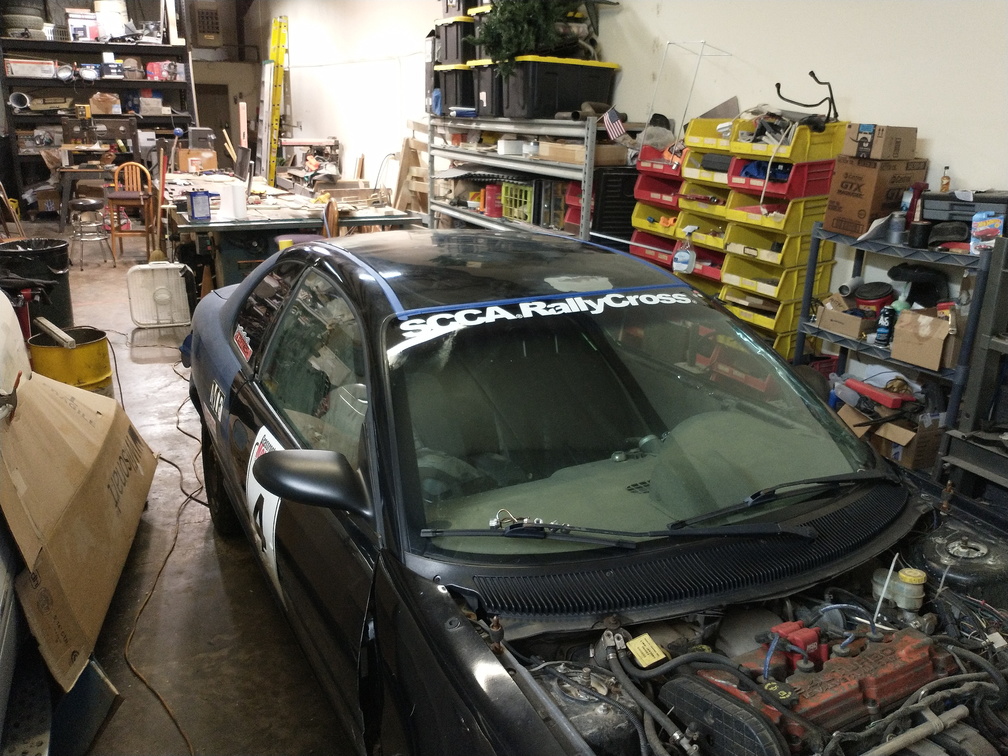
A little bit of masking tape went on, then a little bit of plastic dropcloth, and then four cans of PlastiDip!
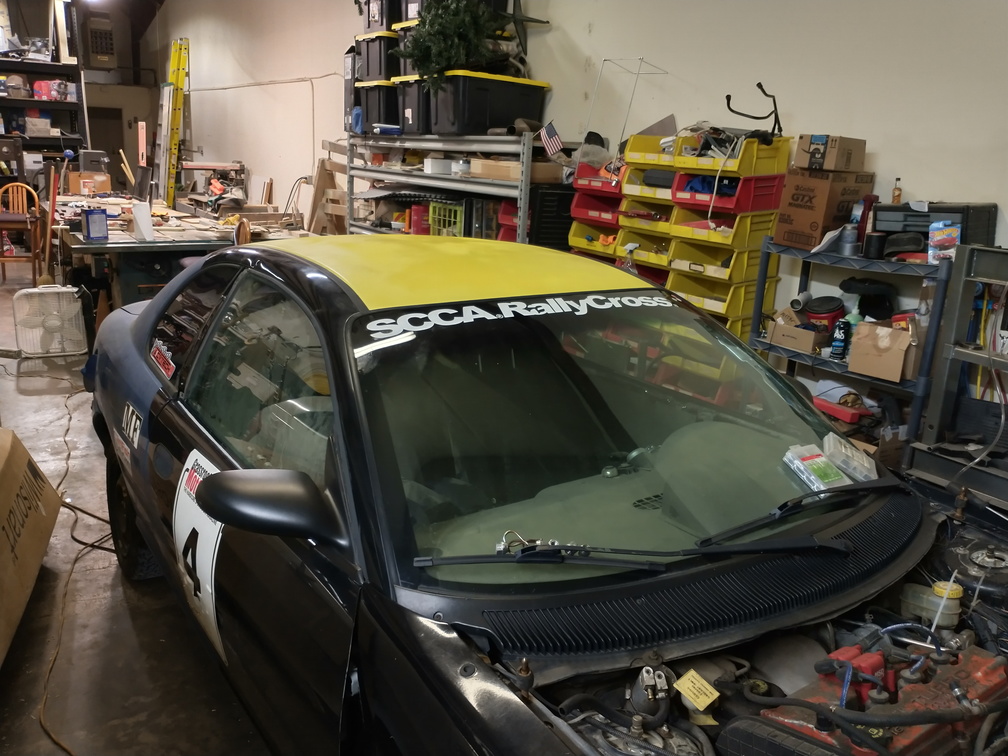
When it was all finished, I had this:
The paint had been coming off the roof in sheets and doing something about that had been on my to-do list for a while. I had all these cans of PlastiDip that I got really cheap at Ollies a while back and yellow seemed to be the color that would work the least bad. I’m not sure how much I really like it, but at least the paint is coming off and the roof isn’t rusting.
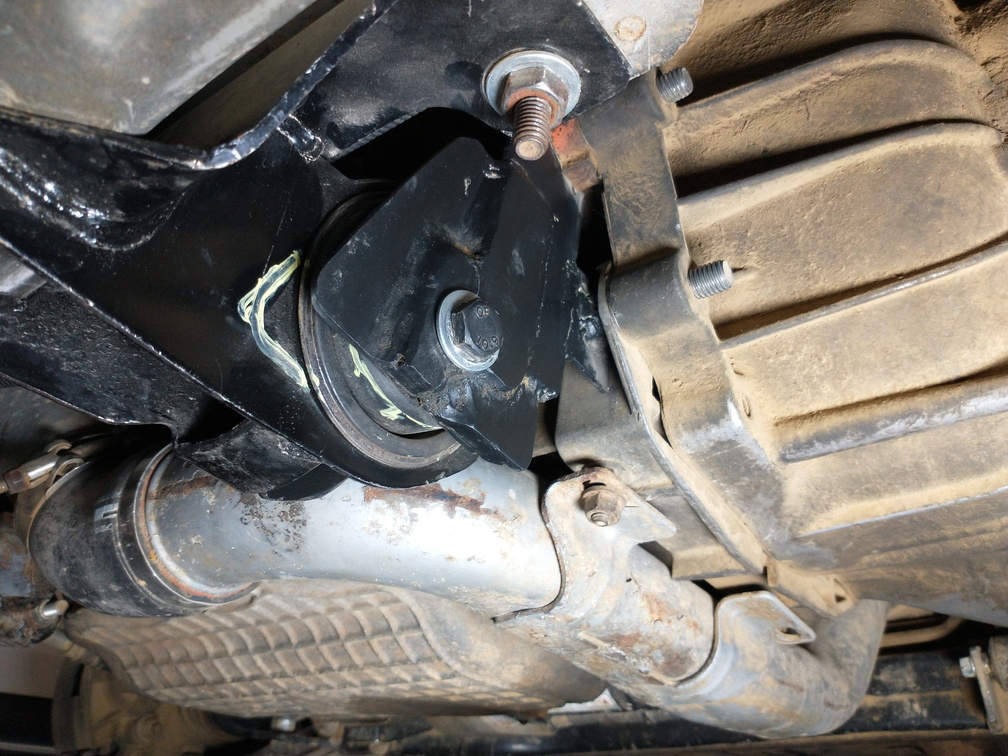
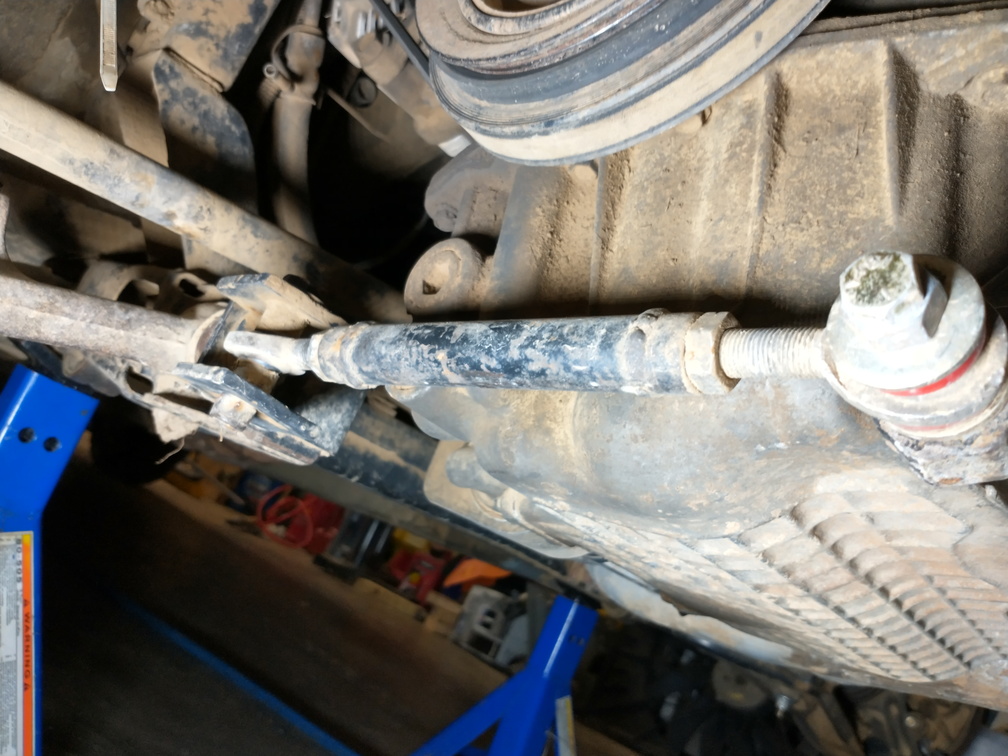
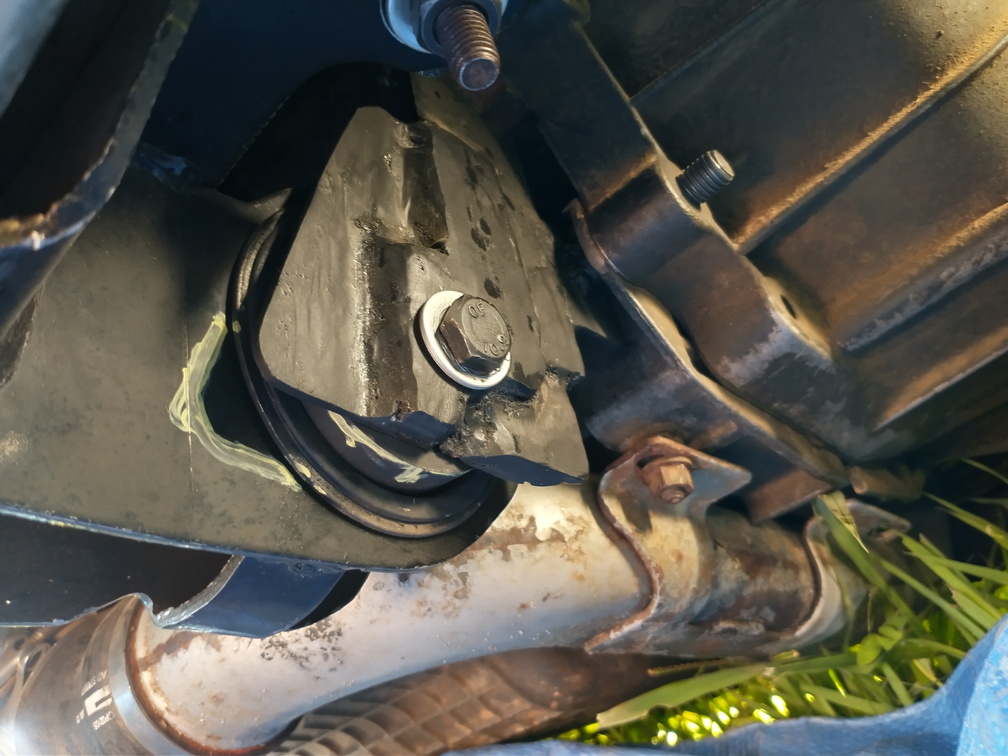
Anyway, now that I had taken care of I could move on to less-important things like checking the mounts. Turns out they all looked just great.
Sorry for the blurry picture, but everything held together really well.
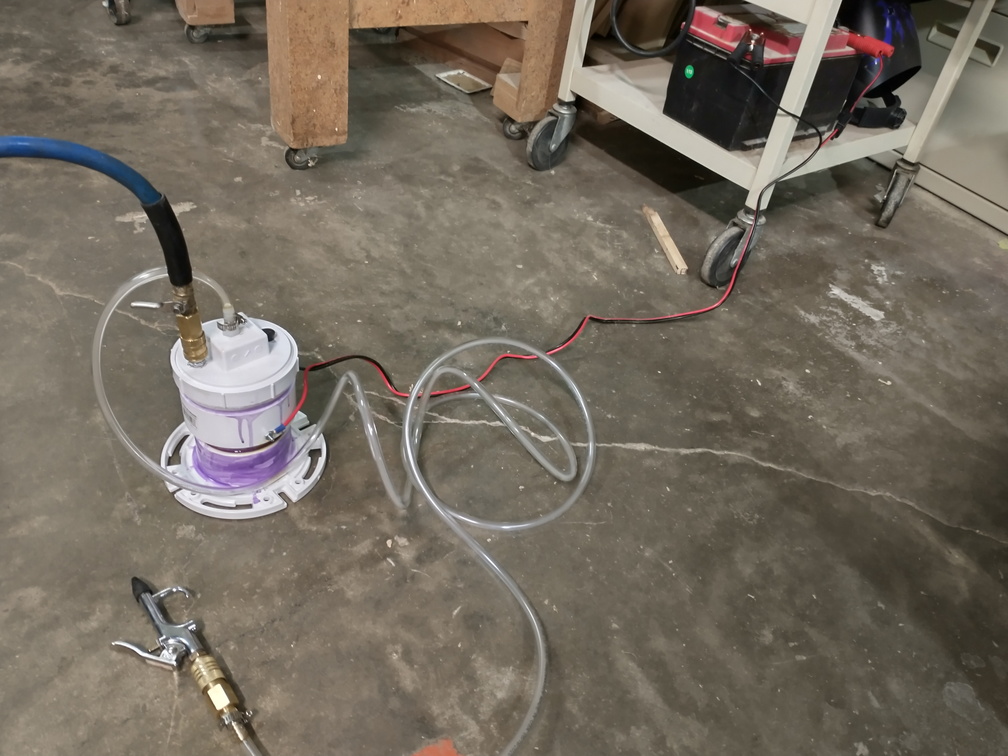
Once that was taken care of, I decided to break out the new smoke machine and see just how bad my electrical tape vacuum cap leaked.
A lot. It leaked a lot.
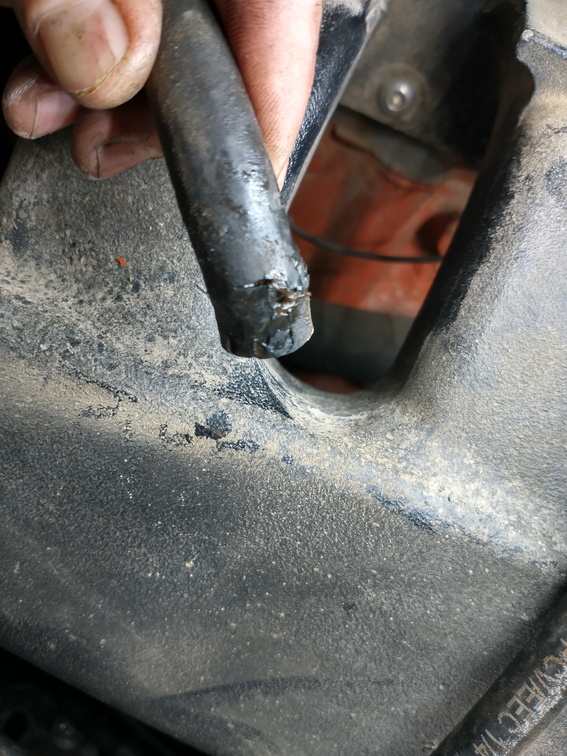
I replaced the cap and then decided to go ahead and smoke the vacuum lines to see if I had any other leaks and in the process I found a ton of smoke from under the intake manifold. Turns out that the line from the manifold to the PCV valve catch can was coming apart a bit:
There wasn’t enough hose once I cut off the bad part to reach, so I connected the PCV valve directly to the manifold, bypassing the catch can. Once I have a chance to stop by the store and get some vacuum hose, I’ll reroute it so that it doesn’t have a chance to rub against things and get pulled in the wrong direction anymore.
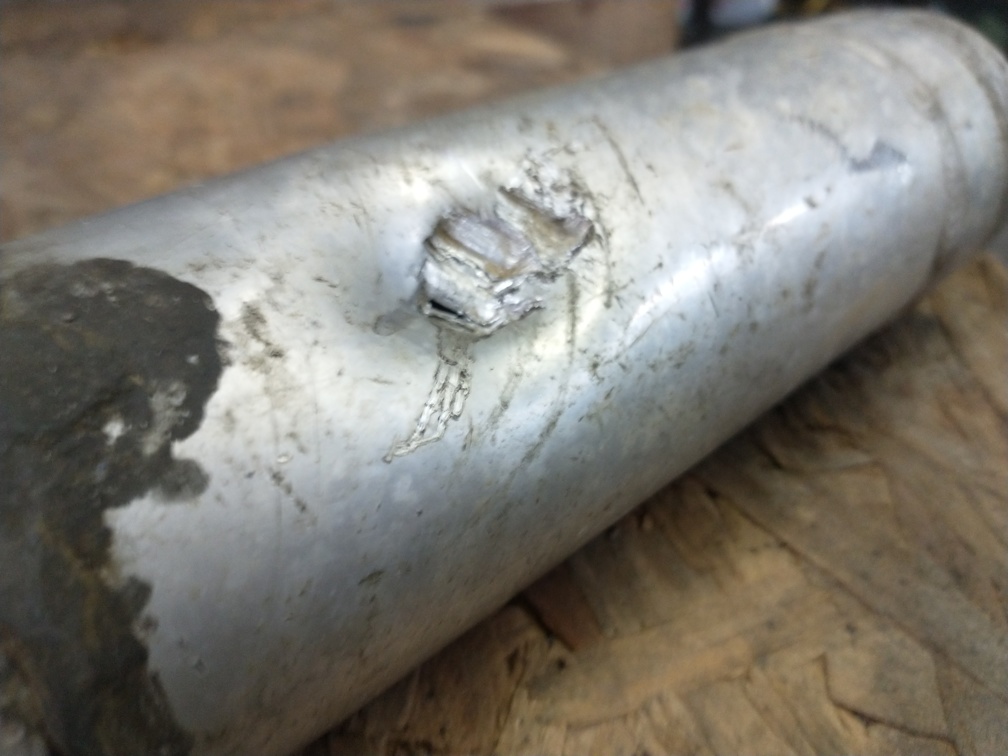
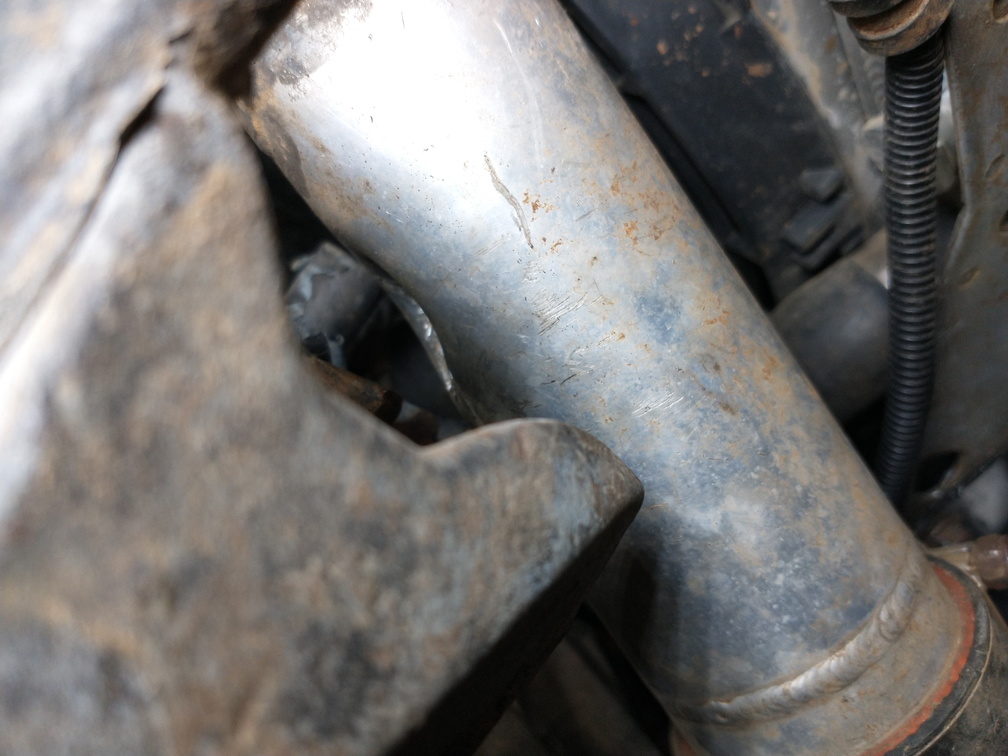
Since I was on a roll, I decided to put the pressure test cap on the turbo inlet and hook the smoke up to that as well just to see if I had any boost leaks. Right away, I saw some very small wisps of smoke coming from around the intake air temperature sender. It’s not a lot, but I need to find some sort of gasket for that to seal it up better. The real problem was all the smoke coming from under the radiator. Apparently, one of the times that I broke the motor mounts, the engine rocked forward and the A/C bracket pierced the aluminum charge pipe that connects the intercooler to the under-engine pipe.
I had no idea that I was leaking boost – I guess the turbo just makes so much boost that a giant hole like that wasn’t enough to prevent the gauge from climbing past 10 PSI. I didn’t have any of the aluminum piping at the shop, but I’ll grab a section from my stash at home, cut it to fit, and swap it in before the next event. It’s in a very easy to access position so I’m not too concerned about it.
Once all that was complete, I also cleaned up the beads on the front tires, remounted them, and put the car back on the trailer. Without using ramps! All I need to be fully ready to compete on Saturday is that section of pipe and a longer bit of vacuum hose. Since I’m so ready, I fully anticipate that the incoming thunderstorms will cause a cancellation. But I think from now on I’m going to hook my smoke machine up to EVERYTHING. Three leaks that it found that I didn’t even suspect of existing and it only took moments to find them. This is another one of those tools that I’m not sure how I lived without.
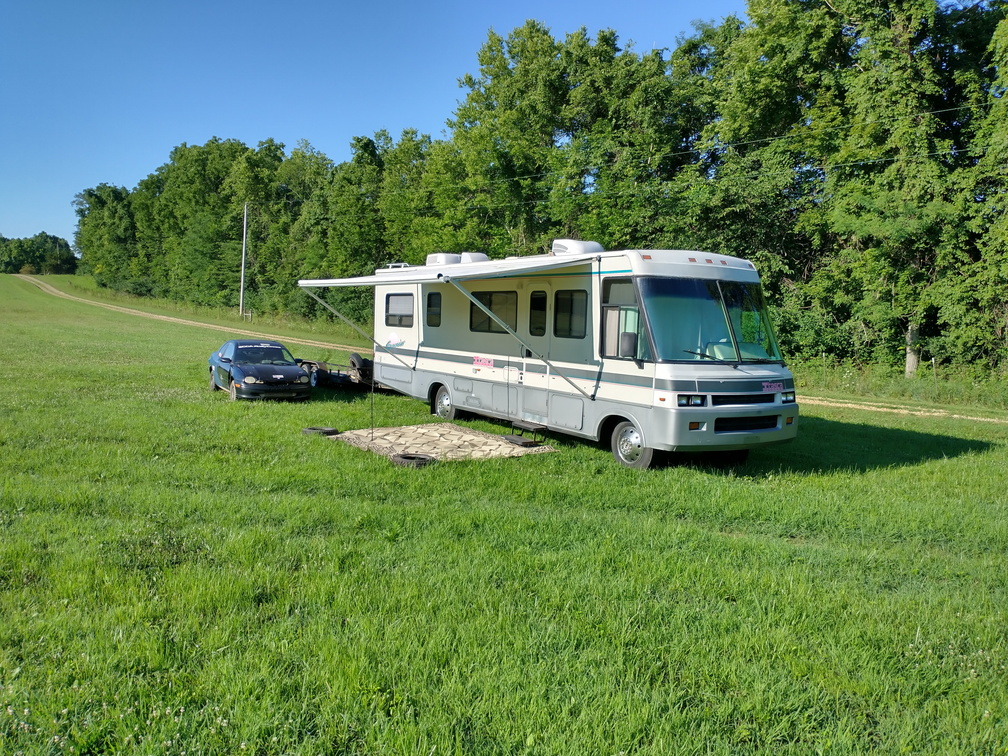
Friday night the RV was packed up, the car was strapped to the trailer, and all I needed to do was get a good night’s sleep before heading to Scott’s Bottom and get back to racing. Even though that’s supposed to be fun, I could barely sleep next to this growing sense of dread and nervousness. At 4am sleep could no longer hold me, so I fired up the old 454, hooked up the trailer, and set off. When I arrived at the farm, I got the car unloaded and set up the RV:
While I didn’t know it at the time, that was foreshadowing the weekend I was about to have: Freaking Beautiful!
The weekend was to be two entirely separate points events like the regional two-days usually are but this time there was a twist: Instead of Sunday being a short session, we were going to run a full second day. With 11 runs on Saturday and 10 on Sunday, the car was about to get punished.
The car just ran great both days. The whole idle situation is really irritating, but other than that it was fine. On Saturday one of the vacuum caps that had dry rotted popped off and then Sunday I de-beaded a tire, but neither of those affected my lap times or caused me to miss a run. The motor mounts held up great:
I got out driven by a little bit under a half-second per lap on both days so I had to settle for a couple of P2 results, but when it was all over on Sunday afternoon I crawled out of the car and jumped on the roof to celebrate. While I do still want to get it back into the garage and up in the air to do a thorough inspection, preliminary indications are that the motor mount problems are finally whipped.
I took a couple minutes yesterday to go ahead and get the car back down on her own wheels. I checked that all the motor mounting bolts were secure, and took the opportunity to correct the camber on the left side. I also was getting a significant amount of movement on the left side that went away when I ensured that the strut collar was tightened all the way. That is something that will need to be watched. While changing to the street tires, I let the car warm up to top off the coolant. Once it was warmed up and stopped burping air, I took it for a quick drive.
I didn’t go too far before I was getting fluid on the windshield and some smoke. Then I lost power steering. My guess was that the power steering lines had gotten in the way of the alternator pulley and had been cut. The real culprit, however, was this:
This would be the wrong place to install the radiator pressure cap. The worst part is that I paused before driving off to get out to double check that I had put the cap back on but decided not to because I absolutely remembered putting it back on. Oops.
A quick trip to Kroger resulted in beer for me and distilled water for the cooling system. I bled the system again, actually put the cap back on, and drove it home.
Made the drive perfectly with no further leaks or other problems. It didn’t even catch on fire a little bit. The idle is pretty touchy still and I do need to take care of that, but for now I need to focus on getting the motorhome ready to go for the two-day event this weekend.
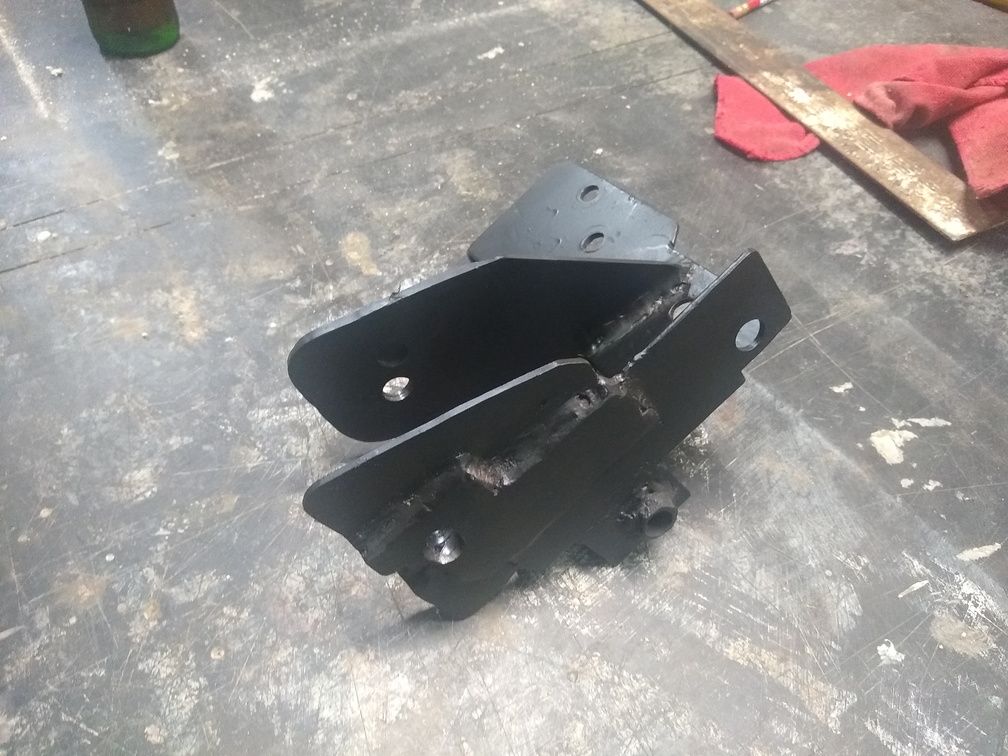
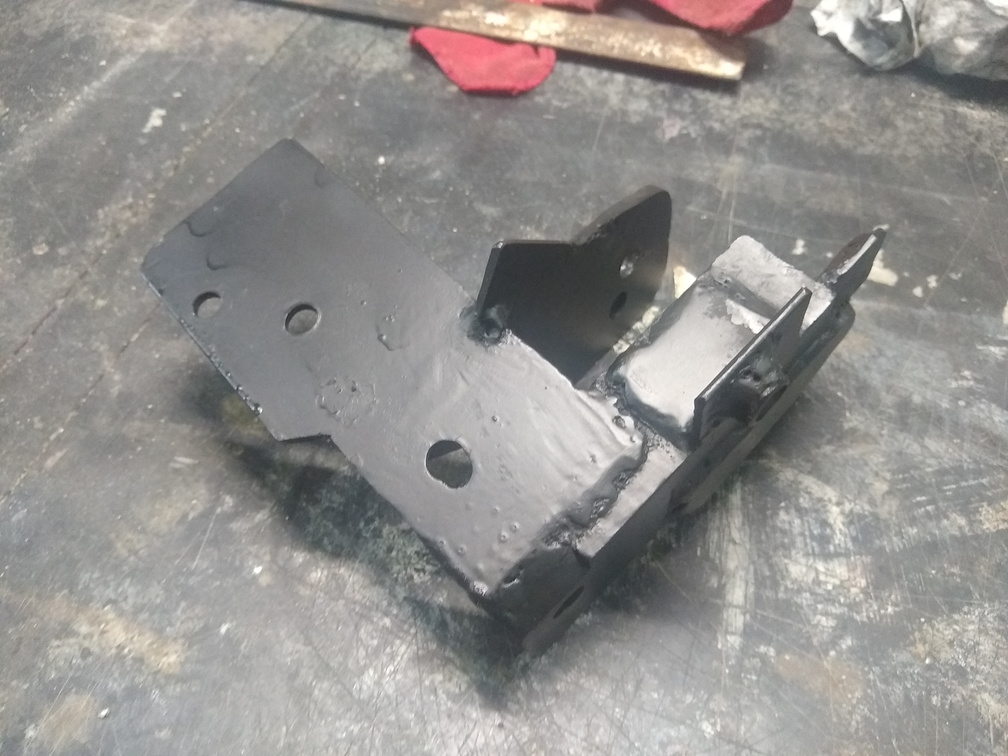
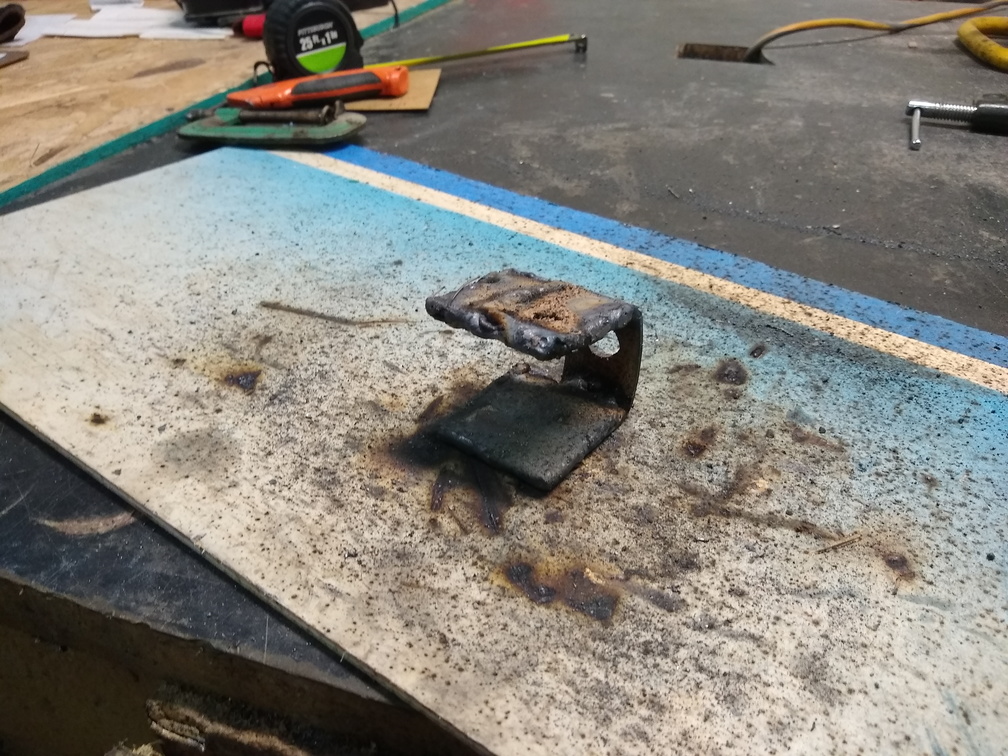
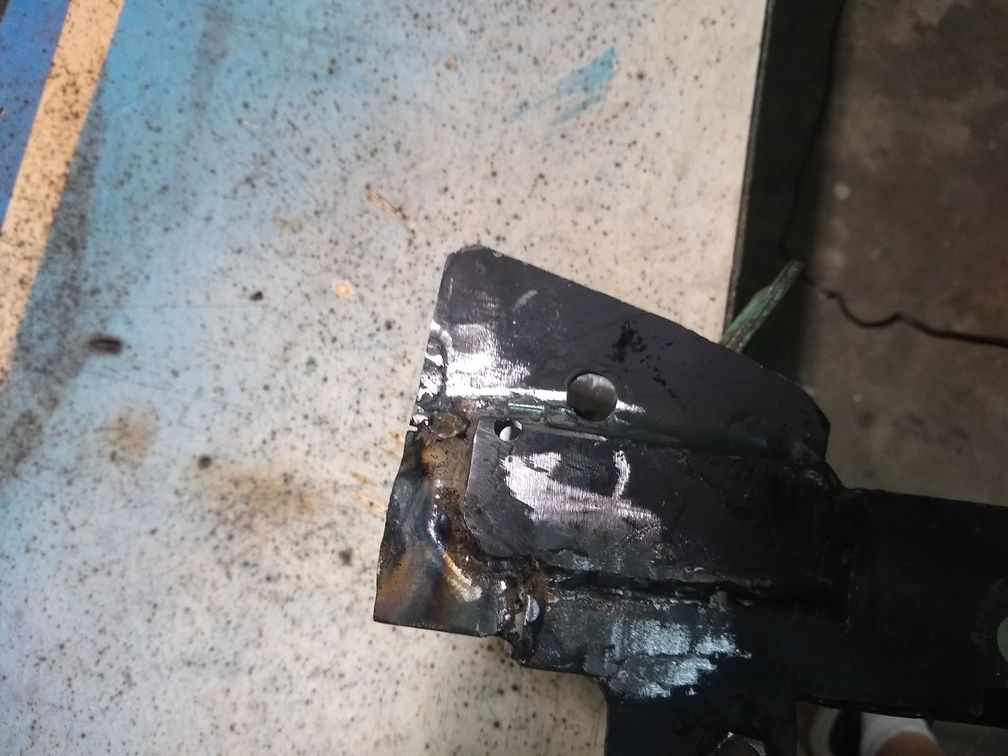
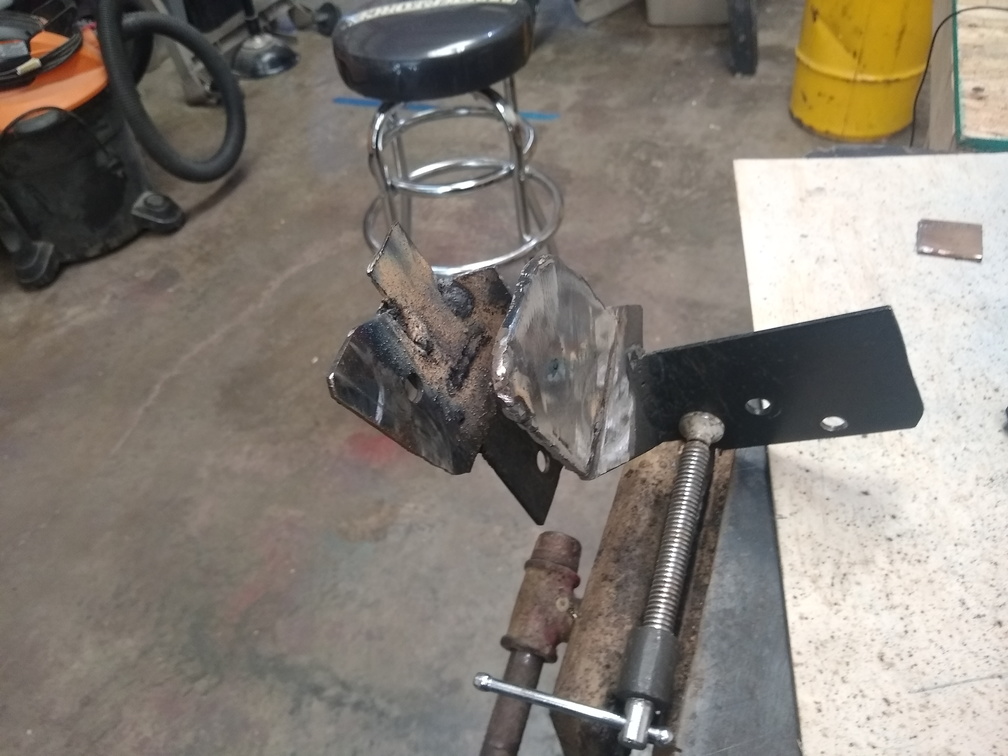
The freshly painted engine-side bracket looked pretty nice on the bench,
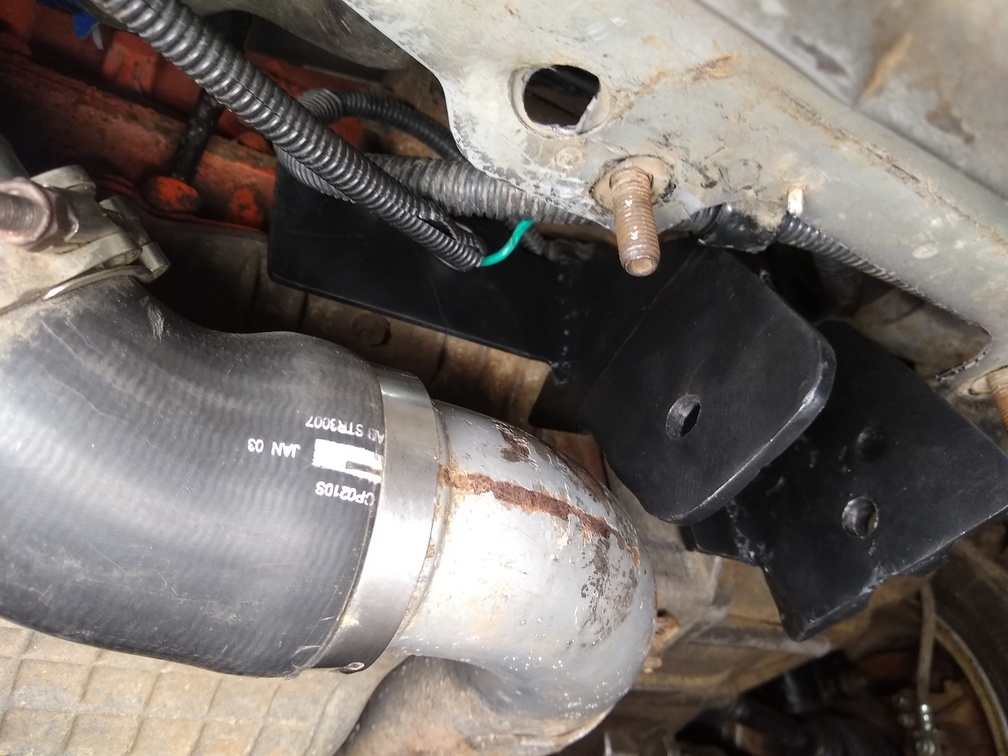
But it looks even better when it’s all installed on the car!
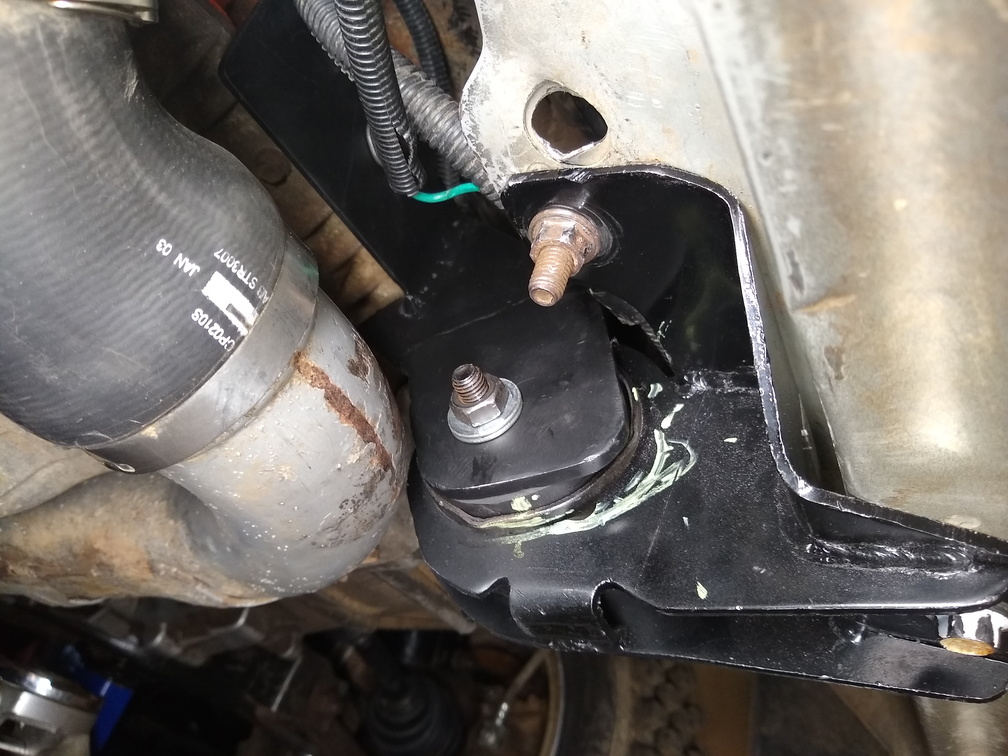
And even better yet when it’s all bolted up and holding the weight of the engine!
The initial plan was to just slam things back together and get the car on street tires for some driving around. But there was the problem of the torque strut. To keep it from rubbing on the oil pan, I was using a pretty long bolt and some spacers. As I looked at it, I realized that really what should be done is the bolt hole needed to be moved over about a half inch. But half-an-inch from the existing bolt hole was air. So, here we go.
The original bracketCleaned up the bracket and cut two pieces for the top and bottom. The larger bit would be welded to the inside of the bracket and the smaller one would take up the space between the original bracket and the extensionWelded together, but kind of ugly.Cleaned up with the grinder and finger sander
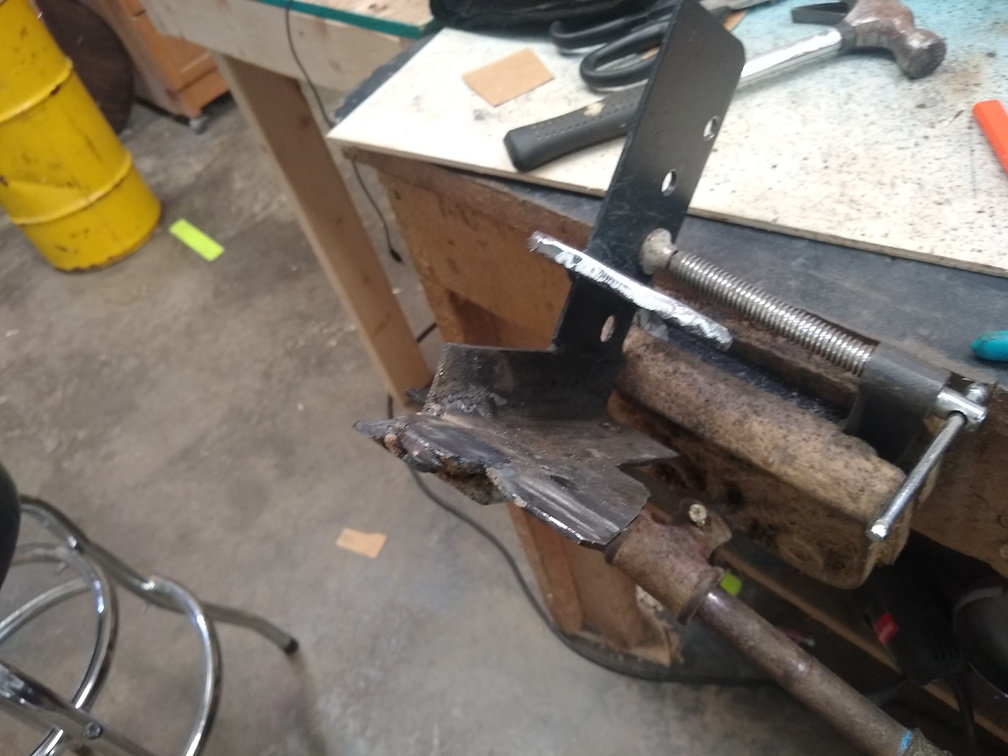
It took a couple hours, but using what I learned from re-shaping the engine-side bracket, I added some metal to the bracket to extend it farther towards the right side of the car. A little bit of hole-drilling and then I mocked it up to see what needed to change.
Turns out: Not much! The heim joint was originally held in with a bit of all-thread and some nuts as spacers. That was a PITA to remove, so I looked for something else to use to space and center the heim joint. Instead of using the solid bobble mount, I went to the regular factory strut. So laying on the floor of the garage under the car were two bits of pipe nipple that had been cut down to use as spacers for the identically-sized heim joint that was the lower end of the solid bobble. The needed to be cut down a little bit more, but with that done I had my spacers. It took a little bit of persuading (hammer time!) to get everything to line up just right, but now the torque strut is bolted up a little bit closer to the engine and it doesn’t rub against the oil pan:
By the time I had all that done, it was almost 1am and I was wiped out. So I went ahead and left the rest of the work for later. Here’s my list:
Top off coolant – I lost a bunch when the motor mounts let loose last time and separated the hoses
Secure power steering lines – they’re very close to the alternator pulley
Correct camber on left-front
Tighten strut body on left-front
Put on street tires
Do some testing
Extra credit: Reconnect the digital coolant temp gauge sender. That will require some work since the wires are broken off right at the epoxy
A trip to Lowe’s netted a new spool of flux-core wire and some new tips which enabled me to finish attaching the additional material to accommodate the correct angle of the engine. A little bit of welding later and I had this:
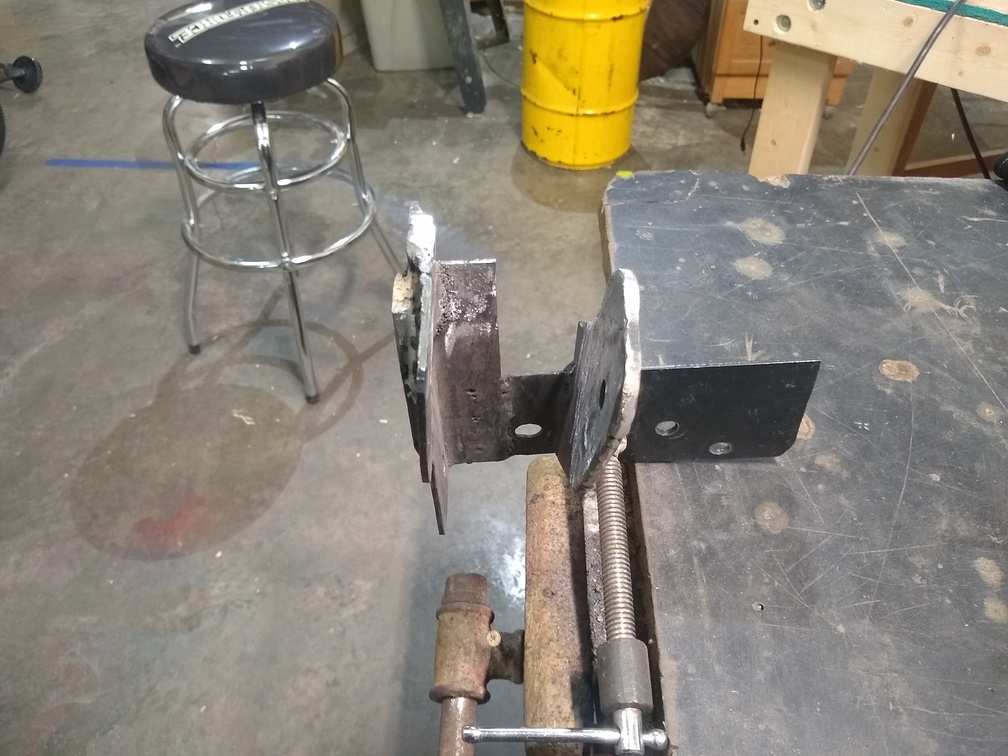
I was all set to just get it wrapped up on Sunday, but I put my drill bits in my B.U.T.T. and then left it at home. So, I had to wait to actually put the bolt hole in. In the meantime, though, everything got bolted back up to the car in order to mark the orientation and position of the body-side mount against the engine-side bracket. From there, I did some careful measuring and template-making so that I could mark the bracket in the proper place. The right side bolt hole was pretty easy to drill and was all good to go. The left-side bolt hole, however, landed right on the edge of the angle-iron that I used to put the right angle on the arm of the bracket.
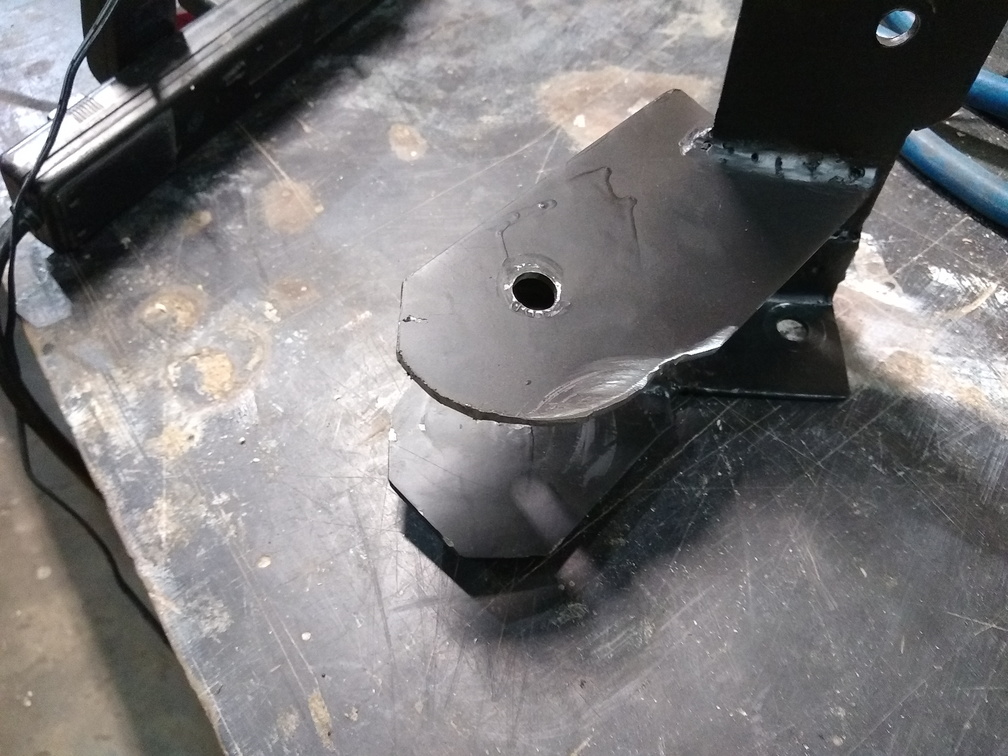
The new bolt hole is the smaller one to the left. That’s the starter hole and once it got to the 1/2″ size that wasn’t going to work too well. To mitigate that, I added a few layers of 1/8″ steel and re-drilled the hole. That gives the bracket enough “meat” to be able to support the bolt. As a side benefit, it also makes the bracket wide enough that I don’t need to add washers in order for the nut to be able to catch the threads.
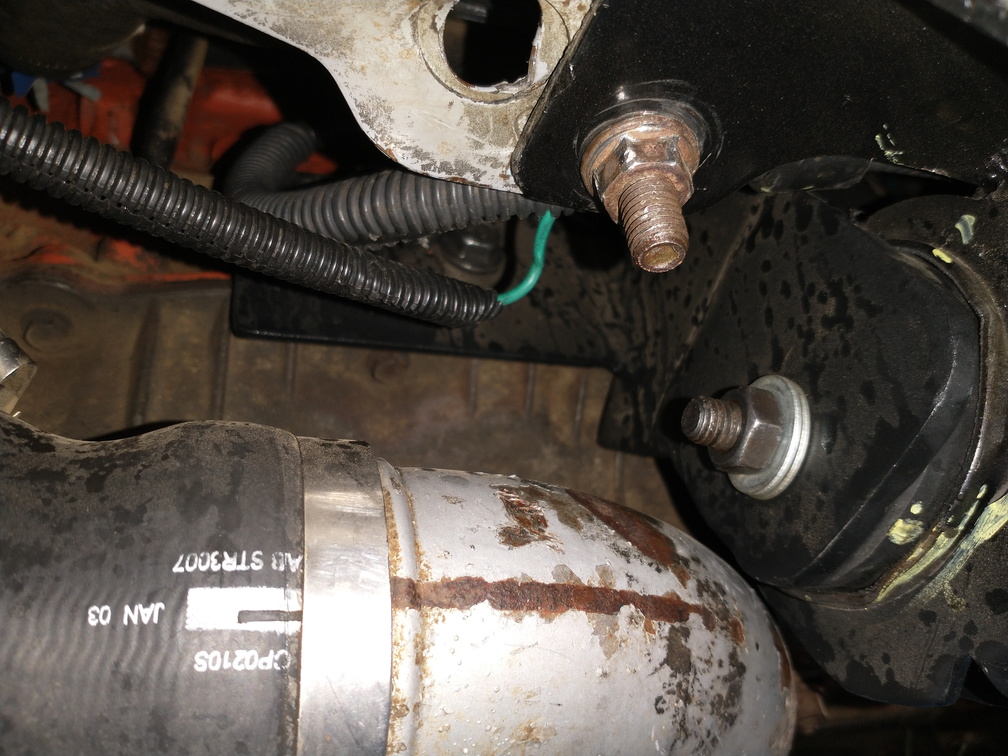
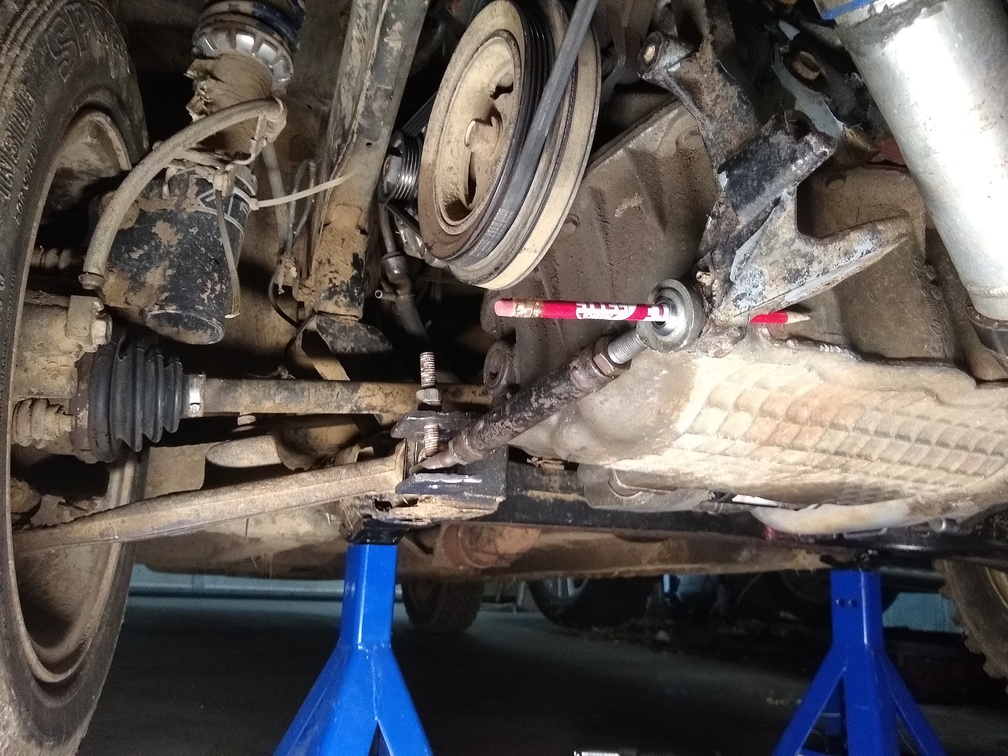
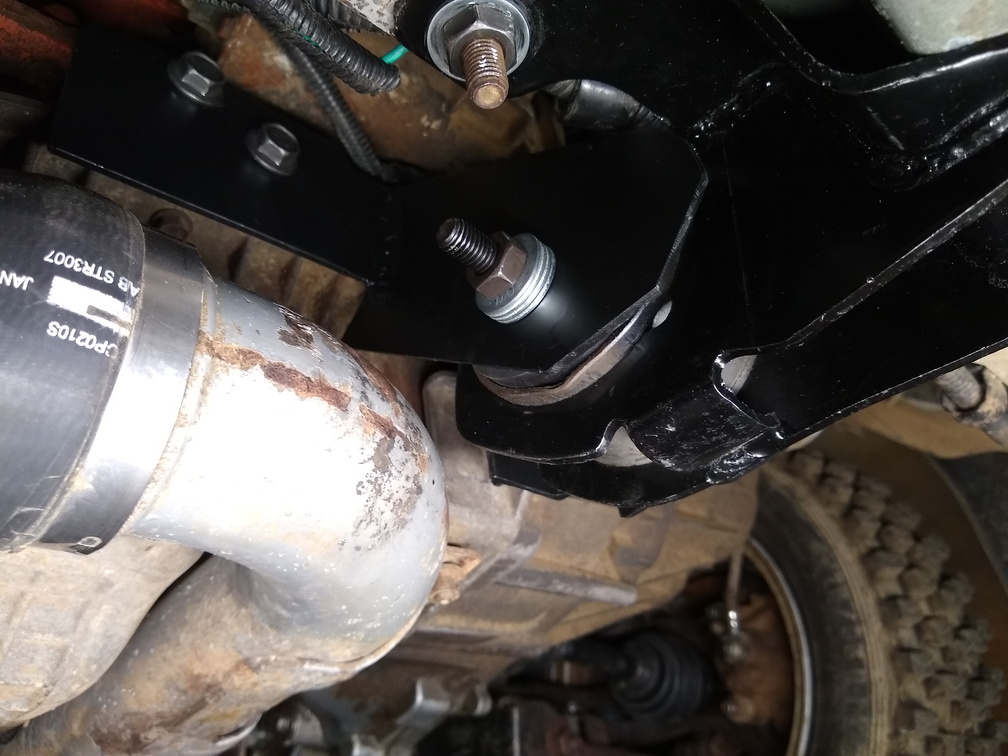
Of course the final test was to bolt everything back to the car once more with all the stock(ish) mounts connected to make sure that everything finally aligns. Good news:
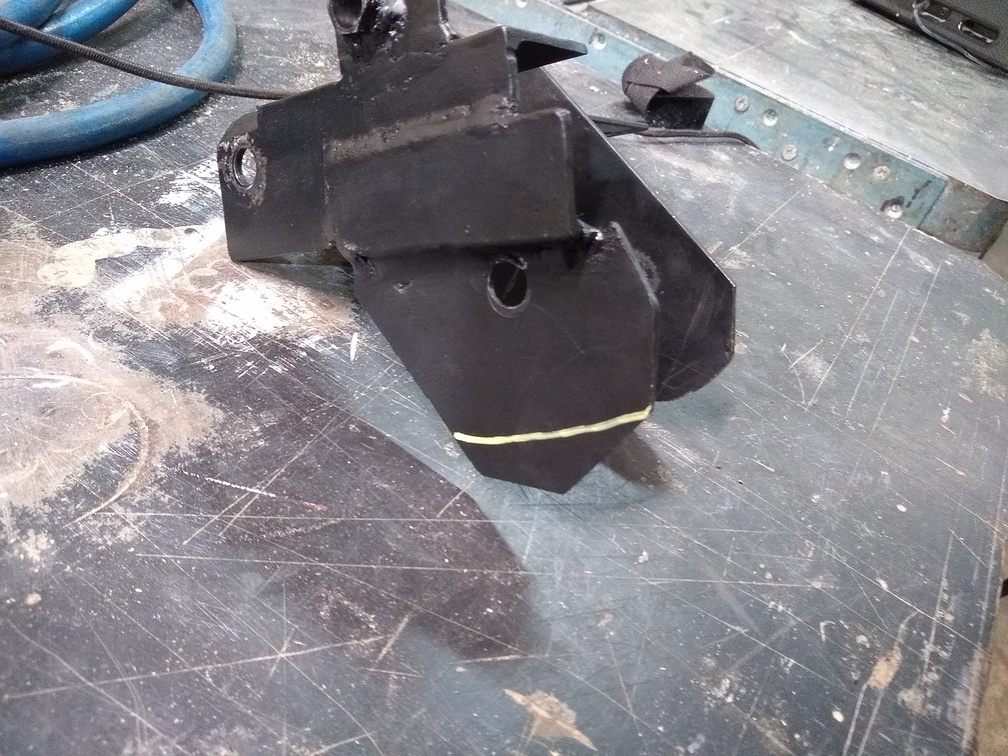
Perfect (enough) fit! You can see that the bobble strut is bolted to the frame bracket in the back and that, while a little close, the body-side mount is not hitting anything. I have to take the whole thing apart again so I can sand down and paint the engine-side bracket and at the same time I’ll grind off a little bit more of the body-side mount just to make sure I don’t put a hole in the charge pipe.
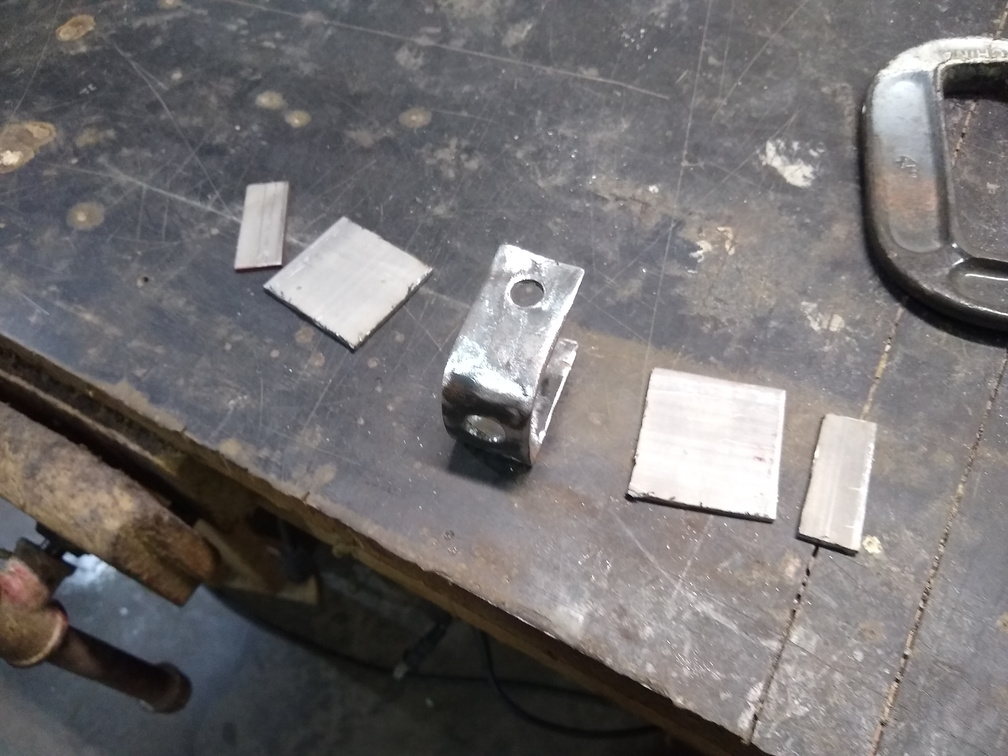
After a whole week of celebrating family birthdays, I had a chance to get back to fixing this problem. Step one was to cut the bracket down some more while also determining what additional material needs to be added.
Once the bracket was trimmed to fit and the cardboard bits were made, more of the 1/8″ bar stock was cut up and welded to the right side of the bracket. This was one large bit that went to the outside followed by a small corner that was welded to the inside so that the rubber bits of the mount are completely covered.
The left side is a lot more complicated because of the angle. I added a little bit of bar stock and then ground another bit down at an angle to support it. I need to get at least one more bit ground down and installed, but unfortunately I ran in to one small snag: Ran out of welding wire!
After hitting up Lowe’s tomorrow morning, I should be able to get this wrapped up pretty quickly.
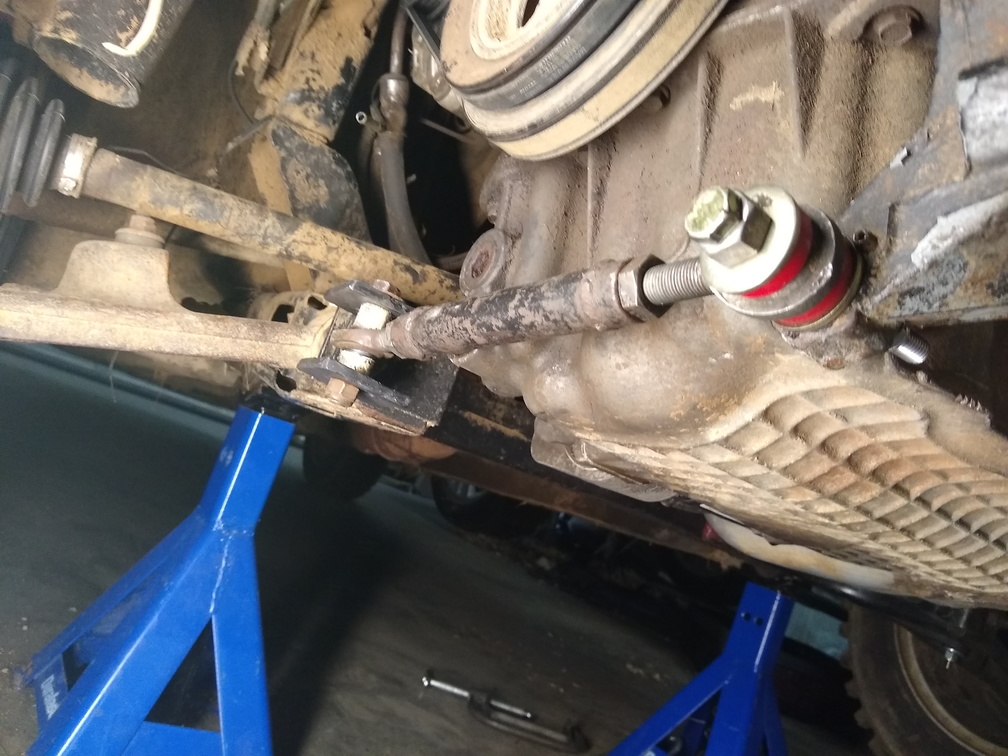
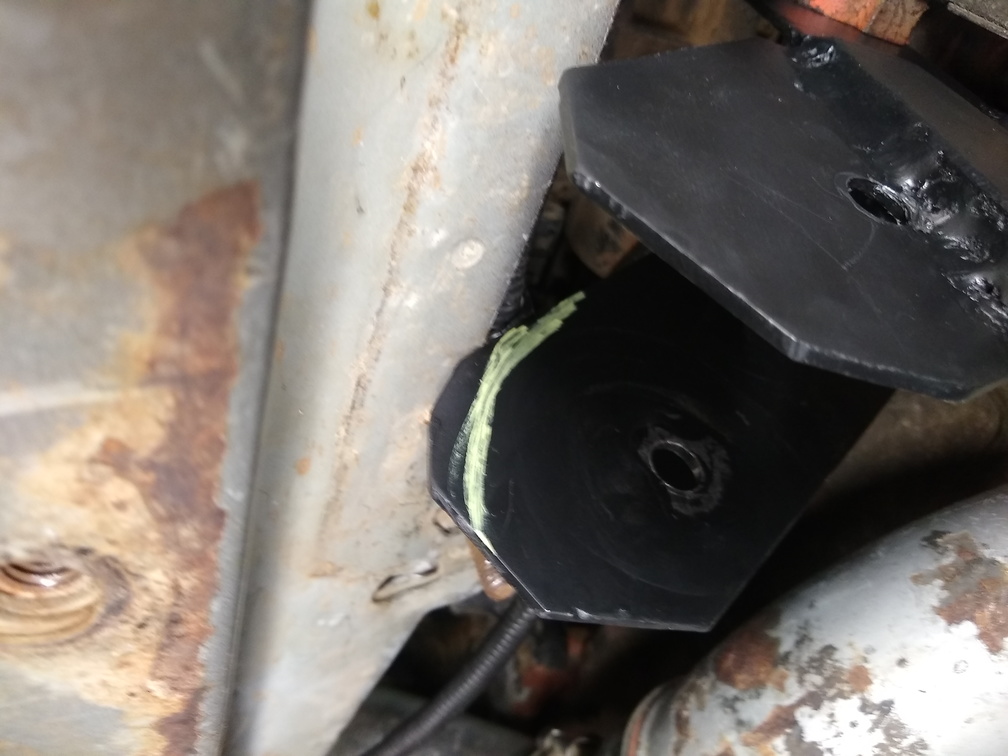
After letting the paint dry, the new bracket bolted up perfectly and looked pretty good. It cleared everything and getting the bracket bolted to the mount was pretty easy.
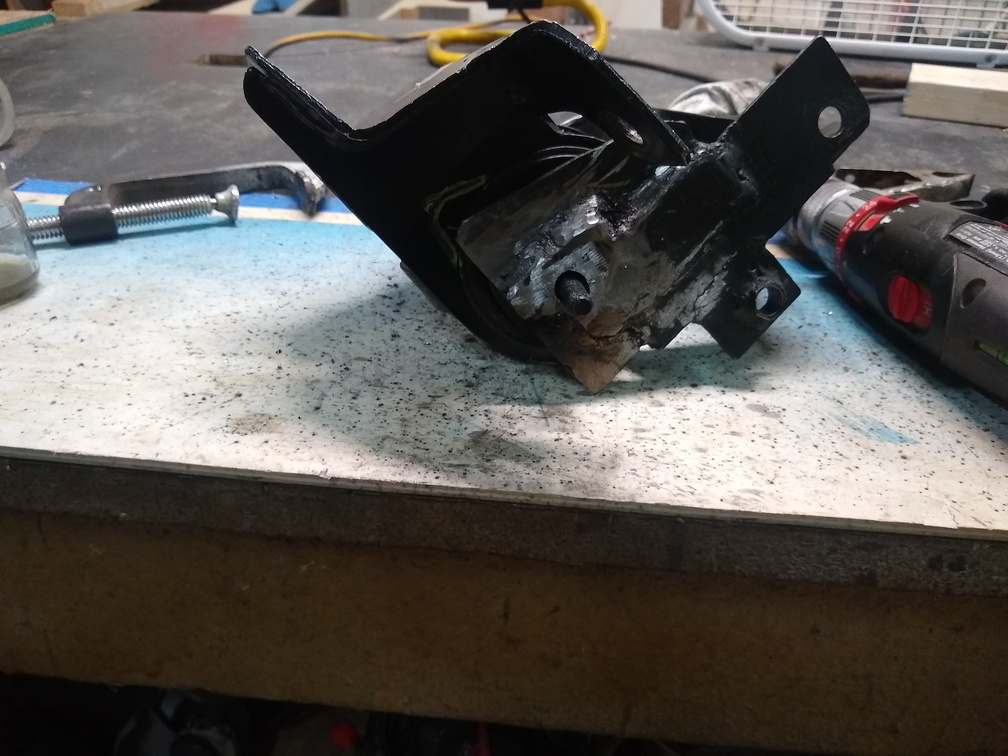
The next step was to hook up the bobble strut, so I grabbed the relocation bracket and the bobble and went to town. First, the remains of the solid bobble had to be extracted, and then the bobble had to be adjusted slightly since the k-member bracket had gotten a little pinched. All that was great, but when I went to bolt everything up, it didn’t fit. Turns out the motor is in the wrong damned place thanks to the front mount. In retrospect, it seems pretty obvious that I should have put the bobble strut in first and then measured and made the front bracket, but it didn’t really occur to me that the angle of the motor would much matter with the bobble. Maybe if I were using round steel instead of the actual bobble the space wouldn’t be a problem, but in any case this isn’t going to work.
So back to grinding and cutting.
With those cuts done, the bracket now fits against the core support, but there’s a new problem:
The bolt hole is completely out of alignment now.
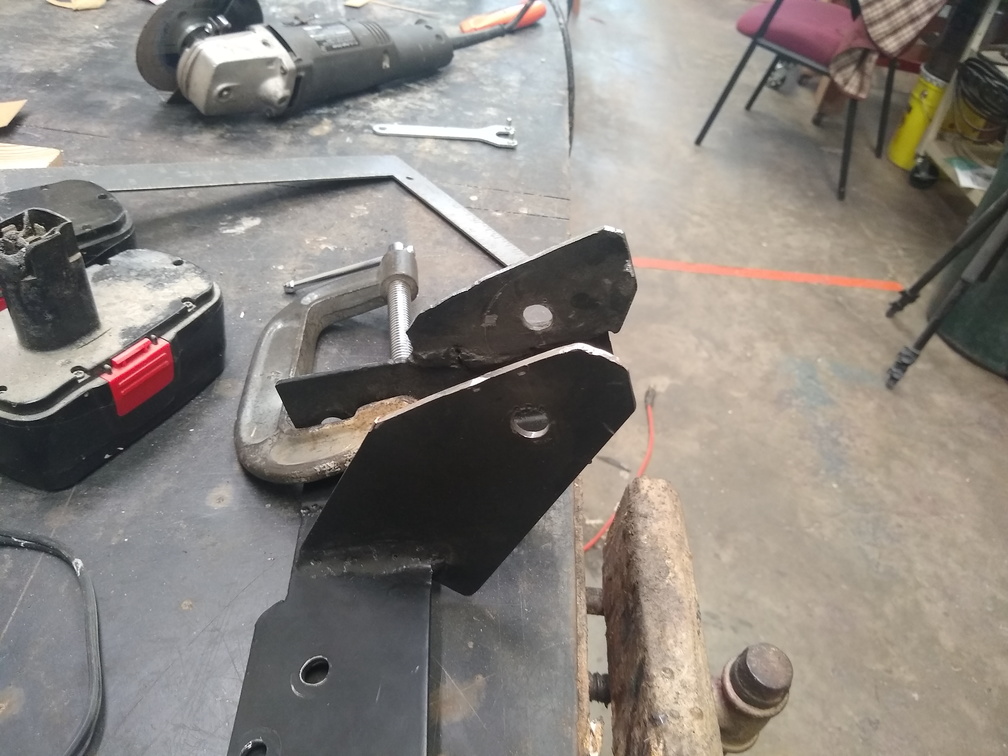
That means that I need to add some material to the bracket and re-drill the bolt hole. I’m thinking that I’ll overlap some bar stock on the outside of the bracket and use that overlap to weld up more flat bar that abuts the existing arm. The left side of the bracket will be a little more difficult since the corner is in the way a bit, but I should be able to figure that out as well.
For now, I think I can modify what I already have instead of starting over, but it would have been really nice to be moving on to the next thing instead of doing this thing a second time.