Non-Automotive Projects

The Lego Table Of Doom (Pt. 3)

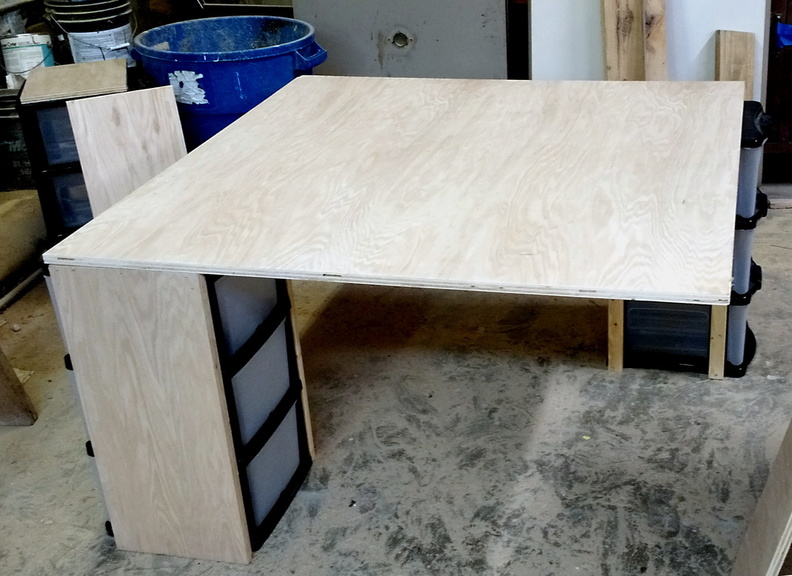
As I mentioned already, I could have just taken the table home at this stage and it would have been fine.  But there were a couple things left to do.

Most obviously, the table needed to have its lip attached.  Originally, my plan was to use the furring strip to build up a 3/4″ lip around the table.  Sounds good in theory, but I had two problems with that.  Firstly, I had used up the entire supply I purchased in framing up the storage drawers.  Secondly, the more I thought about it, the more that seemed like a very limiting lip height.

Initially, I thought I would just forgo the lip entirely and use some edging tape to cover the unfinished edge of the plywood.  Dad did some hunting around his leftovers in the workshop, though, and he came up with these cherry nosing strips.  They just happened to be the exact right size and it gave the table a little rounded lip that was about a quarter inch high.  Perfect to prevent things from rolling off, but not instant carpal tunnel.

My next issue was that in the process of cutting down the plywood, the veneer got chipped a bit in a few places.  Some of the chips could easily be filled with putty, but I was concerned what the larger chips would wind up looking like.

At this point, I should point out to those of you that haven’t figured this out yet: I don’t really know anything about woodworking.  I’m just kind of bumbling my way through this project.  I do know, however, that if I had a quarter panel that had rusted out, I would go find a good panel, cut out a large section of it, cut out the rusted section, trim my good panel to fit, and then weld it in.

Whether it is the right thing to do, I approached the veneer chip the same way.  I started with this chip:

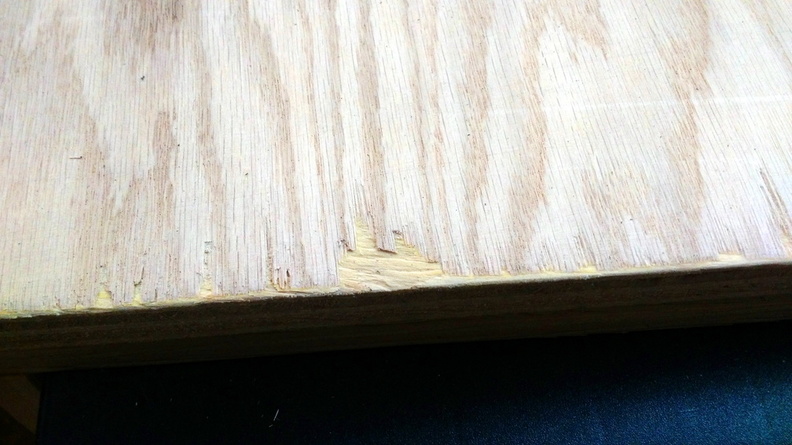
Using a straightedge and an Xacto knife, I cut out the veneer layer:

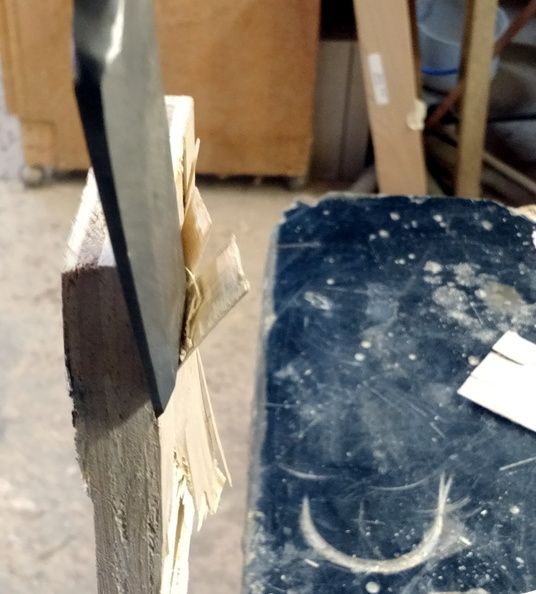
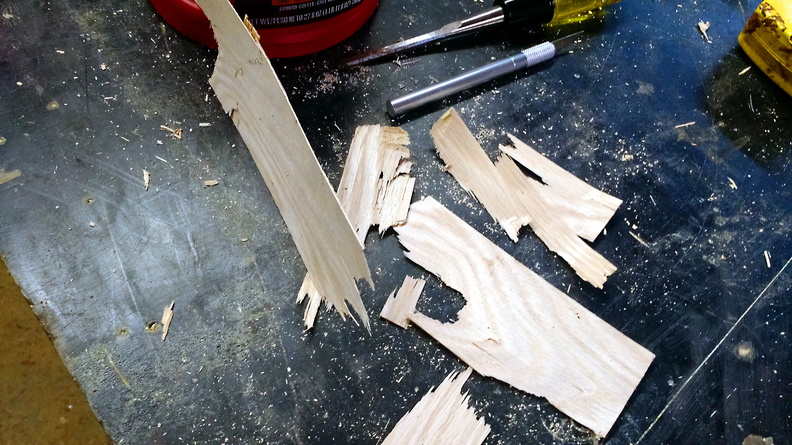
In order to get veneer to replace that bit, I used a chisel to separate off that layer from a leftover bit of plywood:

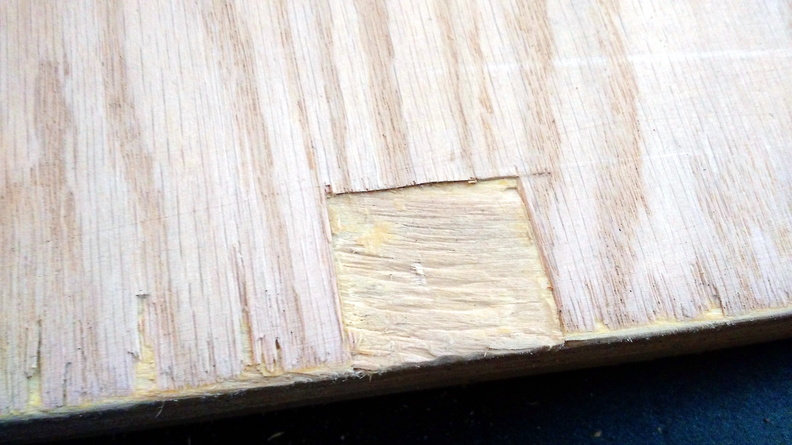
I found some thick paper and used it to cut and trim a template bit that would fit what I had cut out of the table top.  Then I used that template to cut a bit of the veneer I salvaged and glued it into place:

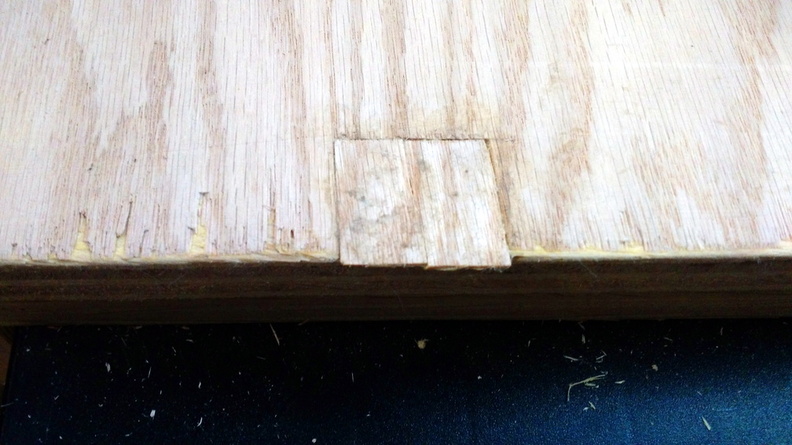
After some putty, a little sanding, and final trimming:

Not perfect, but much better than the giant void.  In the future, I think it would be best to just not chip the veneer in the first place.

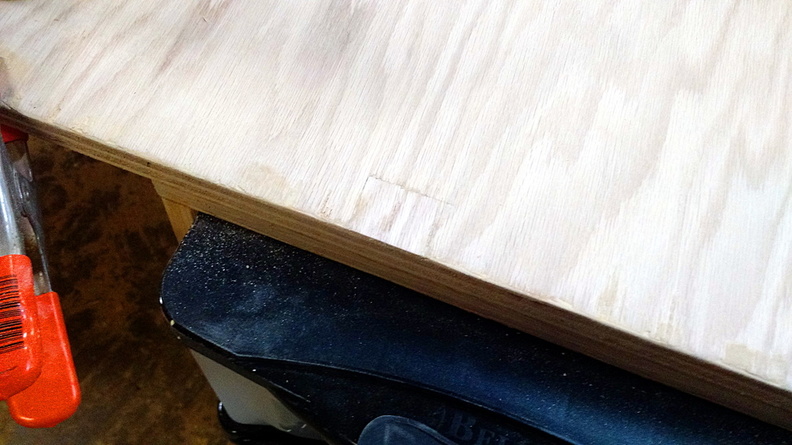
Moving along, though, with the veneer patched, I applied the stain:

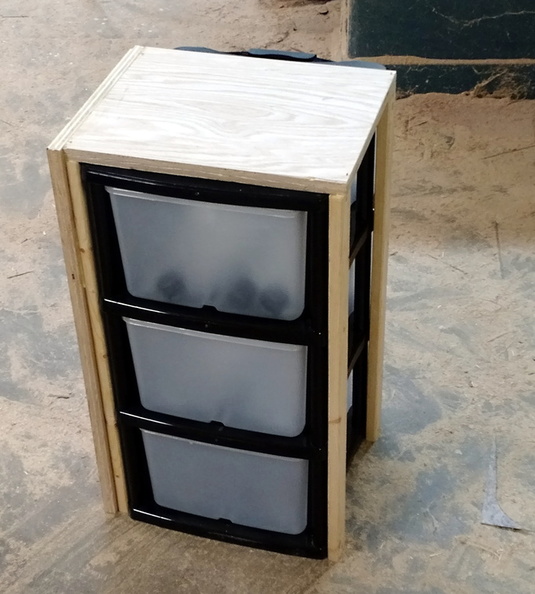
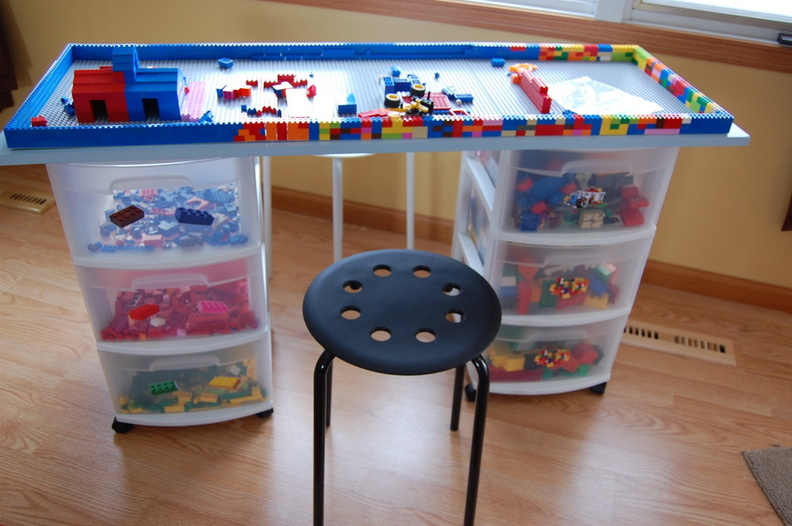
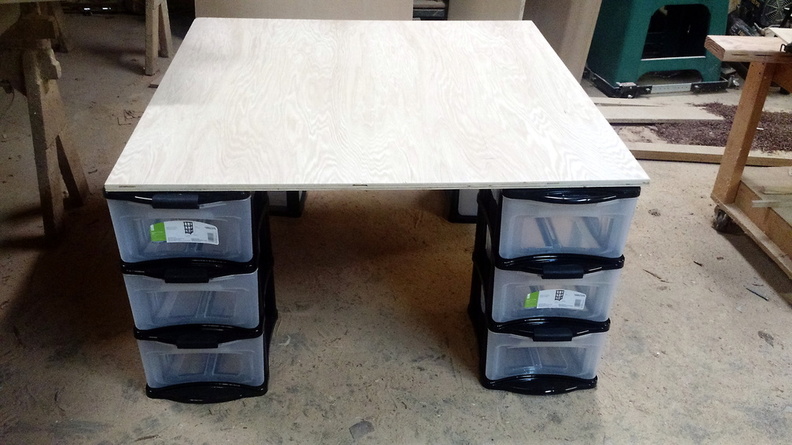
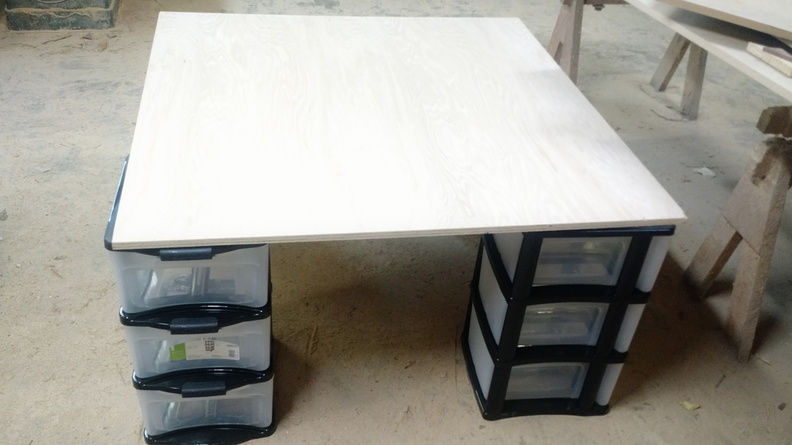
Once the stain was applied, I mitered the nosing and glued/stapled it on to the edge to give it this look:

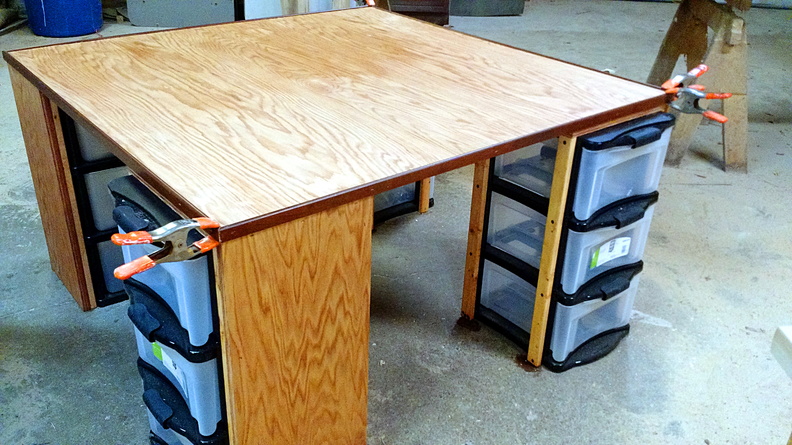
Ignore the clamps.  All-in, I spent a total of about 12-16 hours on construction and finishing.  Again, a decent percentage of that was spent trying to re-engineer this thing.  If I did it again, I’d go about it a little differently.  Using those drawers as a base is just a stupid idea.  I might build actual boxes for legs in which those drawers might fit.  Or I might build boxes in which storage containers could be stored or hung somehow.  I would even consider building compartments that those fabric storage boxes would fit in.

But I would never, ever consider building furniture using plastic storage drawers as a base.  Ever.

Because that’s an incredibly dumb idea.

In retrospect, I realize now that I should have realized then how dumb that idea was before I started.  In the end, I think I put the best possible polish on this particular turd that could be done, and it really does look pretty nice.  But it still has a little flex to it.

Because building furniture using plastic drawers as a base is pretty stupid.

I alluded to a potential problem with the drawer-legs.  This table is quite heavy and somewhat awkward to lift and hold.  Because they’re not boxed in all the way, you really shouldn’t lift it by the legs, so it requires a lot of off-balance hefting to get it off the ground.  In the process of trying to do that to load it into the van to get it home, I managed to forcefully remove three of the legs.

Repairing that added another 30 minutes or so to the build.  Instead of just screws, I put some glue down and then used a screw that was a little bit wider so that it would have a harder time pulling out.  Time will tell how well that works.

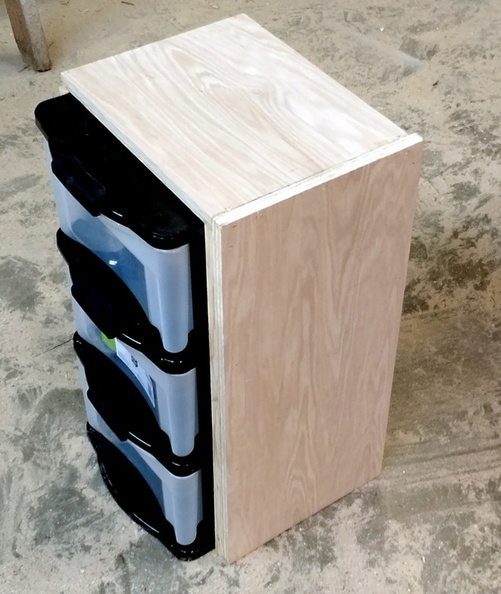
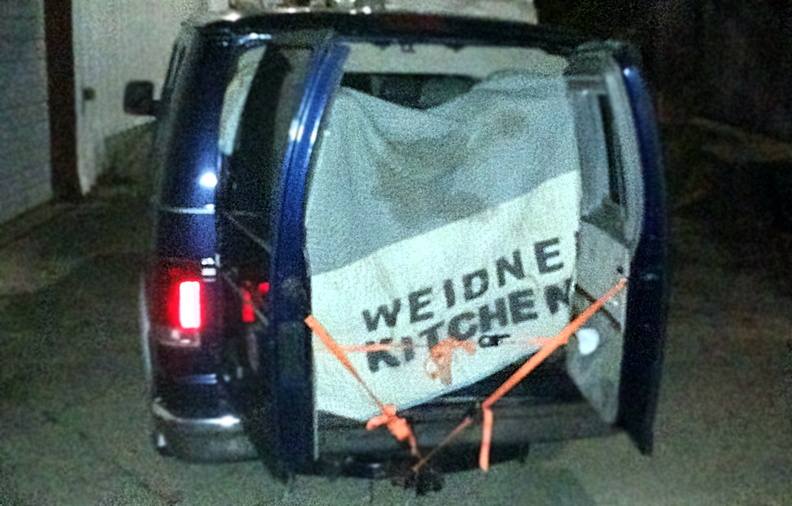
Another lesson that I learned from the Jethro Gibbs School of Building Boats in Your Basement is that you need to double check the size of your vehicle.  As it turns out, because I left the drawers sticking out a bit from the top of the table — I think it looks and works better that way — it adds about 6 inches to the overall width and depth of the table:  48.5×48.5,  That’s a bit too big to fit in my van.  About 6 inches too big, as it happens.  So it made the trip home somewhat precariously:

Overall, the wife and the kids are happy with the table.  All-in, it cost me about $140 in supplies, but I got about $100 worth of nosing for free, and I used glue, staples, putty, and screws from dad’s workshop.  I started the process on the 30th of December and brought it home on the night of the 2nd, but I didn’t touch it at all on New Years Day.  Overall, I had about 12-16 hours into the project, but could easily replicate the table in about 8 hours if I were to ignore my advice about not building furniture using plastic drawers as a base.

Most importantly, though, I learned a very valuable lesson:  Don’t trust anything you find on the Internet.

The Lego Table Of Doom (Pt. 2)

When we left our intrepid adventurer, the Internet-inspired Lego table was turning into a Jell-O-like disaster of a project.  I considered going ahead and building the table as-advertised, but I really didn’t want to go through the expense and energy just to have a bit of garbage in the basement.  Whatever I wound up doing, I didn’t want to add any significant amount of fiberboard or OSB, and I didn’t want to have to purchase any additional supplies if I didn’t have to.

My dad came in at this stage and we both noodled a few different ideas to box in the corners or add legs, but nothing really resonated.  I started cutting up the furring strips to see what I could do with them to strengthen the drawers and I came up with this:

I cut the furring strips to the height of the drawers and attached them with screws to the “legs” of the drawer units.  I cut down the other half of the plywood into side and top sections for the drawer units so that they would be partially boxed in.  I tried just the side:

but without the top bit, it didn’t seem to add enough rigidity.  The side and top pieces were glued and then stapled into place.  I would have really preferred to box them all the way around — across the bottom and then up the other side — but I only had another 16 sqft of plywood and I didn’t want to drop another $50 on a second sheet.

With the drawer until boxed in, the flex was reduced considerably. 


After mocking it up, it was much more stable, even before attaching the legs to the top.  In the interest of full disclosure, I did need to head back to the lumber yard and grab two more furring strips for $0.80 each.  I needed a total of 16 of the auxiliary storage drawer legs and I could only cut 3 from each furring strip.

I put the table on the work table and lined up the legs.  Using a couple right-angle drill attachments (I knew there was a reason I had two of them!), I screwed the legs/storage drawers on to the table top.

Once they were screwed on, it looked like this:

I was actually able to jump up and stand upon the table top without any problems.  Given that I weigh significantly more than most housecats, I’m confident that this table would not have any trouble surviving in a house that suffers from a feline infestation.  I’ll make an exception for Siegfried and Roy, however, since I only tested the table to about 185 pounds.

Now that the basic table was completed, it just needed some finishing work to be done.  I could have brought it home at that point, however, and it would have worked out pretty well.  It certainly would have been worlds better than the original design.  At this point I would say that I had about 8-12 hours invested in construction.  A good 3-4 hours of that time was spent trying to find a way to re-engineer the design, so if you’re looking to construct this table yourself, hopefully I can save you some time there.

You’re also going to notice that the table is not mounted atop casters.  I’ve kept the casters and could install them, however, the boxed-in storage drawers are using the furring strips and plywood to transfer the force of the weight of the table around the plastic and down to the ground.  If those casters were installed, the weight would be borne again by the plastic and I don’t believe that the wooden exoskeleton that has been fitted will be sufficient.  That will probably put the flex back in to the table and that flex would likely result in the fasteners and glue being weakened over time.  If I put it back on casters, it will need to be after boxing the other side — or maybe the side and the back — of the storage drawers and then adding a floor piece to each one as well.  Even then, I remain concerned about the overall structure of the table.

As it turns out, I should have concerned myself more with this as I attached the legs.  But that’s a story for later.  Say, in the exciting conclusion of my adventures with the Lego table in part III.


The Lego Table Of Doom (Pt. 1)

Over Christmas, my lovely wife came across something on twitpinspacebook-whatever that purported to be an easy and well-thought-out table for storing and building with Lego.  The general idea was to set a board across two or three of the plastic three-drawer storage units to make a table that had ample storage built-in.  Genius idea, really, and this is the picture I was shown:

Now, we’ve got three kids, so we needed room for plenty at the table.  Plus, I thought it would be nice to use some actual wood in the construction rather than some laminated fiberboard bit of garbage that would look ugly and not hold up.  I hunted around at the local big box lumber store and came up with four storage drawers, a 4’x8′ sheet of 3/4″ oak veneer plywood, some pine furring strips, and a small can of Minwax stain.  My plan was pretty simple and straightforward:  Cut down the plywood to 4’x4′, use the furring strips to put a 3/4″ ledge around the tabletop, screw the storage drawers to the tabletop, and then stain it.

My dad has a nice woodworking shop as part of his business, so I took my materials over to his shop since there would be a little more room to work as well as access to some better tools.   After cutting down the plywood, I mocked it up and it looked like this:

This meant that only two positions at the table would have easy access to storage, so I rotated the drawers around to look like this:

Looks pretty nice, thought I.

Then I touched it.

I mean, really touched it, put both hands on it and leaned forward a little bit.

It was like touching a table made of Jell-O.  The drawers had so much flex in them, they could not provide a stable platform for the tabletop.  Clamping the drawers to the table demonstrated that it wasn’t the table moving against the base, it was just a very un-solid base.  At this point, I needed to go back to the drawing board and figure out what went wrong and how to shore the table up.

An examination of the drawers didn’t leave me with any obvious ways to quickly provide additional rigidity to them.  I grabbed some scrap bits of wood and mocked up a few different ideas, but nothing really seemed to work out.  One of the limitations I imposed upon myself was to finish this out without going out and buying another $50 sheet of plywood and I wasn’t about to add any OSB or MDF garbage to the project.  Searching around on the Internet for the original specs of the project led me to a few specifics including the exact make and model of drawers that were originally used.  Thinking that perhaps I had just gotten inferior storage containers, I set off to a couple different retailers in search of the Sterilite brand 3 drawers storage containers as used in the original blog posting.  If those were sturdy, went my logic, I could get those, return the drawers I had already purchased (or use them elsewhere in the house!) and then I’d be finished up in time to take my eldest daughter karting.

Turns out, however, that those storage drawers are just as flexible and Jell-O-ey as the ones I had in the shop.  I fell for one of the classic blunders — the most famous of which is never get involved in a land war in Asia —  but only slightly less well-known is this:  “Never believe anything you ever read on the Internet!”

Apparently there’s one of two things going on here:  It is possible that the original design used a very thin and lightweight board as the work surface making the amount of flex in the chassis of the drawer system less obvious.  I’m inclined to think that this is part of the issue since the original poster that I found indicated that somehow their cat was able to break their tabletop into two pieces.  The other possibility is that the original poster has low standards and didn’t notice or mind that the table was rather flexy.  I’m inclined to this that this is the other part of the issue since the original poster thought that any board that a cat could break into two pieces would make an appropriate work surface.

I was now left with the task of building this as an actual useful table that wouldn’t just be another bit of garbage.  But before we continue into part 2, how I decided to reinforce the storage drawers, I want to address what I anticipate will be the primary defense of the original design.

But you aren’t building what the original design was, so of course it didn’t work the way the Internet said it would!

This is a very valid point and one of my own pet peeves of the Internet.  Every recipe review out there has at least one bozo who says that when they made the dish, they substituted Borax for the flour that was called for and then didn’t have chocolate chips, so they used raisins instead, and since they’re allergic to butter they put in their favorite hair cream.  And that recipe was just terrible, so one star, never making it again.  Love folks like that.  That kind of reviewing prowess take a real special kind of dumb.

This is not one of those cases, though.  I’ll address this right now:  When I discovered how flimsy the table as-designed was, I took a step back to see if scaling the table up to a 4’x4′ square and using heavier 3/4″ plywood was overstressing the capabilities of the storage drawer.  I grabbed two of the storage units — remember, these are the units that have just as much flex in them as the Sterilite ones — and a bit of quarter inch fiberboard that was laying around.  I clamped the fiberboard down and found that while there wasn’t quite as much flex, the board wanted to bow in the middle and the whole thing was still about as shaky as Carrie Fisher in the Star Wars Christmas Special.

You are certainly welcome to build this table to the original specification.  If you have low standards and apparently are not a cat owner, I’m sure you’ll be quite happy with it.

If, on the other hand, you want to build something that will actually last, continue on to part II.