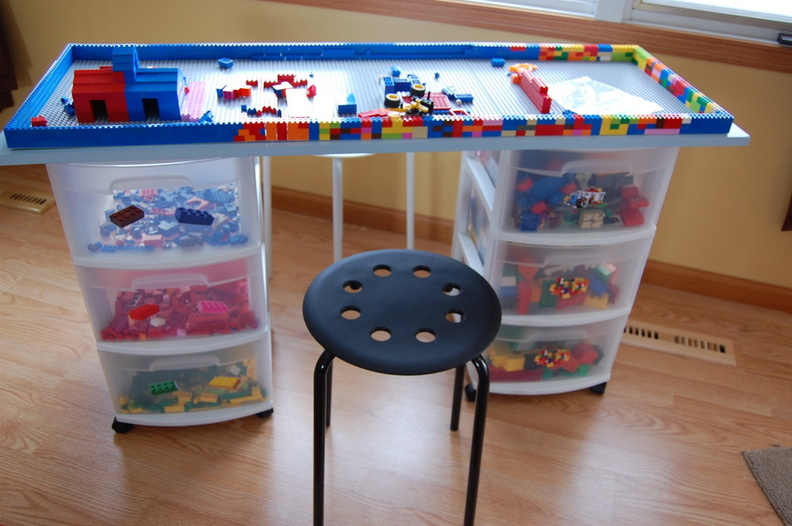
Over Christmas, my lovely wife came across something on twitpinspacebook-whatever that purported to be an easy and well-thought-out table for storing and building with Lego. The general idea was to set a board across two or three of the plastic three-drawer storage units to make a table that had ample storage built-in. Genius idea, really, and this is the picture I was shown:
Now, we’ve got three kids, so we needed room for plenty at the table. Plus, I thought it would be nice to use some actual wood in the construction rather than some laminated fiberboard bit of garbage that would look ugly and not hold up. I hunted around at the local big box lumber store and came up with four storage drawers, a 4’x8′ sheet of 3/4″ oak veneer plywood, some pine furring strips, and a small can of Minwax stain. My plan was pretty simple and straightforward: Cut down the plywood to 4’x4′, use the furring strips to put a 3/4″ ledge around the tabletop, screw the storage drawers to the tabletop, and then stain it.
My dad has a nice woodworking shop as part of his business, so I took my materials over to his shop since there would be a little more room to work as well as access to some better tools. After cutting down the plywood, I mocked it up and it looked like this:
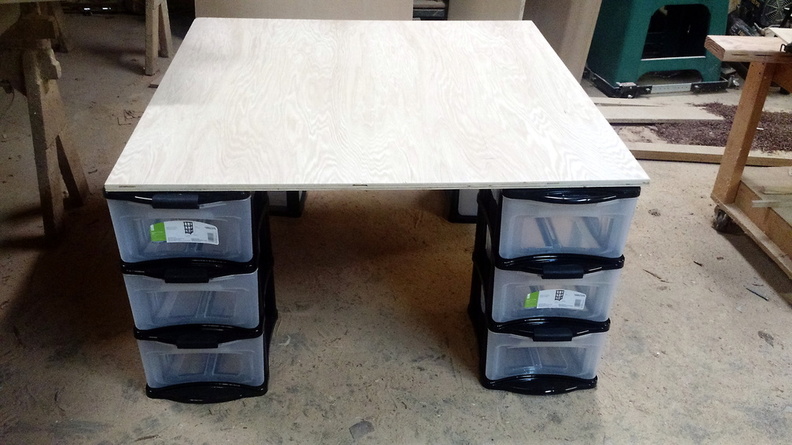
This meant that only two positions at the table would have easy access to storage, so I rotated the drawers around to look like this:
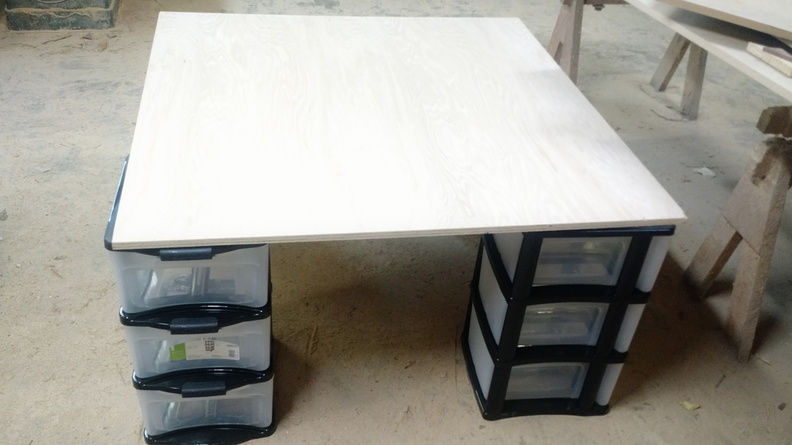
Looks pretty nice, thought I.
Then I touched it.
I mean, really touched it, put both hands on it and leaned forward a little bit.
It was like touching a table made of Jell-O. The drawers had so much flex in them, they could not provide a stable platform for the tabletop. Clamping the drawers to the table demonstrated that it wasn’t the table moving against the base, it was just a very un-solid base. At this point, I needed to go back to the drawing board and figure out what went wrong and how to shore the table up.
An examination of the drawers didn’t leave me with any obvious ways to quickly provide additional rigidity to them. I grabbed some scrap bits of wood and mocked up a few different ideas, but nothing really seemed to work out. One of the limitations I imposed upon myself was to finish this out without going out and buying another $50 sheet of plywood and I wasn’t about to add any OSB or MDF garbage to the project. Searching around on the Internet for the original specs of the project led me to a few specifics including the exact make and model of drawers that were originally used. Thinking that perhaps I had just gotten inferior storage containers, I set off to a couple different retailers in search of the Sterilite brand 3 drawers storage containers as used in the original blog posting. If those were sturdy, went my logic, I could get those, return the drawers I had already purchased (or use them elsewhere in the house!) and then I’d be finished up in time to take my eldest daughter karting.
Turns out, however, that those storage drawers are just as flexible and Jell-O-ey as the ones I had in the shop. I fell for one of the classic blunders — the most famous of which is never get involved in a land war in Asia — but only slightly less well-known is this: “Never believe anything you ever read on the Internet!”
Apparently there’s one of two things going on here: It is possible that the original design used a very thin and lightweight board as the work surface making the amount of flex in the chassis of the drawer system less obvious. I’m inclined to think that this is part of the issue since the original poster that I found indicated that somehow their cat was able to break their tabletop into two pieces. The other possibility is that the original poster has low standards and didn’t notice or mind that the table was rather flexy. I’m inclined to this that this is the other part of the issue since the original poster thought that any board that a cat could break into two pieces would make an appropriate work surface.
I was now left with the task of building this as an actual useful table that wouldn’t just be another bit of garbage. But before we continue into part 2, how I decided to reinforce the storage drawers, I want to address what I anticipate will be the primary defense of the original design.
But you aren’t building what the original design was, so of course it didn’t work the way the Internet said it would!
This is a very valid point and one of my own pet peeves of the Internet. Every recipe review out there has at least one bozo who says that when they made the dish, they substituted Borax for the flour that was called for and then didn’t have chocolate chips, so they used raisins instead, and since they’re allergic to butter they put in their favorite hair cream. And that recipe was just terrible, so one star, never making it again. Love folks like that. That kind of reviewing prowess take a real special kind of dumb.
This is not one of those cases, though. I’ll address this right now: When I discovered how flimsy the table as-designed was, I took a step back to see if scaling the table up to a 4’x4′ square and using heavier 3/4″ plywood was overstressing the capabilities of the storage drawer. I grabbed two of the storage units — remember, these are the units that have just as much flex in them as the Sterilite ones — and a bit of quarter inch fiberboard that was laying around. I clamped the fiberboard down and found that while there wasn’t quite as much flex, the board wanted to bow in the middle and the whole thing was still about as shaky as Carrie Fisher in the Star Wars Christmas Special.
You are certainly welcome to build this table to the original specification. If you have low standards and apparently are not a cat owner, I’m sure you’ll be quite happy with it.
If, on the other hand, you want to build something that will actually last, continue on to part II.