Turdbo Neon

Project log for the re-building of the 1997 Dodge Neon Sport

And closer still

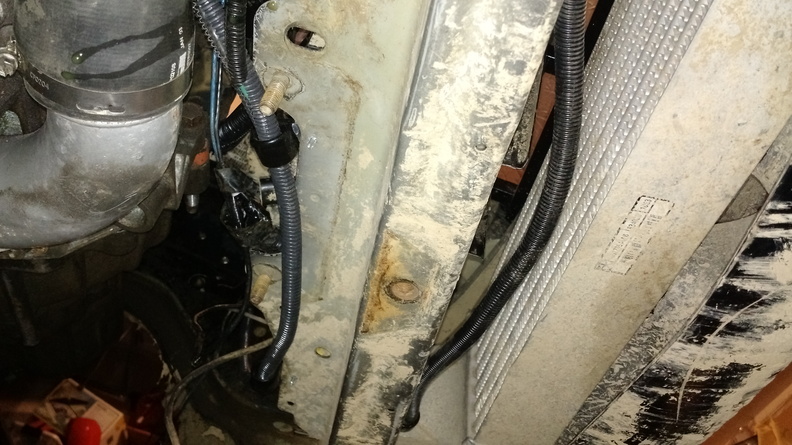
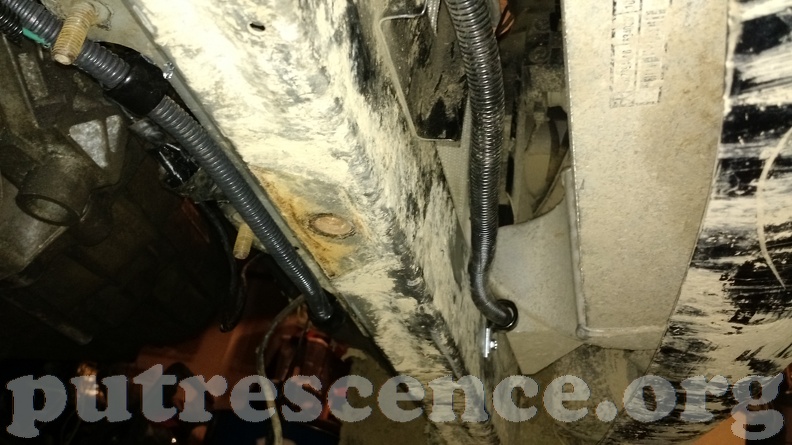
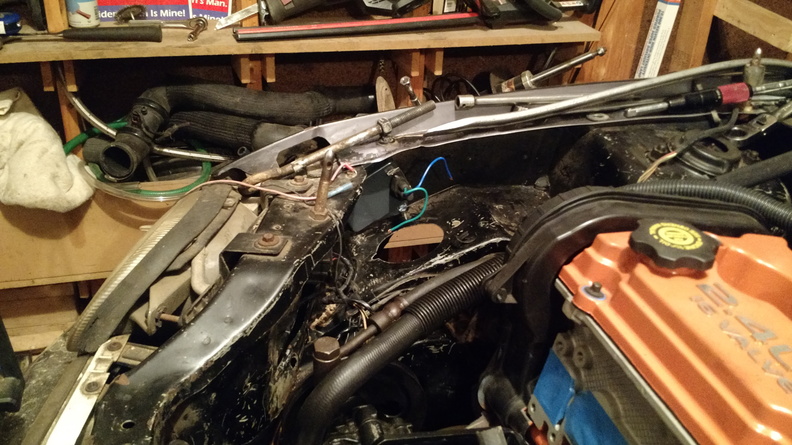
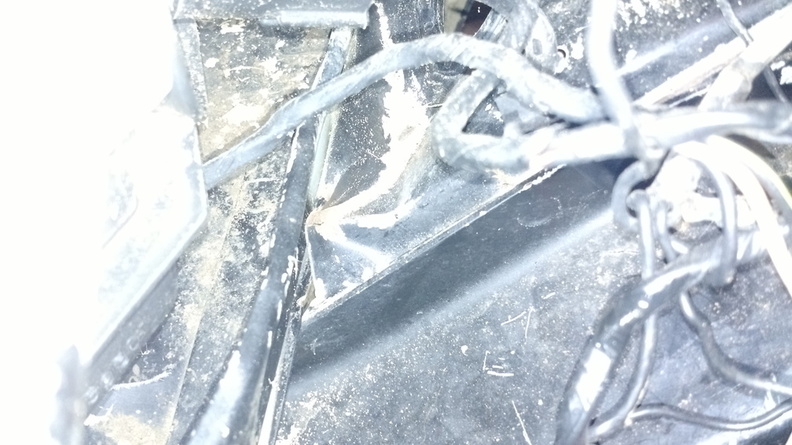
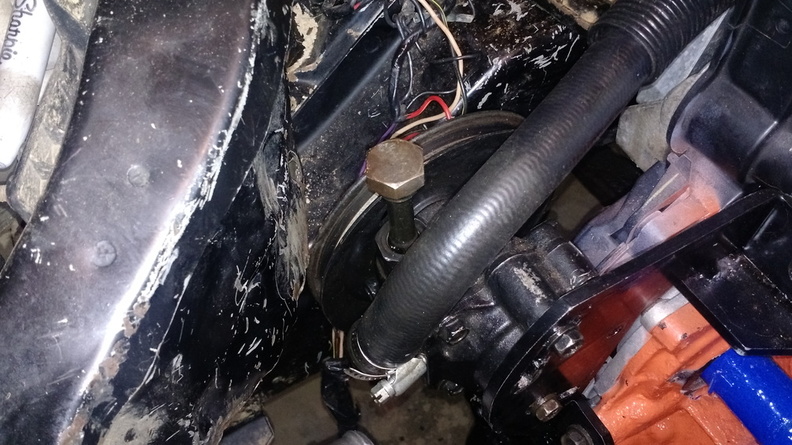
The last couple days have been spent doing small things that make big progress.  I’ve got the wiring mostly taken care of.  I still need to run the wires to the gauges, but other than that, I think the wiring is good to go.  Here’s the view from under the core support for the wires that need to cross the engine bay:

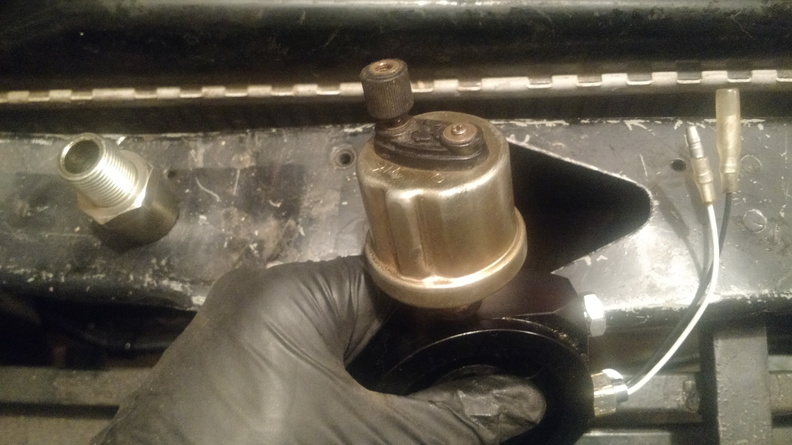
It is going to be critical to have oil pressure readouts, so I needed to repair the oil pressure sender:

That post snapped off a while back so I tried a couple things to get it repaired.  My first attempt was to use a torch and alumaweld to permanently attach a wire to what was left of the stud.  That didn’t work, but it did melt the plastic and allow me to pull the stud out, exposing the wire.  From there, I soldered on a new wire, covered it with shrink tube, and then used RTV to fill in the hole.  It seems pretty solid, so I’m going to give it a try and see if it works.

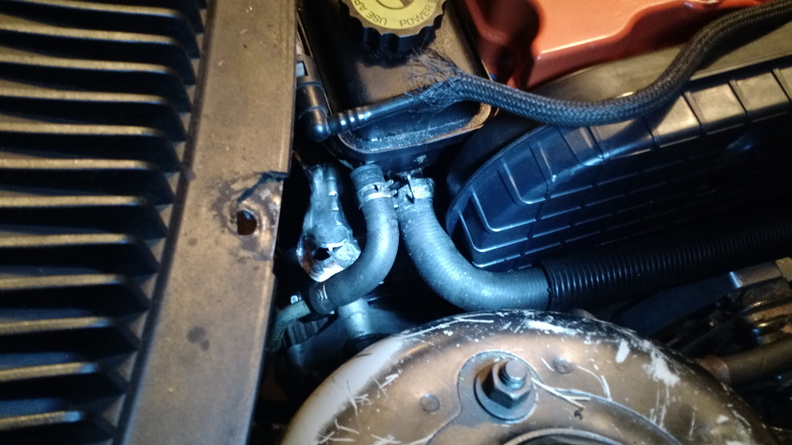
The cooling system is all buttoned up now, with the radiator and fans in place, plus the hose clamps for the heater core lines and the metal strapping in place to support the lower line to the heater core.  I also got the high pressure side of the intake all clamped down.

The list:

  1. PS belt
  2. Re-install MegaSquirt
  3. Install PCV system
  4. Run wires for gauges
  5. Add hose barb to air cleaner pipe for valve cover breather
  6. Torque down O2 sensor
  7. Install oil filter sandwich adapter
  8. Install oil filter
  9. Fill engine with oil and turn by hand a few times
  10. Install axles
  11. Fill transaxle
  12. Try to start engine
  13. Re-install front end
Slow weekend

I had soccer games plus a friend that needed a muffler welded back on, so I didn’t get much done this weekend.  So much for my ambitions to start the car by Sunday.

I decided to use the GM sensor that was part of the original MegaSquirt setup for the IAT and the DOHC CLT sensor.  Using TunerStudio, I set the calibration from the drop down boxes for those sensors and they seem to be sending rational values.  The O2 sensor is a real PITA, though.  I’m not convinced that it is truly linear and the voltage at 14.8 with the sensor unplugged (per the manual’s suggestion) is different than the voltage at 14.8 with the sensor connected.  I re-ran the ground wire for the O2 to the same p,ace as the MS grounds, though, and it seems to be closer on the lean side of the scale at least.  I also ran a ground wire for the ignition box so that I can hook that up.

Some grinding on the front bracket for the torque strut gave me the clearance I needed to get the hot side pipe run and I got the wiring from the alternator to the starter routed.  I utilized a good number of insulated clamps to secure the wiring around the front and passenger side of the engine and bought some more split loom to protect the wires and some hose clamps to complete the heater core connections.  

The list:

  1. PS belt
  2. Run wires across front and right side of engine (50% complete)
  3. Put hose clamps on water hoses to hardline and heater core
  4. Install radiator
  5. Install cooling fans
  6. Re-install MegaSquirt
  7. Install PCV system
  8. Add hose barb to air cleaner pipe for valve cover breather
  9. Install cold-side pipe
  10. Torque down O2 sensor
  11. Install oil filter sandwich adapter
  12. Install oil filter
  13. Fill engine with oil and turn by hand a few times
  14. Install axles
  15. Fill transaxle
  16. Try to start engine
  17. Re-install front end
Closer still…

No recent updates, but I have been working on things.

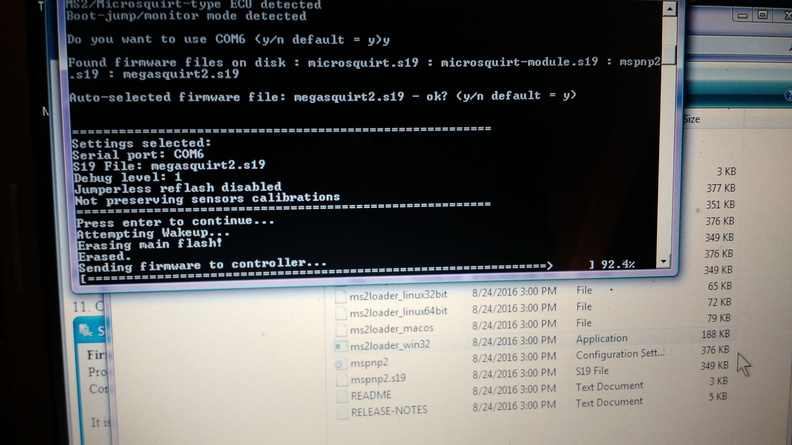
The wiring has been a real PITA.  Not difficult, just very tedious.  At this point, I have the engine wired, though, and gave it a minor electrical test.  The battery is reconnected, and power seems to flow to the electrical systems:

That is MegaSquirt2/Extra code getting loaded.  Exciting times, Goose.

One weird problem that I need to troubleshoot:  The ASD and fuel pump relays both need to be fired up from the MS fuel pump relay output.  In order to do that, I’ve added a third relay so that the MS will power the relay which will, in turn, power both the ASD and fuel.  The diagram I found indicated the need for a diode to prevent the fuel pump and ASD relays from feeding in to each other, but it looked like the diagram showed the diodes installed backwards, so I installed them the way I thought they should be.  Now, as soon as I plug in the MS controller – even with the ignition off – the fuel pump turns on.  So, MS is powered down, but we’re pumping fuel.  Apparently I got too smart for myself.

MS is responding to throttle input and sees the O2 sensor and the CLT sensor, but I haven’t calibrated any of the other sensors or anything yet.  For now, I’m going to leave the IAC disconnected like it was before and I’ll worry about that later.  Likewise on the tach output.  I completely don’t understand the schematics that I’ve found from the Megamanual, so I’ll get back to that later.

The list:

  1. PS belt
  2. Run wires across front and right side of engine
  3. Connect water hoses to hardline
  4. Connect heater core water hoses
  5. Install radiator
  6. Install cooling fans
  7. Re-install MegaSquirt
  8. Install PCV system
  9. Add hose barb to air cleaner pipe for valve cover breather
  10. Install intake pipes and hoses (I think the hot side pipe that I want to try to use is still at the storage garage)
  11. Install PT air temp sensor
  12. Torque down O2 sensor
  13. Install oil filter sandwich adapter
  14. Install oil filter
  15. Fill engine with oil and turn by hand a few times
  16. Install axles
  17. Fill transaxle
  18. Try to start engine
  19. Re-install front end
 

Just a few minutes in the garage last night

Minor progress last night, but a couple things off my list. The throttle body is on, the exhaust is bolted up, both new engine mounts have some paint on them, and the solid bobble strut is re-installed with prothane bushings. That leaves my list like this:

  1. PS and ALT belts
  2. Wire up voltage regulator
  3. Build torque strut
  4. Connect water hoses to hardline
  5. Connect heater core water hoses
  6. Wire engine
  7. Install radiator
  8. Install cooling fans
  9. Install MS2/Extra firmware
  10. Re-install MegaSquirt
  11. Install PCV system
  12. Add hose barb to air cleaner pipe for valve cover breather

I’m sure that list will wind up growing before I’m all finished, but that’s what’s on my radar at this point.

7/16 is Smaller Than 12mm

I realize that it is kind of obvious that 12mm is physically larger than 7/16″.  In fact, it’s about 1/32″ of an inch bigger.  Basically, we’re talking about 15/32″ versus 14/32″.  It doesn’t seem like much.

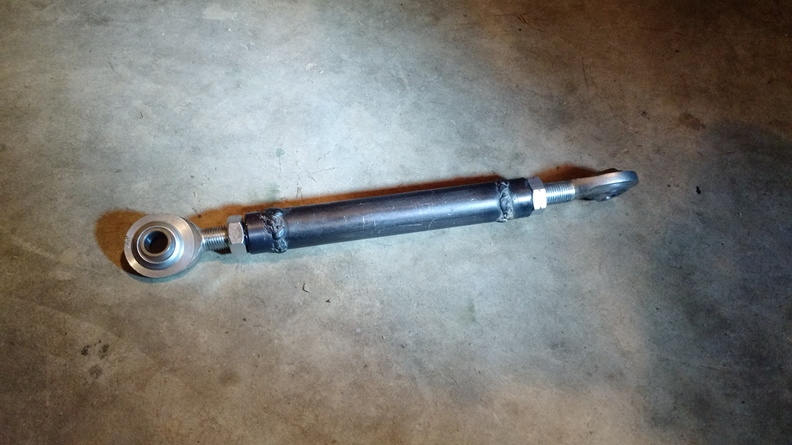
I got the rest of the parts for the engine torque strut today, so I went ahead and welded everything together:

It worked out pretty well, although I did need to cut a couple inches off the tube I bought.  When I measured the length that I thought I needed, the engine was rocked way back on the side mounts.  Anyway, that part went fine.  The problem I ran in to is that the bolt hole that I need to connect the strut to is metric.  12mm specifically.  I think you know how this is going to end.

The good news, though, is that while an M12 bolt will not fit through the rod end bearing, a 7/16″ threaded rod will slide through an M12 thread!  So, my plan is to acquire a couple 7/16-14 nuts to lock a threaded rod in place through the hold in the mounting bracket on the front of the engine.  That will give me a stud, basically, to run the rod end bearing through.  On the other side, I bent up a bracket and put the 7/16″ holes in the legs.  I still need to drill the hole for the attachment to the control arm, but to attach the heim joint, I’m going to get a 7/16″ bolt and nut plus a brass spacer.  I’ll cut the spacer so that there’s a little bit of space on either side of the joint and it rests roughly in the middle of the bracket.

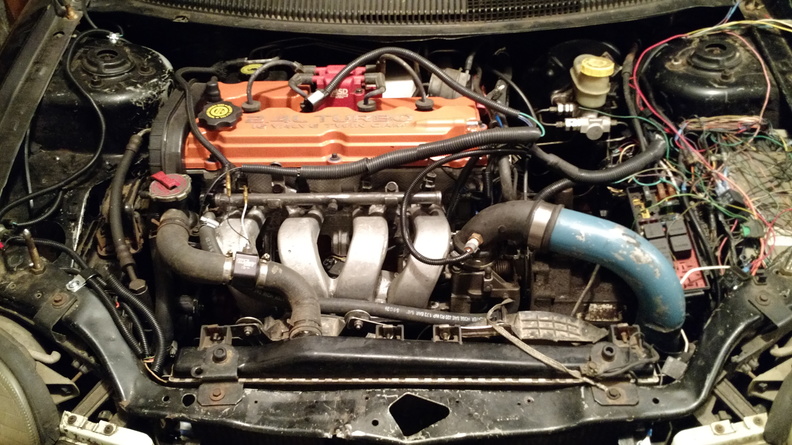
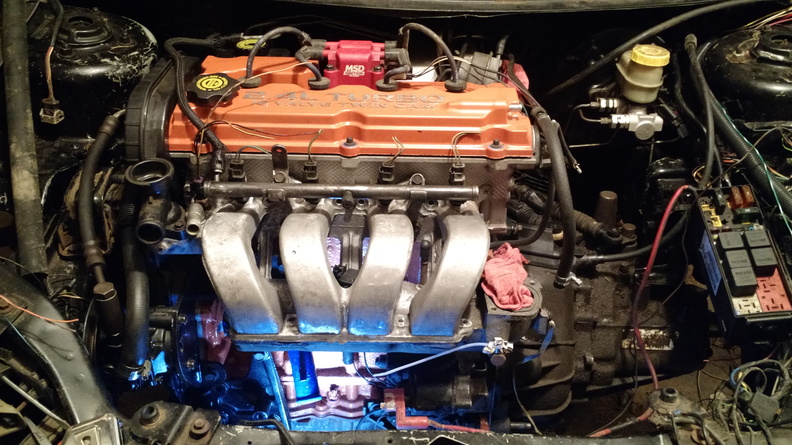
I worked on a few other things so that in the end, I left the engine bay looking like this:

Tim came over and gave me some help tonight.  Specifically, he was able to work out how I need to modify the coolant hard lines to accommodate the intake manifold and the heater core connections.  Basically, I’m going to chop up the hard lines some more to separate the return and the source lines.  That way I can angle things a little better.

In addition to that, we got the shifter and clutch cables hooked up — part of the hardline re-routing is to keep it out of the shift cable bracket!  The thermostat is installed along with the fill pipe.  We also got the power steering reservoir bolted up to the head using some old nuts as spacers.  Amazingly, the return line for the P/S system actually fit, so I don’t think I need to get a new hose for that, so that’s good!

I also picked through the wiring harnesses that I have from the 1gn and from the PT and went ahead and plugged in the various connectors to their sensors.  Additionally, I started running the new vacuum lines.  Little things, to be sure, but now the wiring portion of the project can get underway and I can work on how I route everything.  Overall, a night of good progress!

  • PS and ALT belts
  • Wire up voltage regulator
  • Gaskets for throttle body
  • Build torque strut
  • Add bushings to bobble strut*
  • Connect throttle cable
  • Connect water hoses to hardline
  • Connect heater core water hoses
  • Connect exhaust
  • Wire engine
  •  Install radiator
  • Install cooling fans

Intake Manifold Ready

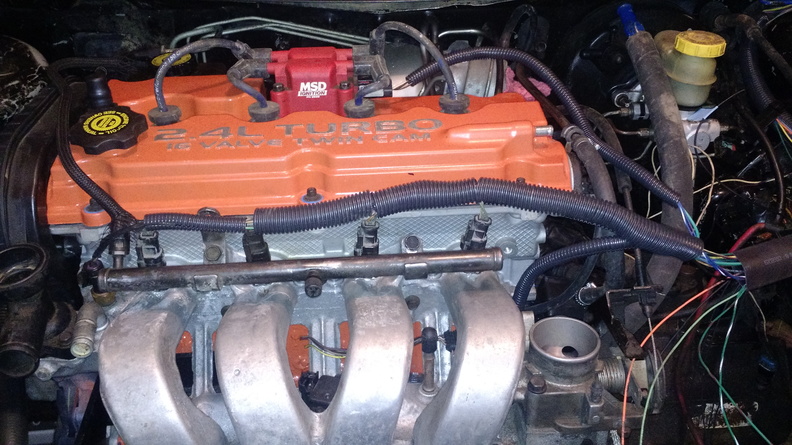
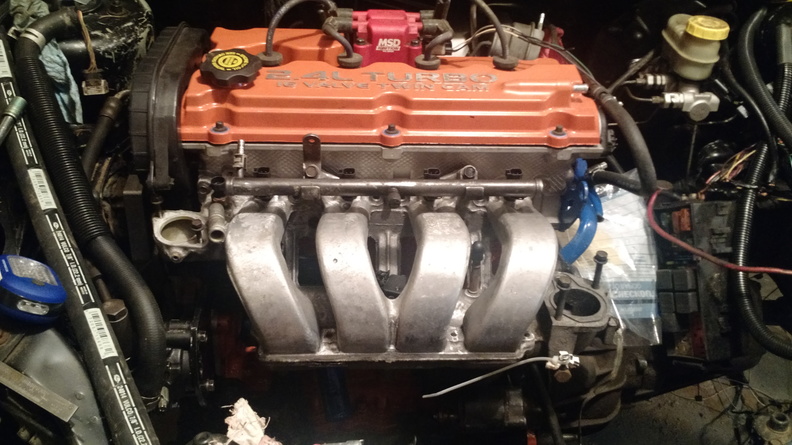
Last night I went ahead and got the intake manifold squared away.  The PT one wasn’t going to clear the hood, so I drilled new holes for the original 2.0 DOHC manifold and went to line it up.  The coolant hardlines were completely in the way, so I cut them back to where they come around on the side of the head.  The plan right now is to trim them up a little more and run hoses around to clear the manifold.

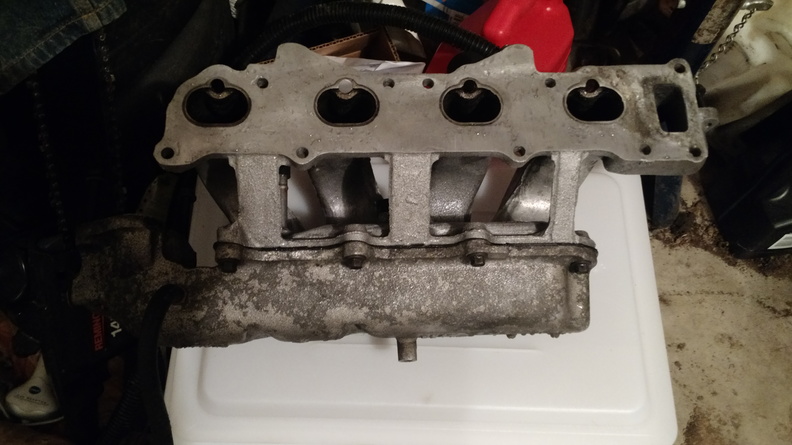
Before I did anything with the manifold, though, I power washed it to clean it up a little, so it looks a little nicer now.  

The PT fuel rail wasn’t going to work because the mounting tabs were in the wrong place.  I was going to weld up some tab extensions and just drill new holes, but the fuel rail wasn’t ferrous, so I’m thinking it’s aluminium.  The DOHC rail had been sort of hacked together to accommodate the longer injectors, but it wasn’t really right, so I went ahead and cleaned up and re-welded the tabs so the fuel rail sits tight on the manifold.

Now that it’s all bolted up, I had to make some decisions around water filler neck.  I seem to recall talk about the PT neck, but that one didn’t fit right from a bolt-hole perspective, so I went with the DOHC neck and it looks like it’ll work.   One of the bolts will be a little tough to start, but it fits.

I need the gaskets for the throttle body and for the water neck, as well as some longer coolant hose for the smaller of the two hard lines.

The wiring harness is pulled through the firewall and I need to go ahead and start splicing on the various connectors.  Some research on the MegaSquirt tells me that the spark output should remain the same under MS2-Extra, but I need to add a 12V jumper to the daughterboard.  I’m still really unsure of what to do about the tacho output — there’s plenty of talk about a circuit schematic to add, but they don’t go into any detail about where to add it.  I’m going to get things wired up without the tach for now and will come back to that and the FIDLE control later.

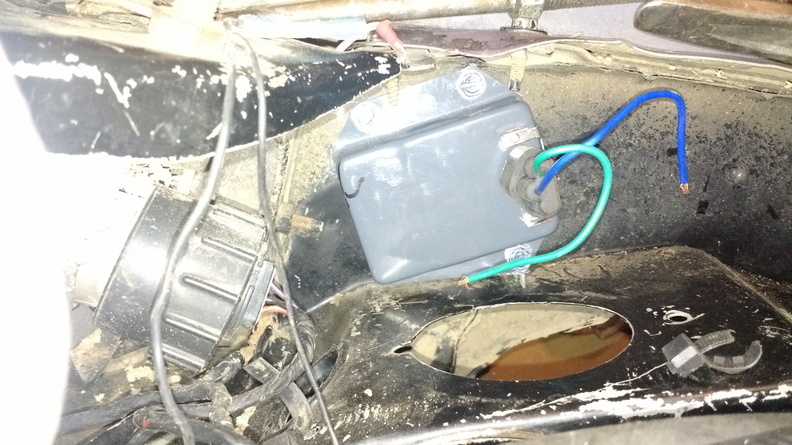
Also, the voltage regulator is mounted and ready to go.

And there’s plenty of room for the power steering pump:

Things that I know about that need to be done at this point:

  • PS and ALT belts
  • Wire up voltage regulator
  • Gaskets for water neck and throttle body
  • Build torque strut
  • Add bushings to bobble strut*
  • Connect throttle cable
  • Connect clutch cable
  • Connect water hoses to hardline
  • Connect heater core water hoses
  • Connect exhaust
  • Connect shifter cables
  • PS reservoir mounting
  • PS reservoir hose
  • Wire engine
  •  Install radiator
  • Install cooling fans

I’m sure there’s more, but right now that’s kind of the big picture.

*On the bobble strut: I’m afraid it might just be too solid, so I’m thinking that I may have an extra Prothane sway bar bracket bushing laying about.  I was going to put a set of those bushings on the trans bracket to put a little bit of give in to the engine mounting.

Catching Up Again…

Yeah.

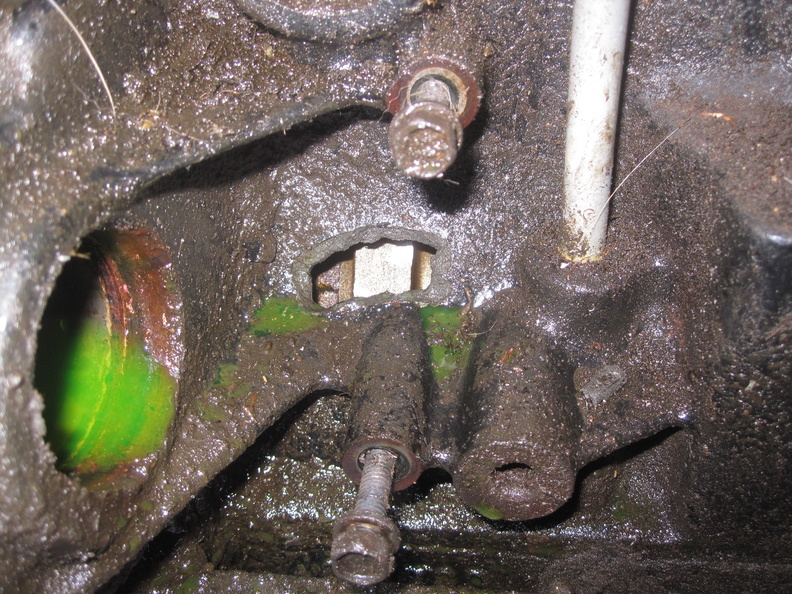
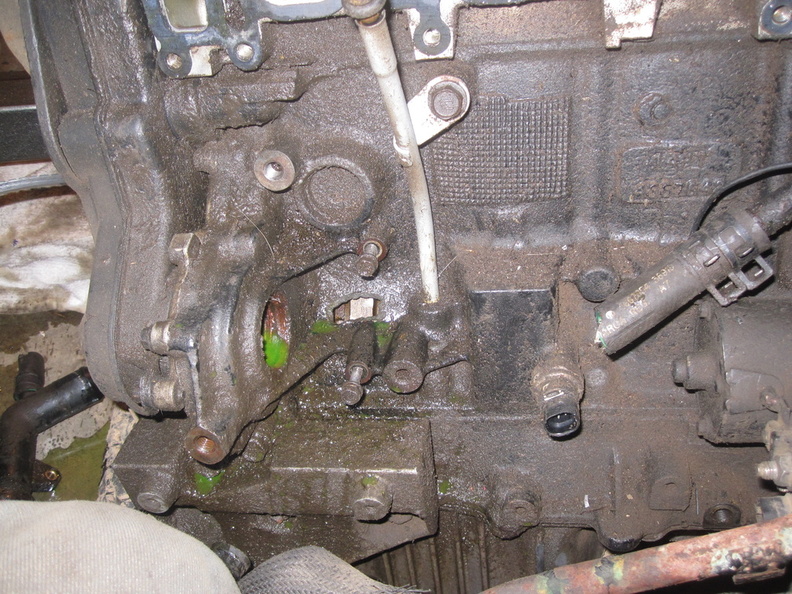
So, old engine has a hole in the block, so it’s pretty much toast.

Crankcase is positively ventilated, I’ll say.

Moving on, here’s where we’re at:

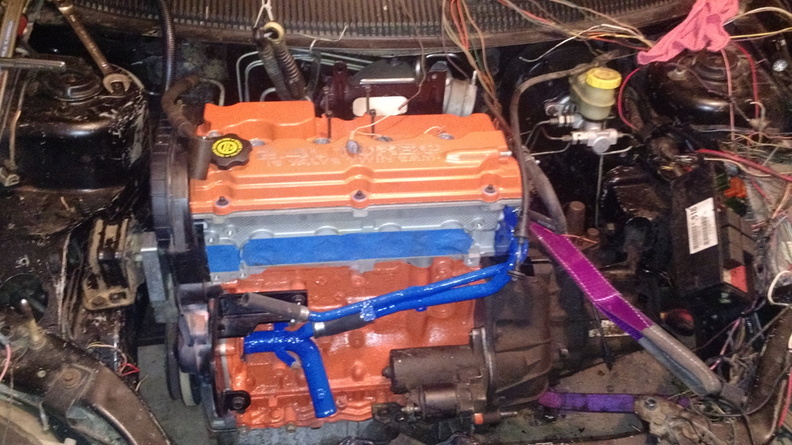
2.4 Turbo engine is mounted (sorta) and I’m getting things put back together.  I had another project take me away from this, but basically, the engine is together and painted.  I ordered up new oil and coolant soft lines from Rock Auto and got those cut and installed.

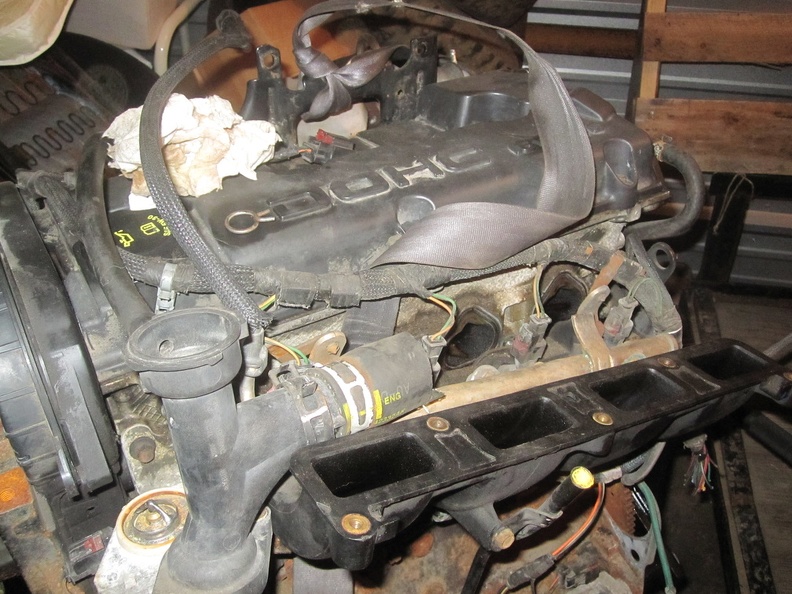
I’ve test-fitted the PT intake manifold and there is absolutely no way under the sun that it’ll make sense to put that on there, so I’ll be drilling the 2.0 DOHC intake manifold and using that throttle body.

A new voltage regulator and wiring pigtail has arrived, and I’m going to mount that up near the right headlight along the inner fender.

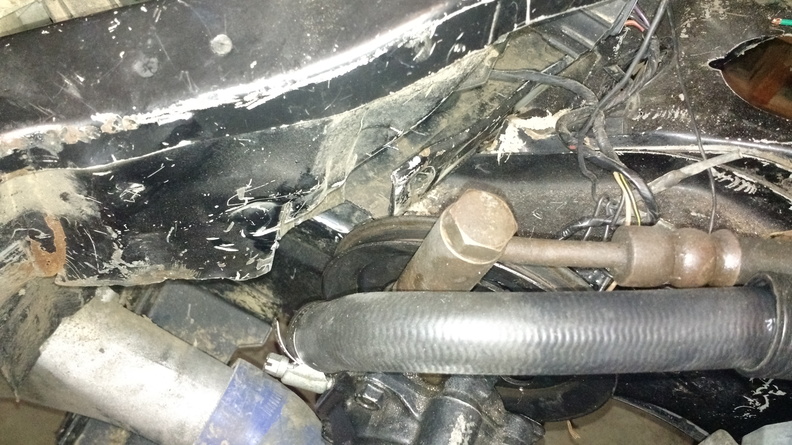
Speaking of the inner fender.  Remember way back when I mentioned that the car had rear ended a Jeep and that’s why I got it for a song?  Well, I just noticed that the damage was a little worse than I thought:

The right side of the core is pushed back an inch or two still which means the power steering pulley doesn’t really fit.  Tentatively, my plan is to cut a section of the headlight bucket out to make clearance for the pulley and belt.  Another issue I need to contend with is coming up with a way to mount the power steering reservoir plus I need to get a new reservoir-to-pump hose since the original one is about an inch too short.

In order to secure the engine in the car, I am not going to use a front mount.  The bracket for the mount interferes with the structural collar and The Internet says to use a solid bobble and a torque strut over on the side.  Apparently the core support is too flexy anyway.  I ordered up about $50 worth of rod bearings and tube to make a strut that will mount from the rear control arm to the right front of the motor.  Next stop will be the hardware store to get what I need to weld up a solid bobble.

The old Megasquirt wiring has been pulled out and I had some massive fits trying to get the new harness run through the existing grommet.  Basically, the plastic wire loom is a mess now so I’m going to replace that and try again.

There isn’t much time before the 2-day event at the end of August, and I’d really like to get back into the dirt!

Oh, Wait, Where Were We?

Since the last update, I’ve gotten a bit of work done, so let me catch us all up:

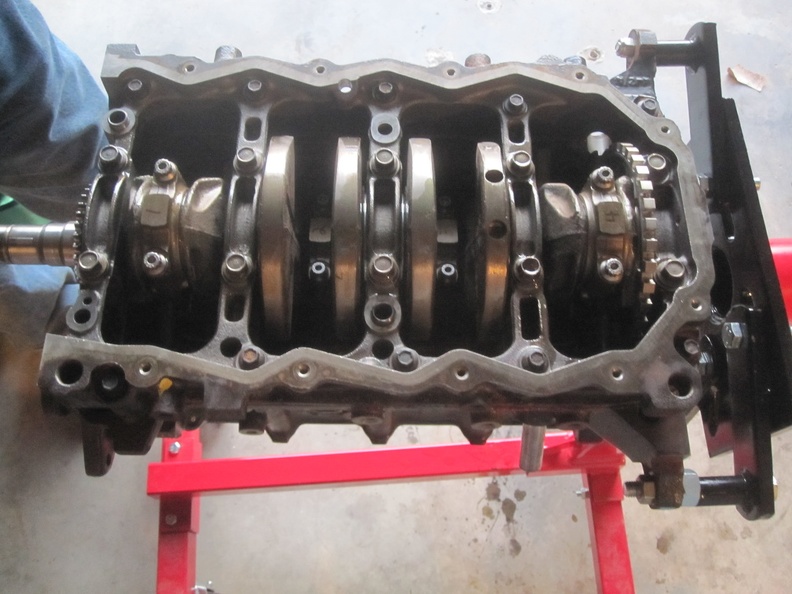
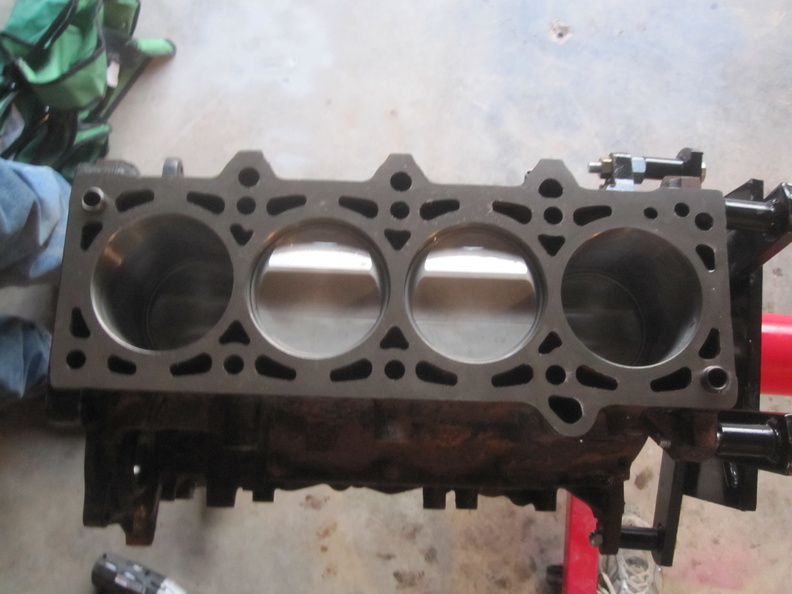
I got the motor disassembled and the block, bed plate, crank, and head dropped off at Monarch.  For $435.12, they cleaned everything up, put in new valve guides and seals, and give it a hone and polish.  Everything is standard size and looking good.

The day after I picked up the parts from Monarch, I took the car out to PE #1 where I had a bit of a rough day.  It was very sloppy and muddy which usually works well, but it was so slippery that left foot braking just stalled the car.  The first time it stalled, it took a while to restart and after the restart it was running really poorly.  Turns out that a vacuum cap came off and the MAP reference line to MS came loose.  When I put those back on, it ran well but I hadn’t realized that the reason the car died in the first place was stalling under left foot braking, so I did it again.  The car fired right away this time, but between those two stoppages, I gave up first overall to my MF competitor.  At the end of the event, I had the best stage time of the day across the board, but wound up 2nd in MF and 3rd overall.

After the event was over, we ran some fun runs.  On the second or third fun run, the car made some really bad noises, shut down, and wouldn’t restart.  Had to be towed back to the trailer and then winched on.

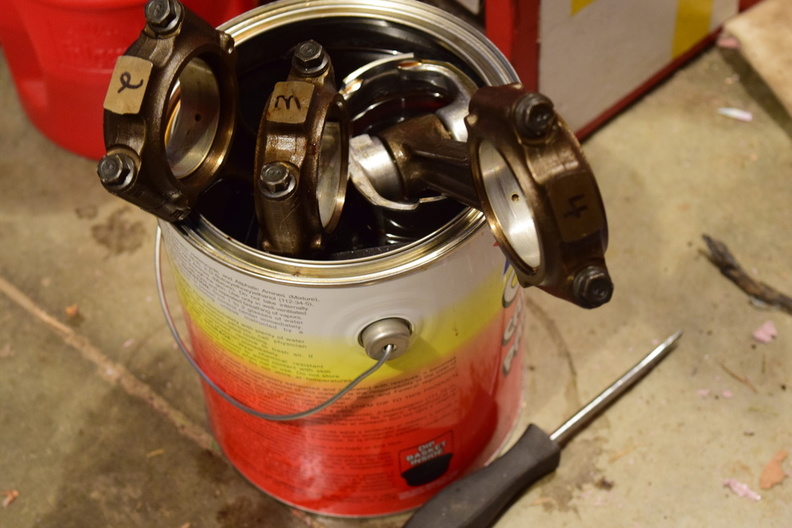
Back in the garage, I pulled the #1 plug and found it bathed in oil.  Putting an indicator down through the plug hole and on to the top of the piston, I discovered that #1 is not going up and down when the engine cranks.  I haven’t torn in to it yet, but I’m fairly certain it’s a rod.

Which puts a little bit of urgency on the rebuild of the 2.4T motor.

I got the block up on the stand and ordered parts.  $435 worth of bearings and rings and gaskets from Rock Auto, $40 worth of bed plate sealant and chain guides from the dealer, $70 for ARP rod bolts off eBay (they’re for a 1.8L Ford Duratec, but they work)

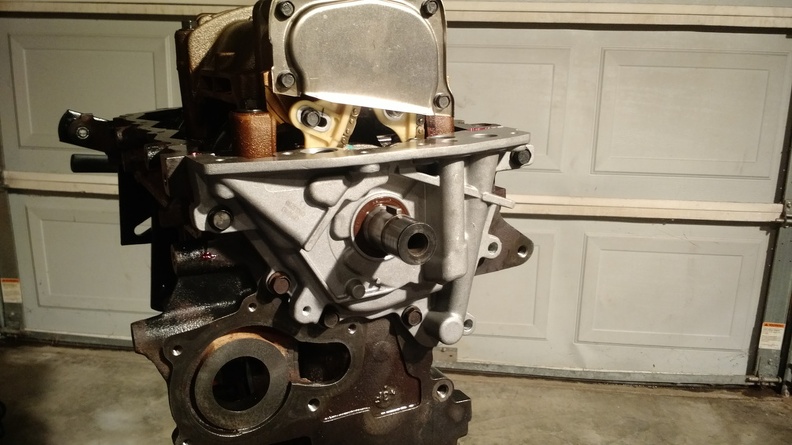
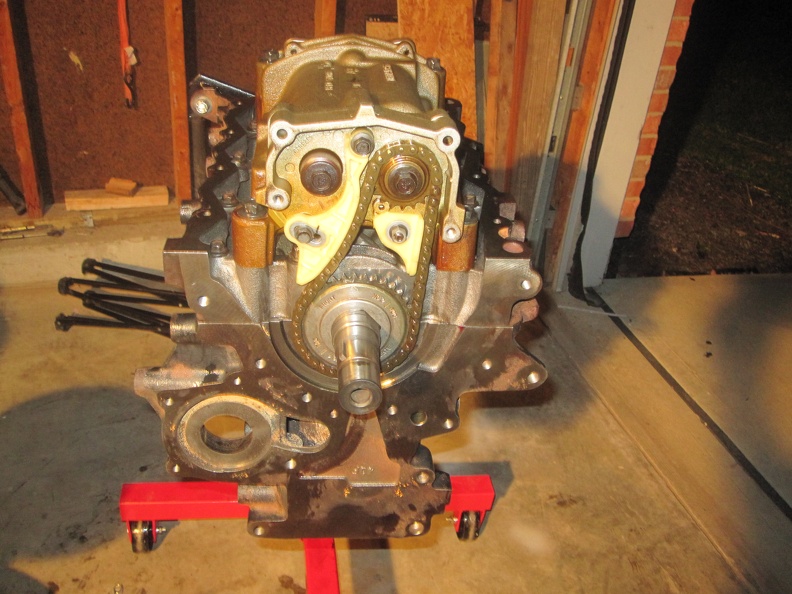
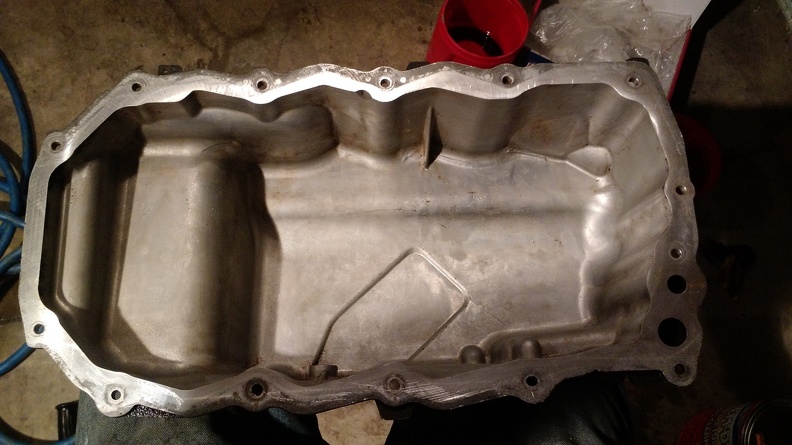
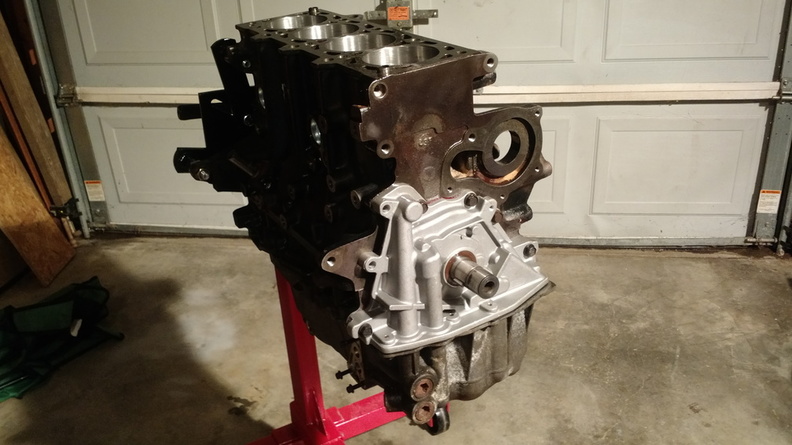
At this point, the bottom end is mostly put together.  The bedplate is installed and the crank and rod bearing clearances are well within spec.  I put a ton of assembly oil all over the bearings and oiled up the cylinder walls.  The balance shaft assembly got a new plastic tensioner and guide and is timed and installed and then covered with the oil pump and a new crank seal.  I cleaned up the oil pan and pickup tube and installed those then flipped the motor over so I can get the head on.

One thing that concerns me greatly is that the FSM instructs you to prime the oil pump by filling it with oil.  I did that, but the in and out ports on the pump both face straight down.  So I’m not sure how much good that would possibly do.

Coming up next will be the installation and assembly of the head.

2.4T Motor Rebuild Begins

I’ve begun the process of getting the motor torn down for the rebuild.  

I started with this and began tearing it down.  The motor came from a 2005 PT Cruiser that was at the junkyard.  I was a little wary because the car didn’t have any crash damage, but we pulled it anyway with the plan to do a rebuild on it.  Looking at the oil and the cams, everything seemed okay — no water in the oil and the lobes looked pretty smooth.  Because of the bedplate design, there wasn’t a good way to pull a main cap to look at the bearings.

Once the lump was out, the first clue was that the crank pulley bolt was missing.  There was a timing belt and the engine turned by hand with no apparent difficulty.

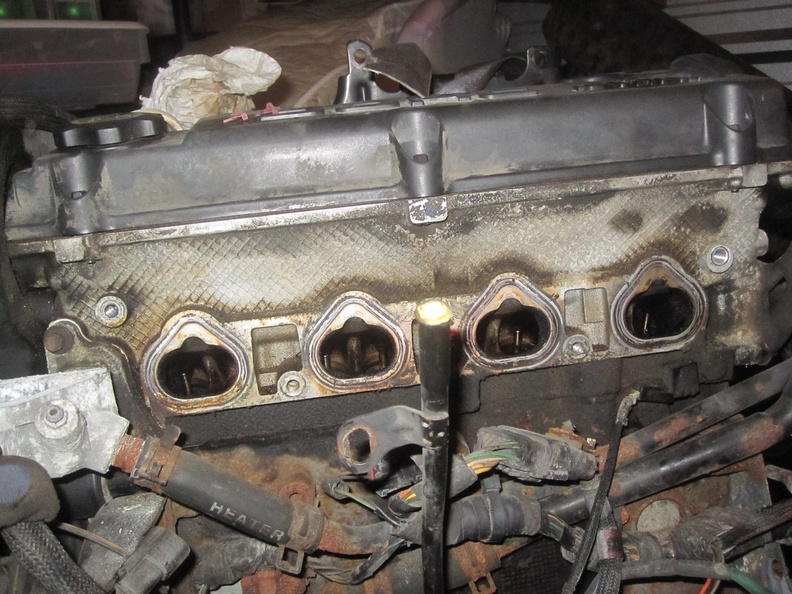
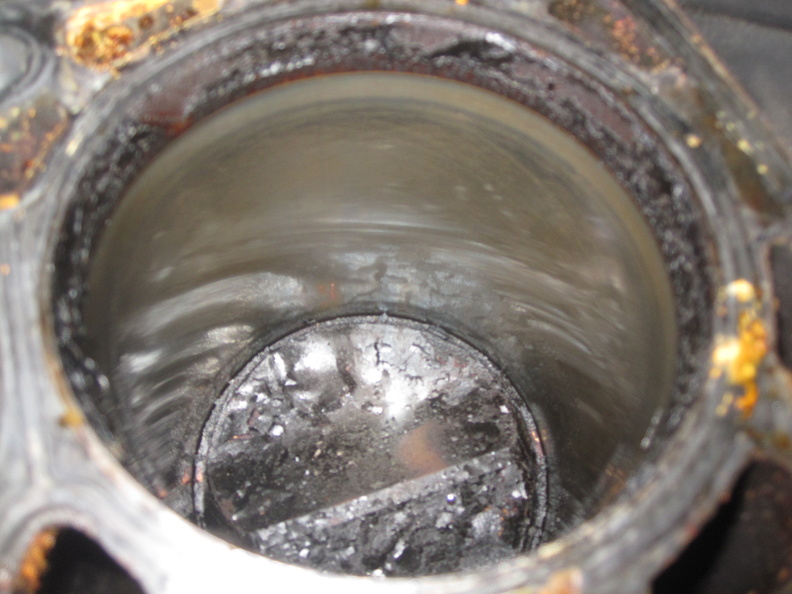
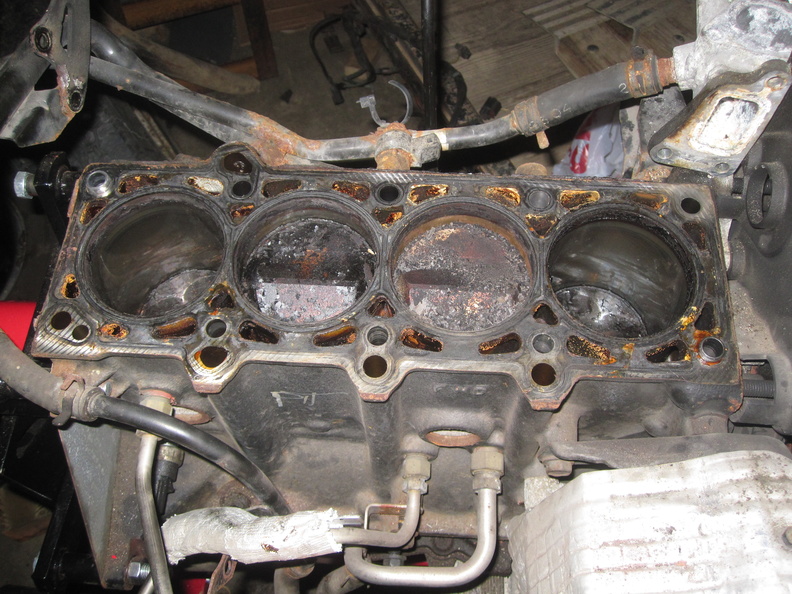
Looking in to the head, there is a lot of carbon on the tops of the valves.  And once the head was off, the carbon was just flaked all over the pistons:

I think this is due to bad valve seals letting oil in.  The charge pipes were completely dry and free of oil, so I think the turbo seals are good.  There’s still good cross-hatch on the cylinder walls and everything moves smoothly.

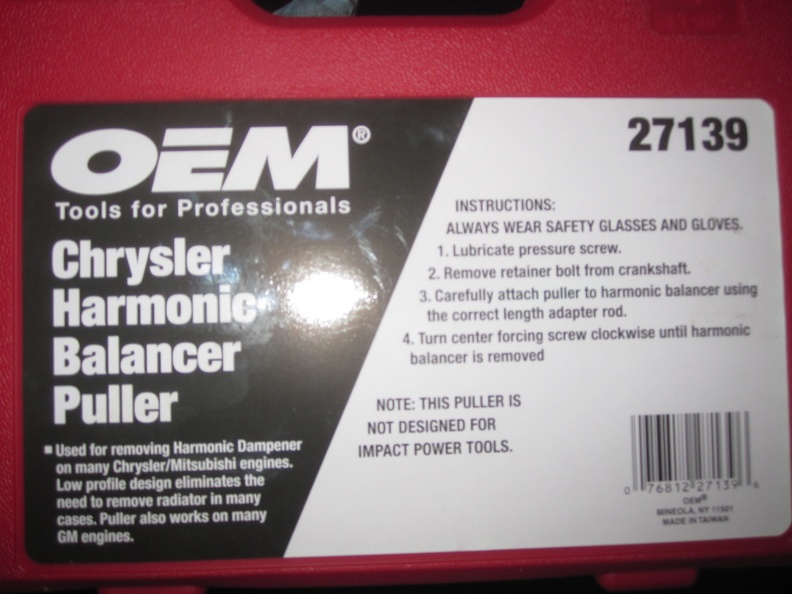
The crank pulley is a little bit of a challenge.  Autozone rents a tool that is for Chryslers, but it needs a little help:

The two rods that come with it that go into the crank bolt hole are not long enough on their own and are too long when used together (plus it wouldn’t be stable).  The key is to put a small screwdriver bit down into the puller bolt to give it an extra 3/4″.  You also can use it “backwards”, but in order to get the jaws in, you have to pull the pin, put the jaw in, put the puller over the jaw, and replace the pin.  Once you do that, it comes right off.

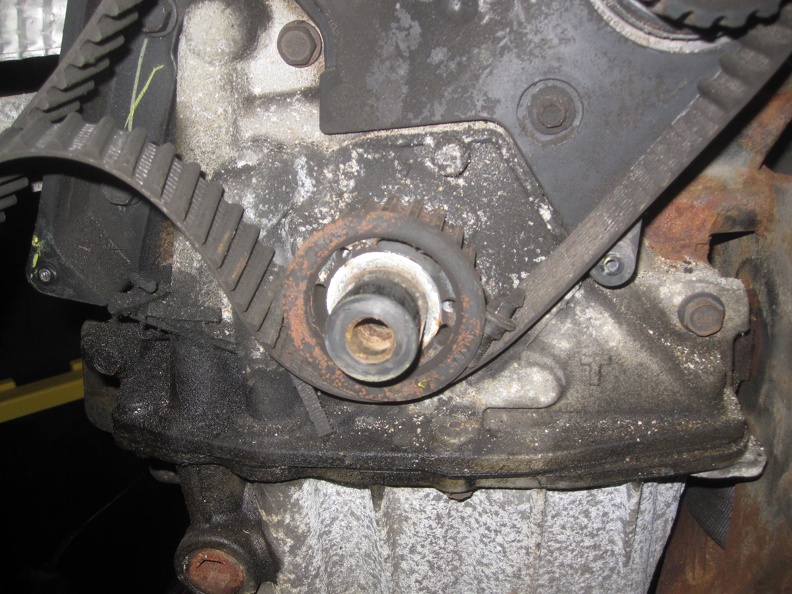
Once that pulley was off, I removed the lower timing cover and found why I think the car was in the junkyard:

That bolt was dropped in later, but notice that the timing belt is missing a ton of teeth.  Good thing the 2.4 is a non-interference engine!

Continuing Updates

It’s been a while since I’ve made any updates mainly because there hasn’t been much drama.  The new front end has been working out well, although the toe being off has chewed up the tires a little bit.  I managed to DNF an event (PE6) due to the failure of the right side axle and I’ve also had a failure of the left side axle that required replacement.
One thing that I continue to fight is leaking Syncromesh from the left axle.  For some reason, the axles I get from O’Reilly will not seat and leak like crazy, but the Advance axles seem to seal up and seat (after taking some of the shaft off to clear the bevel in the OBX).  I though the axle that was in the car was from Advance, so I took the “extra” back to O’Reilly and exchanged it.  As it turns out, I needed to go to Advance for that and I still might.  For right this second, I’m going to leave it as-is with a top-off and just keep an eye on it.  I may try shaving the axle a little bit more to see if that gets it to seat, although it doesn’t make sense that it would leak even if it’s not seating (which it isn’t).  I really am starting to think that the O’Reilly axles are of a slightly smaller diameter which prevents from them sealing on the axle seal.  Another possible fix would be to put a Redi-Sleeve on the axle to firm it up against the seal.

Another problem that developed was a lot of smoking from oil spraying all over the engine.  Because I don’t really want to burn the car down, I installed a second catch can on the left side of the engine to try to capture the oil.  That way I can also see just how much I’m losing.  And it should keep the car from catching on fire, which is a good thing.

The cooling fan is having an issue as well.  Actually, it’s the switch, not the fan — if the switch gets jostled a bit, the fan cuts out.  That switch is probably the wrong size and shape for the dash, so I bought a new switch and I’m going to make a panel to put where the radio used to be.  I’ve got some thin, textured steel sheets left over that I am going to cut to fit and then bolt on.  On that panel I plan to put switches for the LED light bar, the gauge dimmer, and the cooling fan.

Right.  LED light bar.  I’ve been wanting to have some super-bright lights on the car and there’s going to be a night event coming up, so it seems like a good time to get a light bar.  I found a 32″ light bar that should fit between the headlights and slightly above the turn signals.  I’ve got some square tubing that I’ll use to make a mounting bar which will attach to the mount points for the little grille bar that used to be between the signals.  It will probably need a little more securing, but that shouldn’t be a problem.  I’d like to try to figure out a tool-less mounting method and a trailer connector for power so I can take the light bar off easily (and maybe set it up so I could mount it on the van or something!).

Additionally, I’ve changed up the toe a bit.  I’m not 100% sure how straight my strings were (but I spent a ton of time measuring trying to get the right), but as best as I could tell the right tire was almost perfect while the left tire had about 10 degrees of toe-in.  I think they’re both where they need to be, but the car is still up on the trailer right now, so I can’t check yet.

On the gauge front, I finally got the replacement temp sender for the oil temp gauge installed, so that works now.  I also tightened the connection for the oil pressure gauge.  The third switch on my new panel is going to be a switch to dim the gauges — they each have an orange wire (I think) that switch the gauges to “night mode” with less brightness when that orange wire has +12V.  The bright blue gauges right up against the windshield make it a bit hard to see at night, so that should help a lot.