A little more shop-time yesterday resulted in some more progress on the front motor mount bracket! After I joined him at the junkyard in a failed bid to score a good rear end for his S10, Tim came over to the workshop for a little bit to help me with the motor mount creation. What I like about Tim is that he has a analytical yin to my eff-it-all-and-let-God-sort-it-out yang so when I’m doing something that has any sort of structural significance he can slow me down and remind me to measure a third time and check things a fourth. Thanks to his help, the drivetrain-side mounting holes for the bracket are nearly complete!
We did some pretty serious measuring of the aluminum bracket and the bell housing to figure out exactly where the centerlines of the bolt holes needed to be and how much clearance exists around the holes. Typically, getting those measurements is fairly simple but in this case the two mounting points are of an offset depth from each other which made it a little bit harder to just slap it on a bit of paper and trace out the holes. With Tim’s help, though, we were able to determine that the lower bolt hole needed to be 72mm down and 32mm across. As expected, those directions took us clear off the edge of the angle iron in which the upper bolt hole is drilled. From the centerline of the lower bolt hole, there is only 17mm of clearance before butting up against the structural collar, so we decided to go with some 1 1/4″ eighth-inch steel angle iron welded to the back of the existing angle:
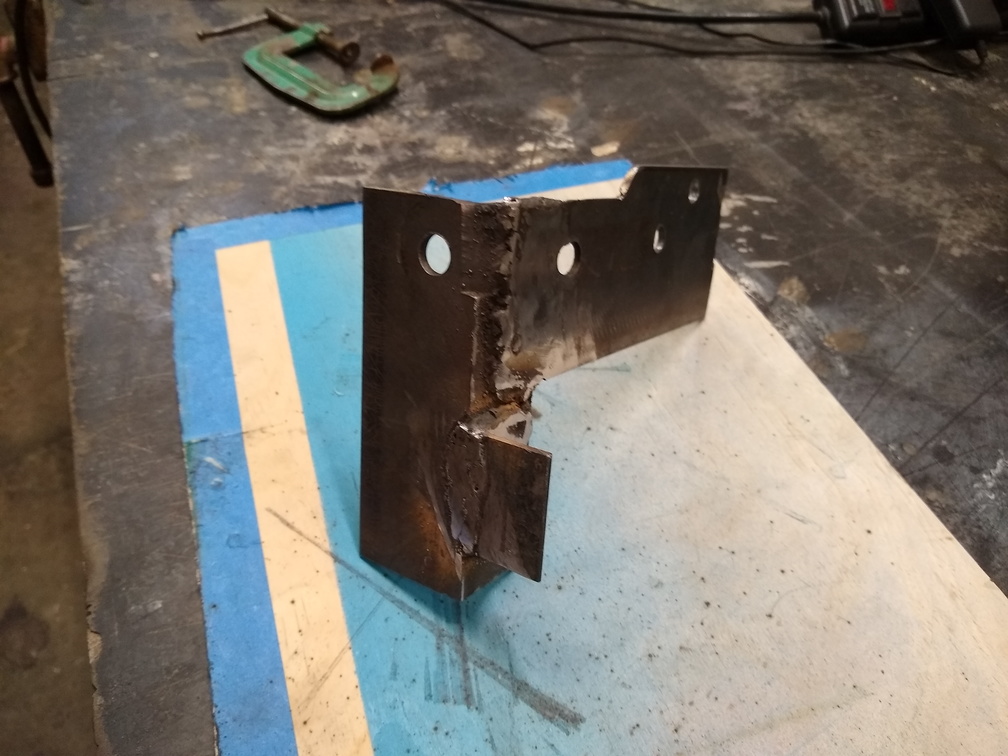
Using the measurements that we took earlier, I drilled a 1/2″ hole in that ear and took it over to the car to test-fit:
Just like that on the first try it fit perfectly!
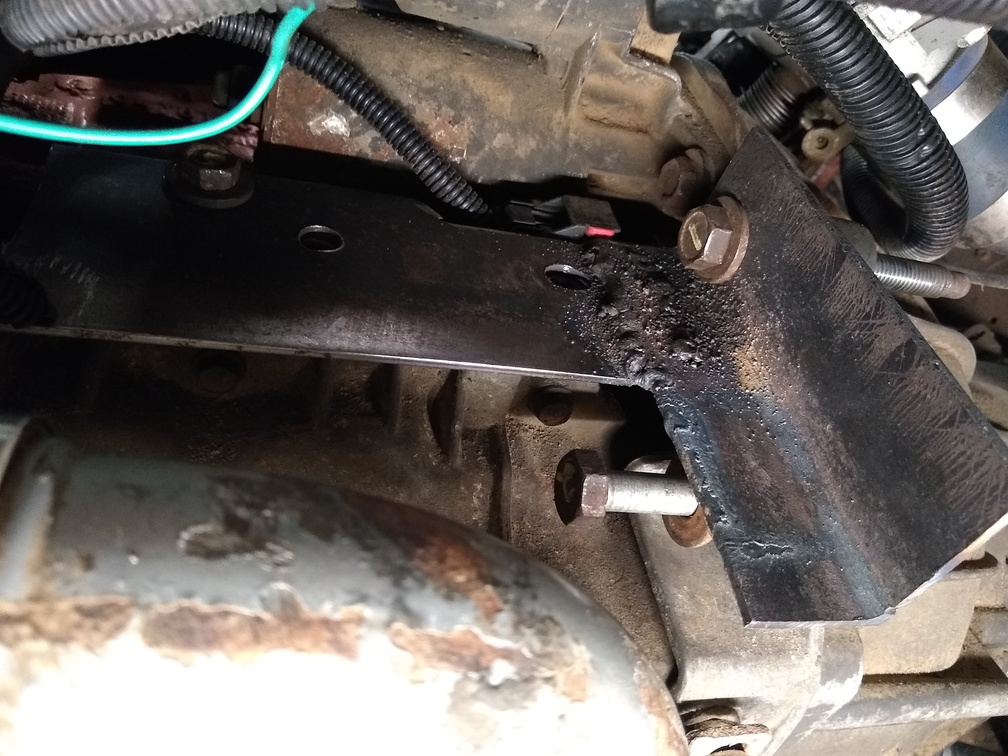
You’ll notice that there’s a gap between the bracket and the bell housing. That is the offset that I wrote about earlier. My original thought was to just get some round tube, cut it to fit the gap, and weld it in. Unfortunately, the tube at Menards was all thin-wall stuff and I didn’t really trust it. Instead, I got a 1/2″ coupling nut. I need to grind off the zinc coating, chop it to fit that gap, weld it on to the angle iron, and then zip the 1/2″ drill through it to take off the threads.
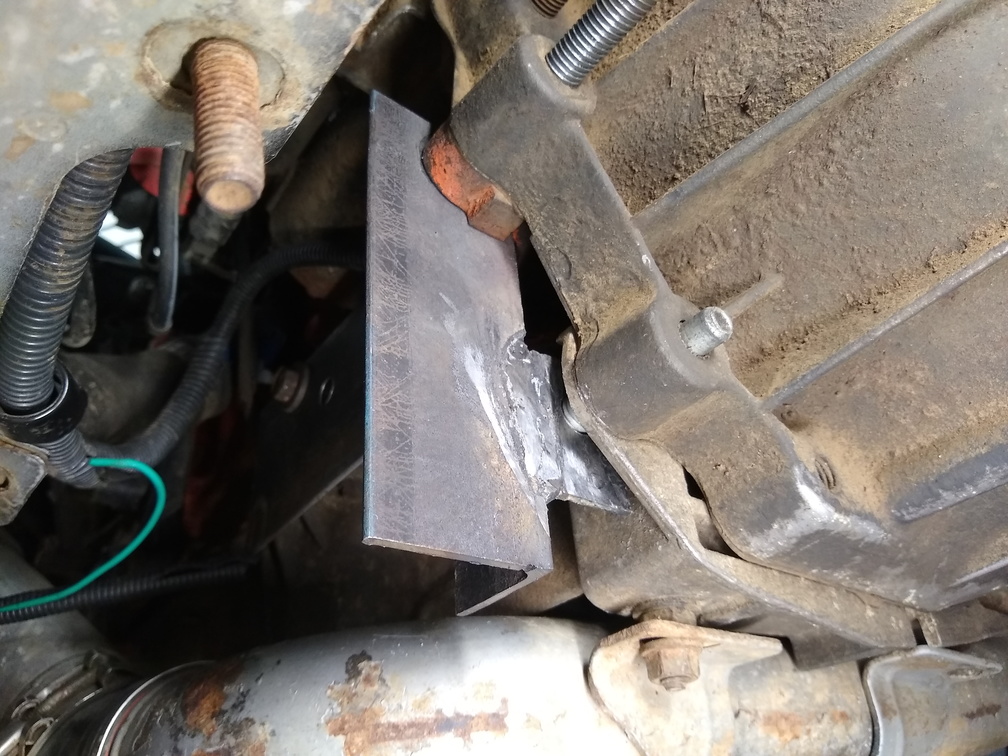
Once the offset is taken care of, I need to build the rails that will connect from the face of the bracket down to the body-side of the front motor mount. I’m going to use the 1 1/4″ angle iron for that and also box it in for some extra strength. Here’s the front-on view of the mount that you need to have in your head to imagine what I’m going to do next:
There are a couple concepts that are kicking around in my head for the connection that goes down to the body-side mount. My primary concern is that I’d like for my craptastic welds to be more about holding things together than taking all the force. I’m thinking that I could weld some of the angle across the bottom, butting it up against the bottom of the engine-side bracket. Then I can cut the angle at an angle and weld it to that brace so that the force is pushing up into angle iron which then gets pushed against the edge of the bracket. I’m not sure that doesn’t just wind up bending the bracket, though.
My next thought is to weld angle iron across the face of the engine part of the bracket to basically give it a shelf. Then the angle that goes down to the body mount would come up and in to that. The more I think about it, the more I think this is the plan that’s going to win out.
Once it’s all together and I can get all the bolts to line up, I’ll take the whole thing off, grind the ugly welds to make them a little less ugly, trim the bracket a bit so nothing is hanging around that doesn’t need to hang, round off all the sharp edges, add some bracing wherever I can, and then paint it up.
Slowly but surely, I am making solid progress!